This past week I finally planted the trees in my permaculture orchard. I decided to plant semi-dwarf trees because they tend to be heartier and live longer than dwarf trees but produce in a smaller area and produce more quickly than standard trees.
I bought bare-rooted trees from GrowOrganic.com for my mini-orchard. Bare rooted fruit trees are those sold without a pot and the type purchased by tree nurseries, but they can be purchased by individuals too. Bare-rooted trees will save me money and are available in a much wider selection of varieties and sizes than those sold in pots. Also, they are less expensive to ship. Because bare-rooted trees don’t have an extensive root system, they do require proper planting and careful treatment during the first year to establish healthy root systems and provide a reliable harvest.
I bought three apple trees, a pear tree, and a peach tree and I purchased them so that I would have tree fruit from mid-July to November.
First, we have the Red Baron Peach. This tree is the earliest of all the trees in the orchard. It is self-pollinating. It blooms early to mid-season and harvest from the middle of July to August first. It produces a rich juicy, large yellow freestone fruit. It is a vigorous tree that needs fertile, well-drained soil and regular pruning and thinning.
The pear is the Pontiac Pear. It is self-pollinating and has a superior resistance to fire blight with good-quality fruit. This fruit harvests in August-September.
The first apple that I chose was the Golden Delicious. The reason I chose it, is that it is not only self-pollinating, but it also pollinates other apple trees too. It resists woolly apple aphids and collar rot. This is the earliest of the apples that I chose and produces ripe apples in early September and is a sweet eating apple.
I chose the Braeburn apple because it can be kept in long term storage and I like the fact that it was grown from a “wild-seedling”. It doesn’t hurt that it originated in New Zealand too. This apple is harvested in mid-autumn.
Finally, I picked the Liberty apple because this apple is low maintenance. It has a natural disease resistance to apple scab, powdery mildew, cedar apple rust, and fire blight. Its fruit has a crisp white flesh, yellow with red overtones, a crisp white flesh, and a tart but sweet taste. It harvests in late autumn.
Where I Planted My Trees
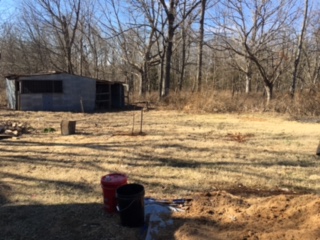
I put a lot of thought into where to plant these trees because once they are in the ground, they can’t be moved. Our land is on a south facing slope which is great for gardening, but not so good for orchards. South facing slopes heat more quickly than north facing ones which wouldn’t be a problem, but late spring frosts can destroy the tender buds on those south facing trees. Therefore, it is necessary to protect the trees from a direct southern exposure, but how do I do this on a south facing slope?
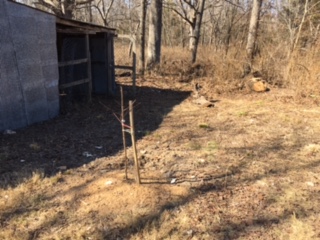
I made the use of a microclimate created by the buildings on our place. I planted these trees along the western boundary of the property on the north side of the trailer just north of the hen house. This way, sun shining on a frosty morning won’t cause sunscald. There’re large trees on the western side of the yard so the trees are protected from westerly winds. Also, the north side of the yard will stay cooler than the south side of the yard and will prevent the trees from budding too early. The fruit trees will bud later, preventing late frosts from destroying the flowers and therefore future fruit.
How I Planted My Trees
Here in this part of Missouri, we are able to plant trees any time that we can work the soil during the late winter. In more northerly climates, trees would need to be planted later in the season either late winter or early spring but definitely before the trees bud.
For each tree I dug a hole about a shovel’s depth and at least three times the side of the bare-root stock. I made the holes square because a square hole is better than a round one as it encourages the roots to push out into the surrounding ground. I kept the soil I removed on a tarp.
I added a few inches of good garden compost and worked it into the soil around the hole. I mixed the compost into the top two inches of the soil out to what would be the tree’s dripline. I placed the tree in the center of the hole and spread out the roots. As I put the soil back around the tree, I made sure to mix some compost into the soil as I replaced it around the tree. I made sure that I planted just to the slightly darker junction on the tree’s trunk that indicated where the soil level was when it was first grown. I made sure that the soil around the hole wasn’t planted deeper or shallower than when the trees were first grown. Since my fruit trees were grafted onto rootstock, I made certain that the joint was above ground.
Before I buried the tree roots, I put a thick wooden stake a few inches from the center of the hole and on the side of the north wind (As I said earlier, I have trees for a windbreak.) I hammered this firmly into the ground using a mallet. I firmly pressed the tree and post into the ground with my heel, careful not to damage the roots. When the hole was half full, I pulled the tree up an inch and then let it drop to help the soil fill in around the roots.
When all the soil was added and firmed, I attached the tree to the stake with a soft tie and left enough room for the tree trunk to grow. I plan to add a protective fence around the trunk of each tree. At this stage I covered the area which would be the dripline with sawdust to suppress weeds.
I watered the soil well to stop the roots drying out and to further settle the soil around them.
Further Care During the Spring/Summer/Fall
Until the root system is at least as large as the tree it supports, the trees are particularly vulnerable to environmental stress. During this first year, the trees can easily die from not getting enough water or nutrients. I will need to keep the trees well-watered, especially during dry weather. A good soaking once or twice a week is much better than surface watering daily, though during extreme heat it can be worth doing both. It’s also vital to keep the area around the tree completely free of weeds and grass as they will compete with the young tree, which is why the sawdust mulch will be highly effective.
<p value="<amp-fit-text layout="fixed-height" min-font-size="6" max-font-size="72" height="80">I will also have to remember to remove any and all blossoms from the trees this first year and not let any fruit develop. By keeping the trees from bearing the first year, the trees will have less stress and become healthier and produce greater bounty in the future.I will also have to remember to remove any and all blossoms from the trees this first year and not let any fruit develop. By keeping the trees from bearing the first year, the trees will have less stress and become healthier and produce greater bounty in the future.I am looking forward to sharing more about this orchard in the future. If you have any questions about growing your own home orchard, please let me know by commenting below.
<p value="<amp-fit-text layout="fixed-height" min-font-size="6" max-font-size="72" height="80">If you have anything you would like to add, feel free to add it in the comments below as well!If you have anything you would like to add, feel free to add it in the comments below as well!
I absolutely love this post. I have fruit trees too and it’s great to learn about other planting ideas from others like you.
LikeLike
Thank you! I enjoy the information you share too!
LikeLiked by 1 person