No space is too small for a vegetable garden that you can pick from year round. You just have to redefine “vegetable garden”.
You don’t need vast acreage to feed your families. Just yesterday I was remembering the first time I came through this part of Missouri in 1979. I came through at the end of July and I remember the numerous gardens I saw in backyards all throughout the state. That was what made me fall in love with the area, the vegetable gardens. It reminded me a lot of what I saw when I was in Canada a few years earlier. I remember rows and rows of suburban homes, each one with a vegetable garden, a couple of fruit trees, grape vines on the back fence, and some had fishponds in the yard as well. A lot of food can be grown in a relatively small space.
I published The Four Seasons Vegetable Gardenearly this spring detailing how anyone can grow a vegetable garden that will keep them in vegetables all year long and already, I see this book as being even more needed than ever before. Now, not only do we have the aftermath of the pandemic, but we also are facing inflation and recession. Anything that we do to increase our purchasing abilities will increase our ability to feed our families and pay the rest of the bills.
Imagine learning what foods grow in your area seasonally and learning to eat what is in season. Imagine being able to go out to your garden any time during the year, picking and eating what you’ve grown. How would you like to be able to have fresh vegetables from your garden every day all year long, no matter what the weather? The Four Seasons Vegetable Garden will show you what it takes to do exactly that.
In The Four Seasons Vegetable Garden, you’ll learn the basics for making that happen. From this book, you’ll also learn some of the secrets to producing more than one crop from the same piece of ground. You’ll learn where to put your garden. How to utilize garden space so that you can make the best use of every inch of soil through interplanting techniques.
Potatoes are one of twelve vegetables that in The Survival Garden I demonstrate how to grow.
It’s easy to place blame on someone or something else in regard to the lack of food security in our world. We could blame the government. We can the disease that had us locked up for two years. We can blame the war in Europe. We can blame our president or our economic system. We can blame someone else or even ourselves or we can take responsibility by responding with a solution, at least for ourselves.
I have watched hundreds of prepper videos and articles and read dozens of prepper books. Most of them give a laundry list of things that you should buy to stock up on supplies for The End of Our World as We Know It. They tell you that you need to purchase food, water, medicines, energy for cooking, heating, and lighting, and a way to protect yourself from whatever may happen when dealing with others.
I have done many of those things and have been glad that I did them. When we didn’t have electricity for over a week many years ago, I was glad that we had water and food and a wood cookstove already for that time.
When we both lost our jobs a couple years after that, we had a lot of food that lasted us until we were able to get additional help. During this time, we also had a garden, and I canned a lot of our food.
What if We have an Extended Crisis?
What happens if the power is out for a long time, and we can’t use refrigeration, or we can’t get to the grocery store, or food isn’t available at the grocery store for an extended time? Our stored foods will only run out. Then what?
Some of these prepper videos also encourage canning foods for long-term storage. I do that too. I have canned meat, vegetables, fruit, ready-to-eat meals, and even canned reconstituted dried beans so that if we were to have an extended time where we couldn’t cook.
All the above are good for a limited time, but what will we do when our stored foods, canning lids, and power are no longer available? What then? How long will the food we stored last us?
Gardening, a Perpetual Skill Set
There’s a skill set we can all learn that previous generations all knew and that was the backbone to everything that they did and that was the fact that they gardened and knew what it took to store their food over the winter. Yes, some of the food that they grew they fermented or dried to last them through the winter months, but some of that food they were able to store without any kind of refrigeration, dehydration, pickling, or any other form of mechanized processing. They grew vegetables that didn’t need any of this. They knew which foods they could store that didn’t need it! They could store these vegetables all winter without
Not only did they grow the foods that didn’t need it, but they also knew how to grow the seeds, clippings, or sprouts that they planted. They knew what each variety needed to reproduce. The propagation of beans was different than the propagation of potatoes. The propagation of potatoes is different than the propagation of carrots. The propagation of carrots is different than the propagation of squash, and the propagation of squash is different than the propagation of sweet potatoes.
Why I Wrote The Survival Garden
I wrote The Survival Garden with this concept in mind. My parents grew up during the depression and I grew up in a poor family where I learned a lot from them about what I am sharing. This book won’t tell you about all the things you can plant throughout the year, nor does it offer everything that you can store over the winter. However, in this book, I’ve included the most common vegetables that can be grown in most parts of the United States and much of the world.
For the entire month of June, I am sharing my books in the first annual Cygnet Brown Book Club Month! All throughout the month, I will be featuring not one, but all of the books that I have written to date. The gardening-related books I am writing here on The Perpetual Homesteader. The first gardening book I am sharing is Simply Vegetable Gardening. My non-gardening books are shared on my other blog HowMySpirit Sings. (here’s the link).
When I first started writing Simply Vegetable Gardening, we were living at my brother’s place after losing our home to foreclosure. I started writing it during the Great Recession with the intention of helping other people get started gardening by sharing what I knew about it. To tell the truth, I also wanted to begin earning a living writing about topics that I loved, and I do love gardening.
Here we are again facing uncertain times and many people have started gardening lately, but few have the experience that I have in getting my hands dirty with soil. I have had fifty years of experience getting plants to grow without fertilizers, herbicides, or pesticides.
Home Garden to Combat World Wide Food Shortages
What I shared in Simply Vegetable Gardening is even more relevant today than it was then. In this time of food shortages and fertilizer shortages, I don’t worry. This year, my garden is bigger and better than ever because I don’t just talk and write about gardening, I practice what I preach.
I believe that one of the solutions to food shortages is increased home garden production. Anything each one of us can grow ourselves can make a difference in food shortages around the world because that is just one more thing that we don’t have to take out of the mouths of people in other countries. Every potato that we grow and eat ourselves is another potato available in the stores for someone else.
I wouldn’t say that I grow organically because to be able to say that specifically, my garden would have to be organically certified which it is not. I don’t purchase a lot of organic substances for my garden, and I use very few means of combating pests and diseases. What I do is build my garden using natural means and substances. I primarily feed the soil and provide the necessary nutrients to feed the soil microbes, creating a symbiotic relationship with my plants, making them both healthy and pest and disease resistant.
Consider starting a garden this year or at least learn to garden without outside resources. To help you do this I highly recommend reading Simply Vegetable Gardening.
Spring is planting season, but it is also the rainy season here in the Missouri Ozarks and the temperatures are more variable than in any other area of the country. It can be dry and hot early in the day and cold and rainy by the end of that same day. It can be raining in one area and residents a few miles down the road can be begging for a few drops of water for their gardens. It is certainly a time of change. The objective is not to fight those changes, but to flow with them.
A Tragedy
RIP Henny Penney
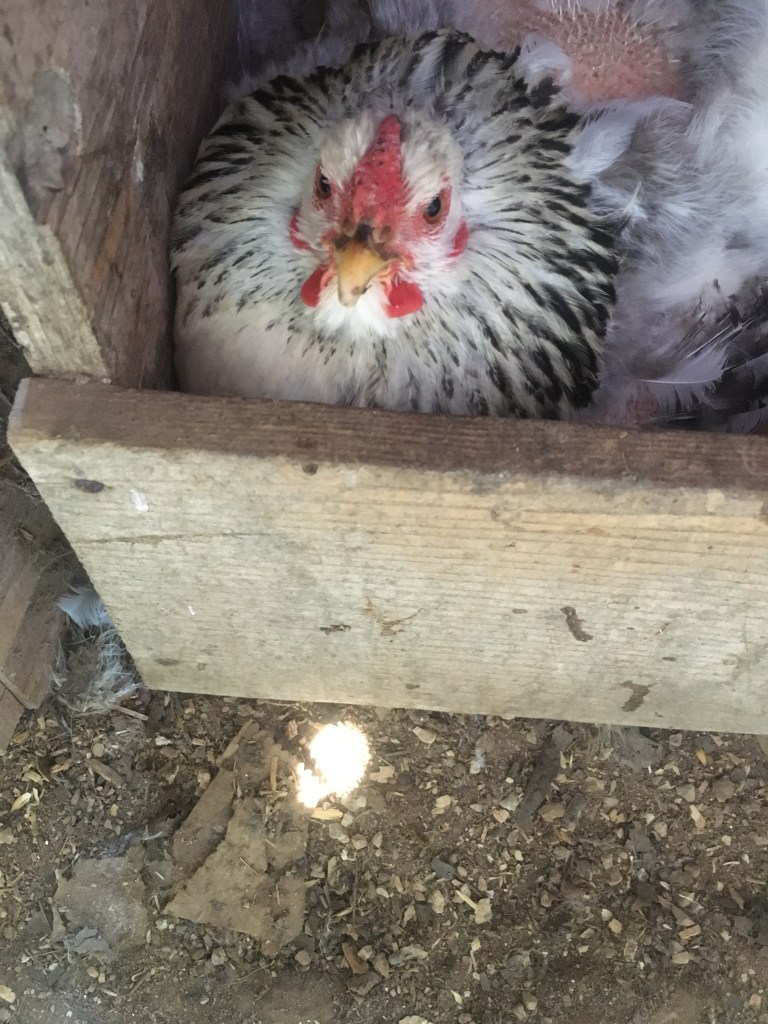
The chicken setting on the eggs was taken by an animal during the night. I usually hear something, but not this time. When I got up in the morning, the door was open, but I thought I had closed it. My guess was an intelligent animal opened the door and wanted what was inside. I dreaded what I would find. Sure enough, eggshells were scattered everywhere. A few tail feathers showed that Henny Penney too had been taken. Our egg setting hen was gone. My guess is that the local fox population had a fine chicken dinner that morning. Unfortunately, I had no time to mourn. It’s spring! There was too much to do.
Canning Dried Beans
Early in the week, we had very cool temperatures, so I decided to take advantage of those temperatures. I decided to can the dried pinto beans that I wanted to do during the winter, but never found the time to do.
Why do I can dry beans? Well first, it takes less energy to can eight pints of beans than it does to slow-cook each batch one at a time. Second, the beans won’t dry out like they would if I didn’t process them. Dried beans, even though they won’t go bad, do take longer to cook the longer they are kept in storage. The third and probably the most important reason is that I don’t want to have to cook them during the summer when it’s too hot to cook. Plus, that heat helps keep the house warm so we don’t have to run the heater.
I canned and added 23 pints to my pantry. This summer we’ll be eating them in Mexican meals that we make from scratch.
The actual processing of the beans doesn’t take much time, most of the processing is watching the boiling process. Therefore, there’s a lot of time to do something else. I decided that I would use that time to make granola.
Granola makes a quick and easy cold breakfast cereal for hot summer mornings. Most of the ingredients I keep in my pantry and there’s no need to be concerned with artificial colors or flavors or preservatives. Everything that goes into my granola I can pronounce. For more information about this granola and the recipe, check out this online article that I also wrote on Hubpages.
Garlic Scape Pesto
This week I also made garlic scape pesto by using the scapes from the elephant garlic that I am growing. To make the pesto, I picked all the scapes (the seed pods) from my elephant garlic. Removing the scapes allowed the elephant garlic to focus more of its energy on bulb production. What’s good for the plant is also good for me.
Making garlic scape pesto is easy. With a knife, simply cut up the scapes into two-inch sections. Then place in the blender and blend the scapes until they are well pulverized. Next, add olive oil and blend to make a creamy base. Next, add about ½ cup of dried parmesan cheese and black pepper to taste. This easy, fragrant pesto can be spread on bread or crackers, put on pasta, used with fish, or as a substitute for garlic, onion, or scallions! Add to sandwiches, pasta, lamb, and fish dishes. Tastes great mixed with mayo.
First Green Salad
This week we made our first green salad from the garden this year. We had lettuce, radishes, radish pods, green peppers (yes, we have fresh green peppers in our garden already!), and green onions. I also added a little red onion that I had in the refrigerator along with cheese and some boiled egg and some Chipotle grilled chicken and topped with ranch dressing. I ate it with grilled bread and my husband ate it as a wrap in a tortilla.
Weeding, Weeding, Weeding!
You would think that with cool weather that the weeds wouldn’t grow as fast as they do, but with all the rain we have been getting we’ve not only been mowing the lawn more, but I have had to take some time each day that it wasn’t raining and devote to weeding the garden. The good news was that the rain loosened the soil so that it was easier to work, but the weeds already had deep roots. Next week I hope to replant bare spots in the garden.
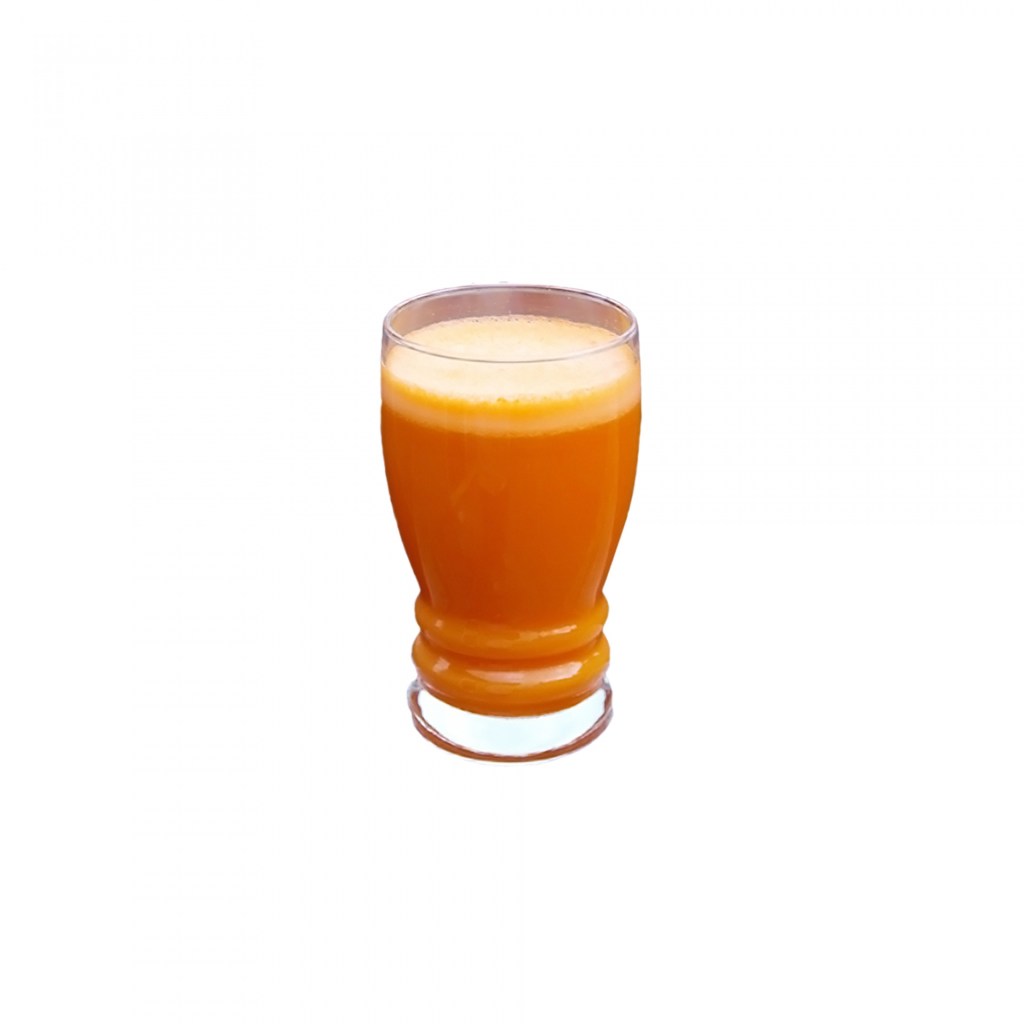
I have been suffering from osteoarthritis for years. Sometimes this makes it difficult for me to get things done on the farm as I want to do, but I have found a tonic that may actually help heal the problem.
When I normally think of tonic, I am reminded of Granny on the Beverly Hillbillies and her rumatiz’ medicine. Unlike Granny’s tonic, mine has no alcohol but as the dictionary suggests, my tonic does give me a feeling of vigor and wellbeing and it is restorative and offers stimulation. However, I wouldn’t exactly call my tonic a “medicine”, but rather a natural way of getting rid of the pain that zaps my energy.
The pain that I feel is from years of abuse to my joints. I had worked in factories, food service, nursing homes, hospitals, marched in the military, and am currently doing farm work, and since I am in my sixties, I am dealing with pain in my hips, shoulders, and back. For a long time, I had been dealing with the pain using over-the-counter medications like Tylenol, Ibuprofen, and Naproxen all of which are not good for the long haul. I decided to see if there wasn’t something out there that could help, not just ease the pain, but possibly even help heal the joints.
I know that there are a lot of products out there that claim to help with arthritis pain, but I didn’t want to spend a lot of time and money on products that didn’t live up to their claim so I did a little research on my own. Here’s what I found that works for me.
NOT MEDICAL ADVICE
What is it you ask? Well before I tell you that, I want to say that this is what I do, and it is not medical advice. I am not a doctor, nor do I play one on television. All I can tell you is that it works for me, but I can’t tell you that the same would work for you as well. You need to talk to your own doctor and do your own research.
Researching the Ingredients
I had read some time back that turmeric and ginger both reduce inflammation.
Turmeric’s active ingredient, Curcumin, is touted for the ability to reduce inflammation. If a person has arthritis, gout, or muscle pain, it is recommended that a person add a little turmeric to meals. It has anti-inflammatory magic. Plus, it’s relatively cheap. A little bit goes a long way too. It takes only a quarter teaspoon for my purpose.
Ginger can be used fresh, dried, powdered, or as an oil or juice. It’s a very common ingredient in recipes. It’s sometimes added to processed foods and cosmetics. Its benefits are supported by science. It contains Gingerol. According to research, Gingerol has powerful anti-inflammatory and antioxidant effects it may help reduce oxidative stress, which is the result of having an excess amount of free radicals in the body.
Research has indicated that ginger helps with the symptoms of Osteoarthritis, my problem, which is a common health problem. It involves degeneration of the joints in the body, leading to symptoms such as joint pain and stiffness.
Research has found that many people who used ginger to treat this type of arthritis saw significant reductions in pain and disability.
Apple Cider Vinegar is another ingredient that I include in my tonic. It is made by fermenting the sugar from apples. This turns them into acetic acid, which is a main active ingredient in vinegar and may be responsible for its health benefits. It contains some potassium, amino acids, and antioxidants. These benefits are science-backed. There are others, however, that are more subjective. For instance, it is said to be a natural energy booster. It also may boost the absorption of calcium thereby strengthening bones and improving health. Apple cider vinegar also has anti-inflammatory properties.
Honey- Honey is primarily composed of sugar, provides small amounts of several vitamins and minerals, and is rich in health-promoting plant compounds. Unfiltered, unprocessed raw honey is loaded with antioxidants including phenolic acids and flavonoids. Antioxidants help neutralize reactive oxygen species in the body, which can build up in cells and cause damage. This damage can contribute to osteoarthritis. I have also personally found that the locally produced honey that I get is great for reducing the allergic reaction I get from pollens in the air. (Again, this is not medical advice, it just seems to work for me.) Most importantly, honey makes the rest of the ingredients of this tonic go down.
Putting It All Together
I, of course, had researched other foods that may help with osteoarthritis pain, but I decided to include these four ingredients primarily because they are easy to procure (they are all available locally) and they are cheap. Ginger, honey, and apple cider vinegar were used in a drink called switchel that pioneers drank during the summer to quench their thirst, prevent nausea from drinking warm water, and provide electrolytes. The turmeric is an easy add and I think that it adds a complementary spicy flavor.
To make the tonic, I put about an ounce of warm water at the bottom of the glass and add a tablespoon of honey. I stir the honey until it is completely dissolved. Next, I add a quarter teaspoon of ginger and a quarter teaspoon of turmeric and a tablespoon of unfiltered raw (with the mother) apple cider vinegar to the mixture and mix it well. Then I add as much water as I feel like drinking to the mixture and drink it.
It May Not Be for Everyone, but It Works for Me
It may not taste that great at first, but it takes better each time I drink it perhaps because the positive effects are obvious. Within a couple of minutes, I begin to feel the warmth of the ginger and the turmeric and soon I feel my joints loosening. The pain I was feeling usually subsides and I can do what I need to do around the farm.
I love spring. Now that the frosts are done and the rain has subsided for a few days, it’s time to get the garden going in full swing. Since the frosts look like they are done for the season and the rain has turned off, for now, we’ve been hustling to get many more of our garden planted.
Garden Update
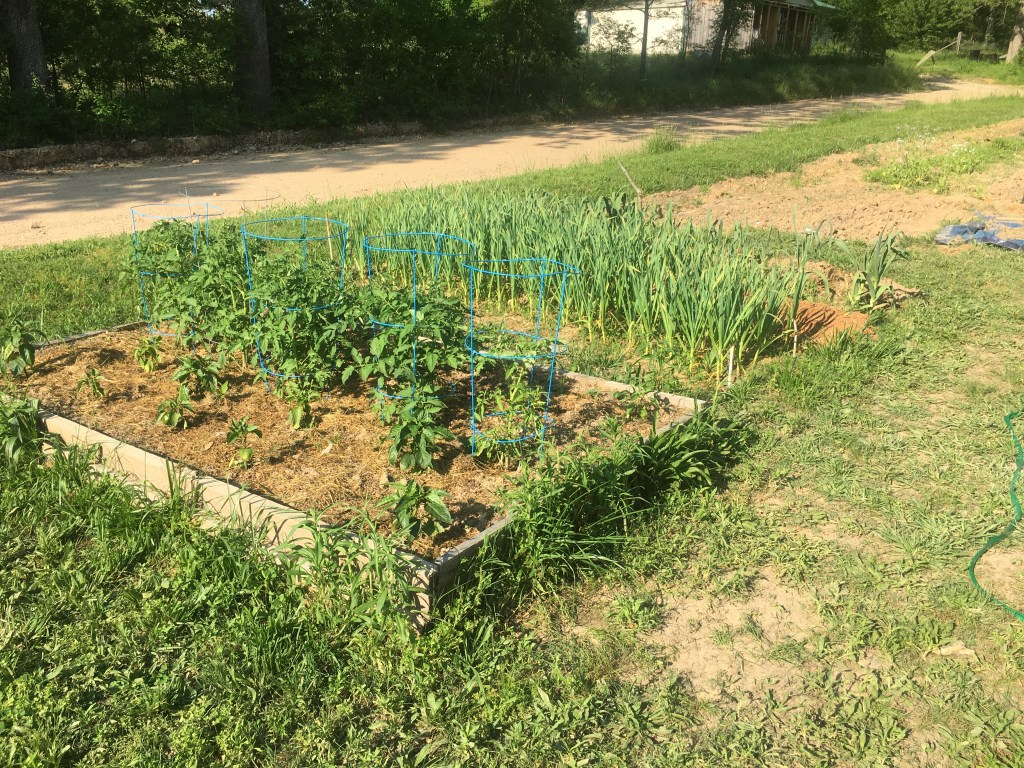
The tomatoes and pepper plants are doing well and as you can see, so are the garlic which will be ready within a month.
We planted bush beans, Cherokee Trail of Tears pole beans, sweet potato plants, zucchini squash, sunflowers, and okra and have more to grow in the garden beds.
The idea of digging ditches and filling them with sawdust seems to be working for the tomato plants that we planted next to the fence we are using for their vertical supports. One of the things that I did this year which is a no-no when it comes to clay soil like ours is that if you work it when it is wet like it has been, it tends to clump up into bricks that are impenetrable. Therefore, when I was working this soil this past week, it was hard to do. However, by wetting the soil some of the soil became workable, and I was easily able to break up what had been bricks with my potato hook.
If you find yourself in a similar situation, be sure not to use too much water. Let the water soak into the clods for a few minutes before trying to work them. If it doesn’t work, use a little more water. Too much water is used on the clods, and you’ll be back where you started. Last year I did something similar in that I waited until the next rain before I tried to work the ground again. It worked too.
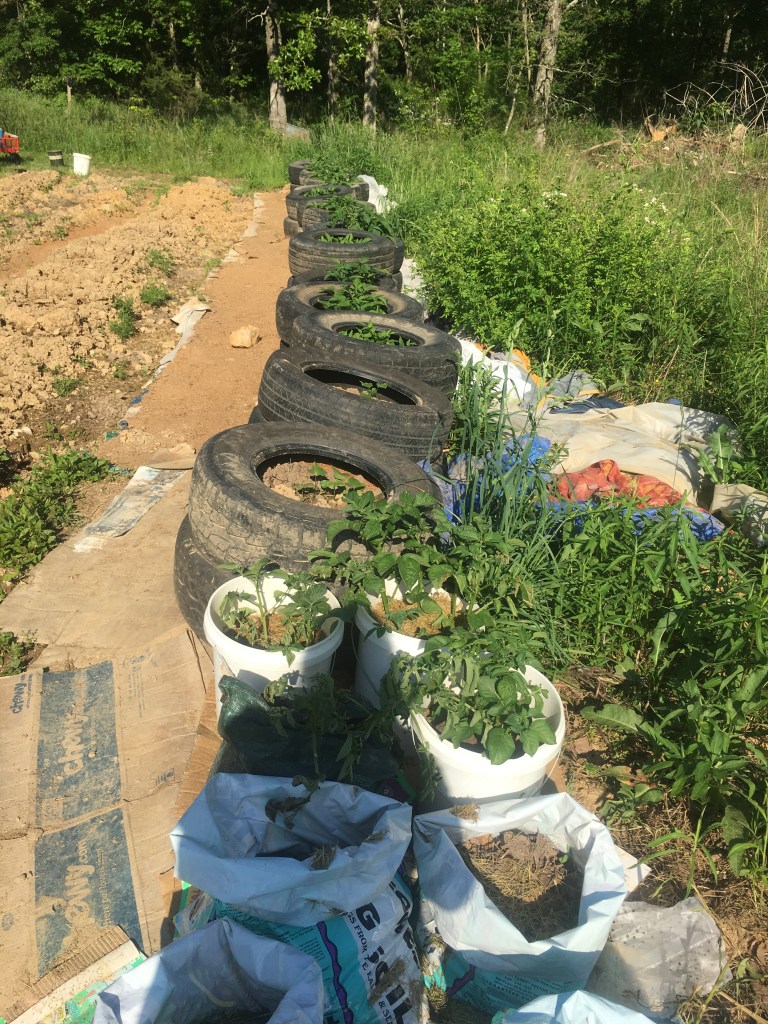
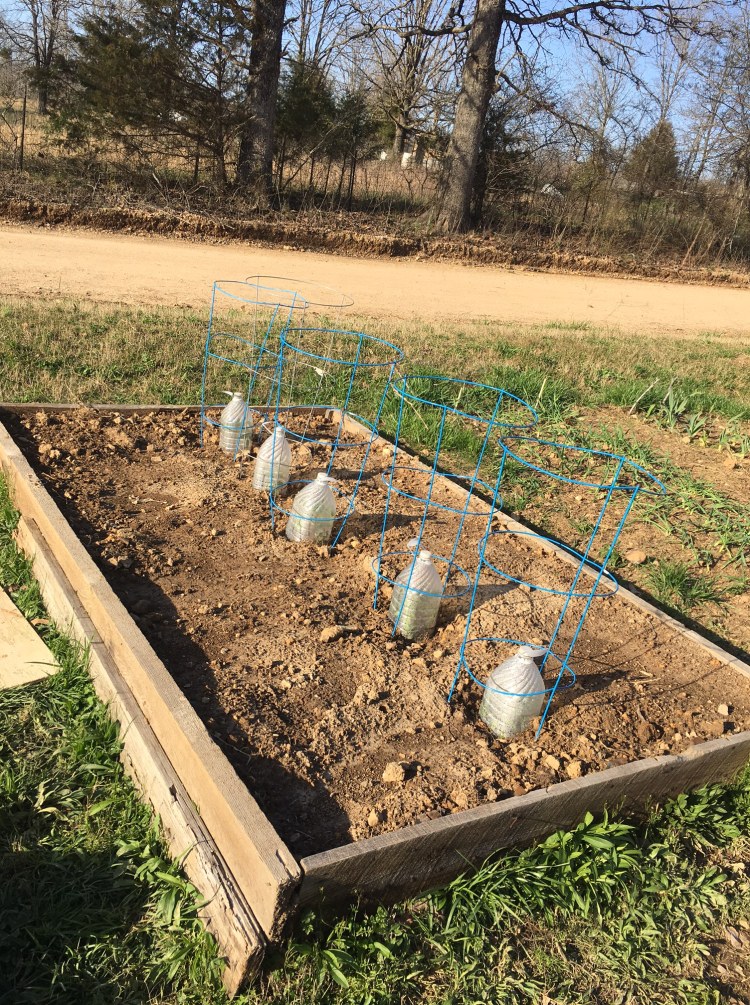
We planted many of our potatoes and both sweet potato plants in tires!
A lot of the garden is up, but the rain did cause some plants to drown. We had to replant the potatoes that we planted in the ditch, and I replanted some of the corn and still have more that I need to fill in.
The early salad green garden includes onions, lettuce, radishes, beets, carrots, and other greens. Our pepper and tomato beds are doing amazingly well. We have many sweet peppers already set on the plants and hope to get some peppers before the end of the month. Not bad for May in the Ozarks!
I have been thinking about starting a gardening book specifically for the Ozarks.
Baby Critters!
On Mother’s Day, our cat had her second kitten in five years. The kitten is a beautiful little Calico. She had the first on Christmas Day a year and a half ago. I’m wondering if these kittens weren’t gifts to me for those holidays!
She wasn’t very happy with me taking her picture but she is sticking with her job of setting on eggs.
We also have a chicken who has gone broody and is setting on eggs. She seems determined to get herself a little flock of chicks. We’ll see how many she hatches out if any. A couple of weeks ago, we sold several roosters and we have one left. There’s a good chance that some of these eggs will produce a rooster or two or more. More on this later.
One of the nice things about being a perpetual homesteader is that there are foods that I am now growing that I didn’t have to plant this year. I have taken some permaculture practices and added them to my homestead so that I don’t have to reinvent the proverbial wheel every year by planting a strictly annual garden.
Today I want to share some of the fruits and vegetables that I planted last year that I don’t have to replant this year.
Strawberry Plants
When I lived back in Springfield, I was growing these strawberries and brought them with me when I moved here. I have a nice little patch of strawberry plants growing. Though I plan to move them to a better larger location next year, this year, I’ll have a nice little supply for us to eat.
Asparagus
Planted next to the strawberries is the asparagus. They take three years to get up to eating size. I started these from seed back in Springfield so they are a year shy of us being able to eat them, and they are almost to the size we want. We didn’t get any of the asparagus this year, but the chickens enjoyed a few choice spears. Next year we should be getting a decent crop for our own use. I am sure they will be worth the wait!
Baby Peach
Here on my peach tree, I have the first of two peaches growing. I am really excited because these are the first peaches I have ever grown. The variety is resistant to several peach diseases and insects. I am still learning about the various natural means of protecting these peaches from those problems.
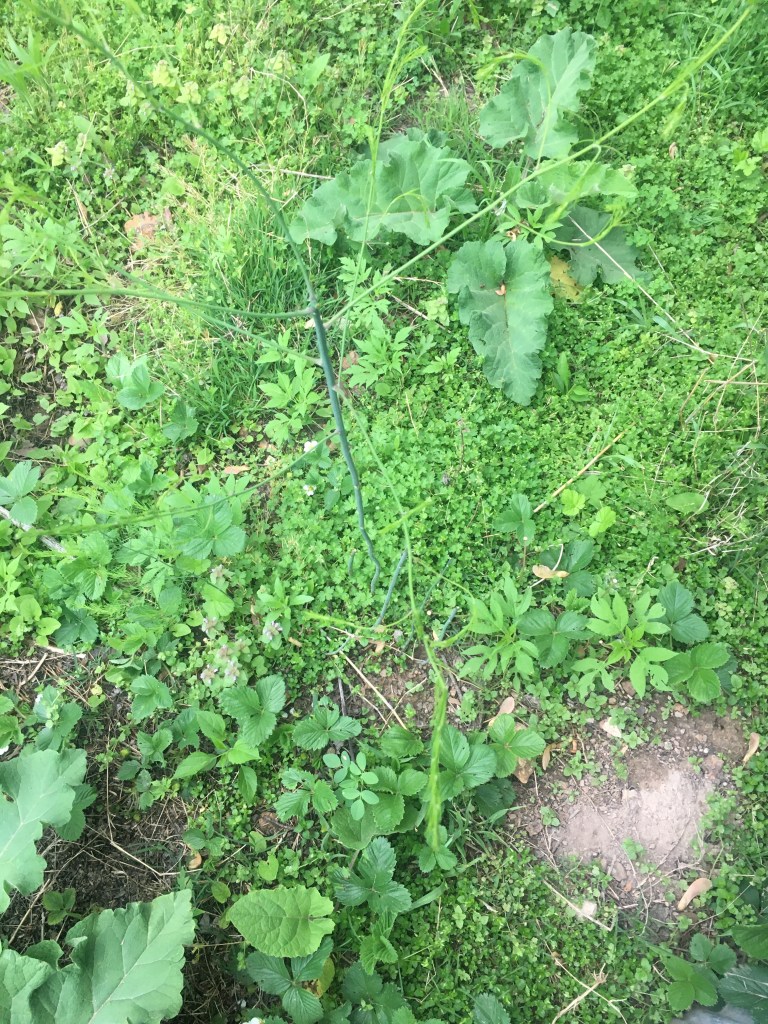
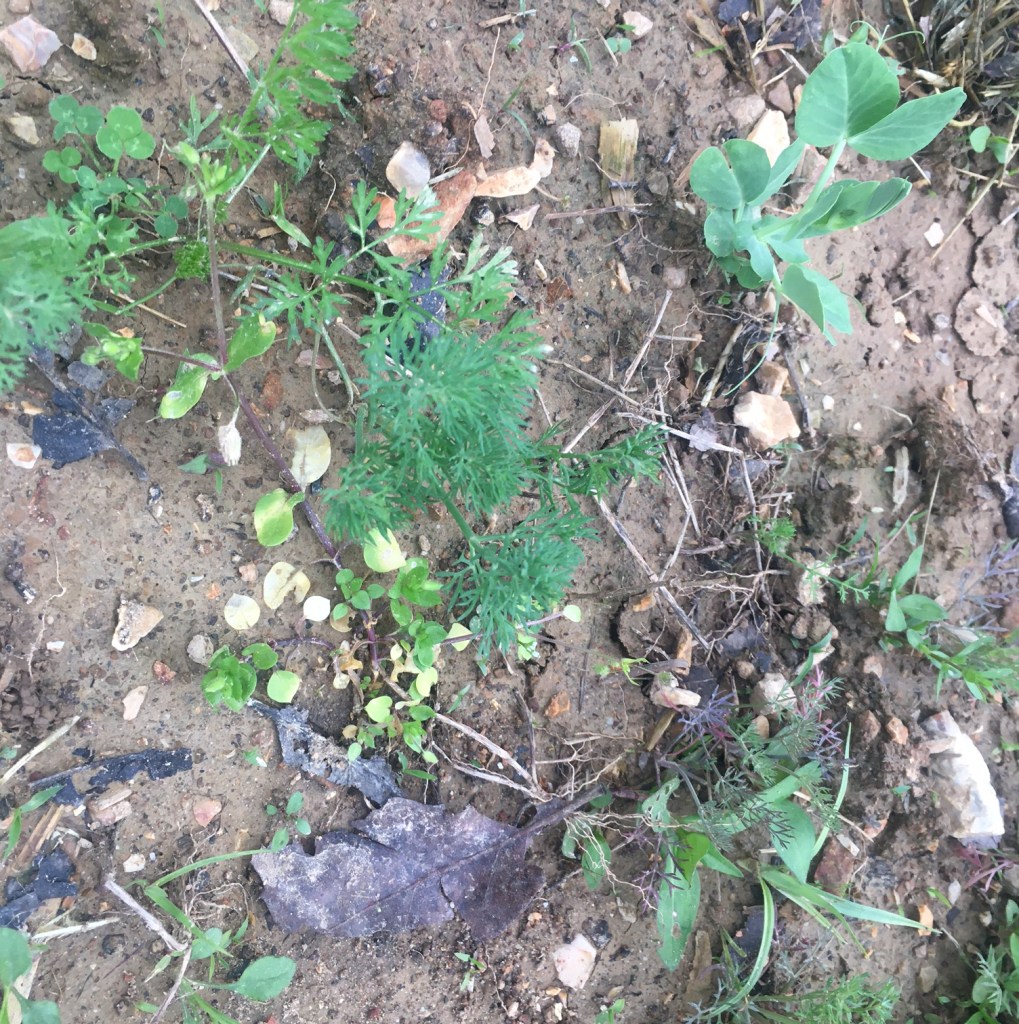
I planted the peas this year, but is dill that I planted the year before last is coming in strong for the third year! This plant is not a perennial like the previous plants that I have shown. It is a self-seeding annual among several self-seeding plants that I have not had to plant this year. The rest of the vegetables that I am showing on this blog are also self-seeding annual vegetables.
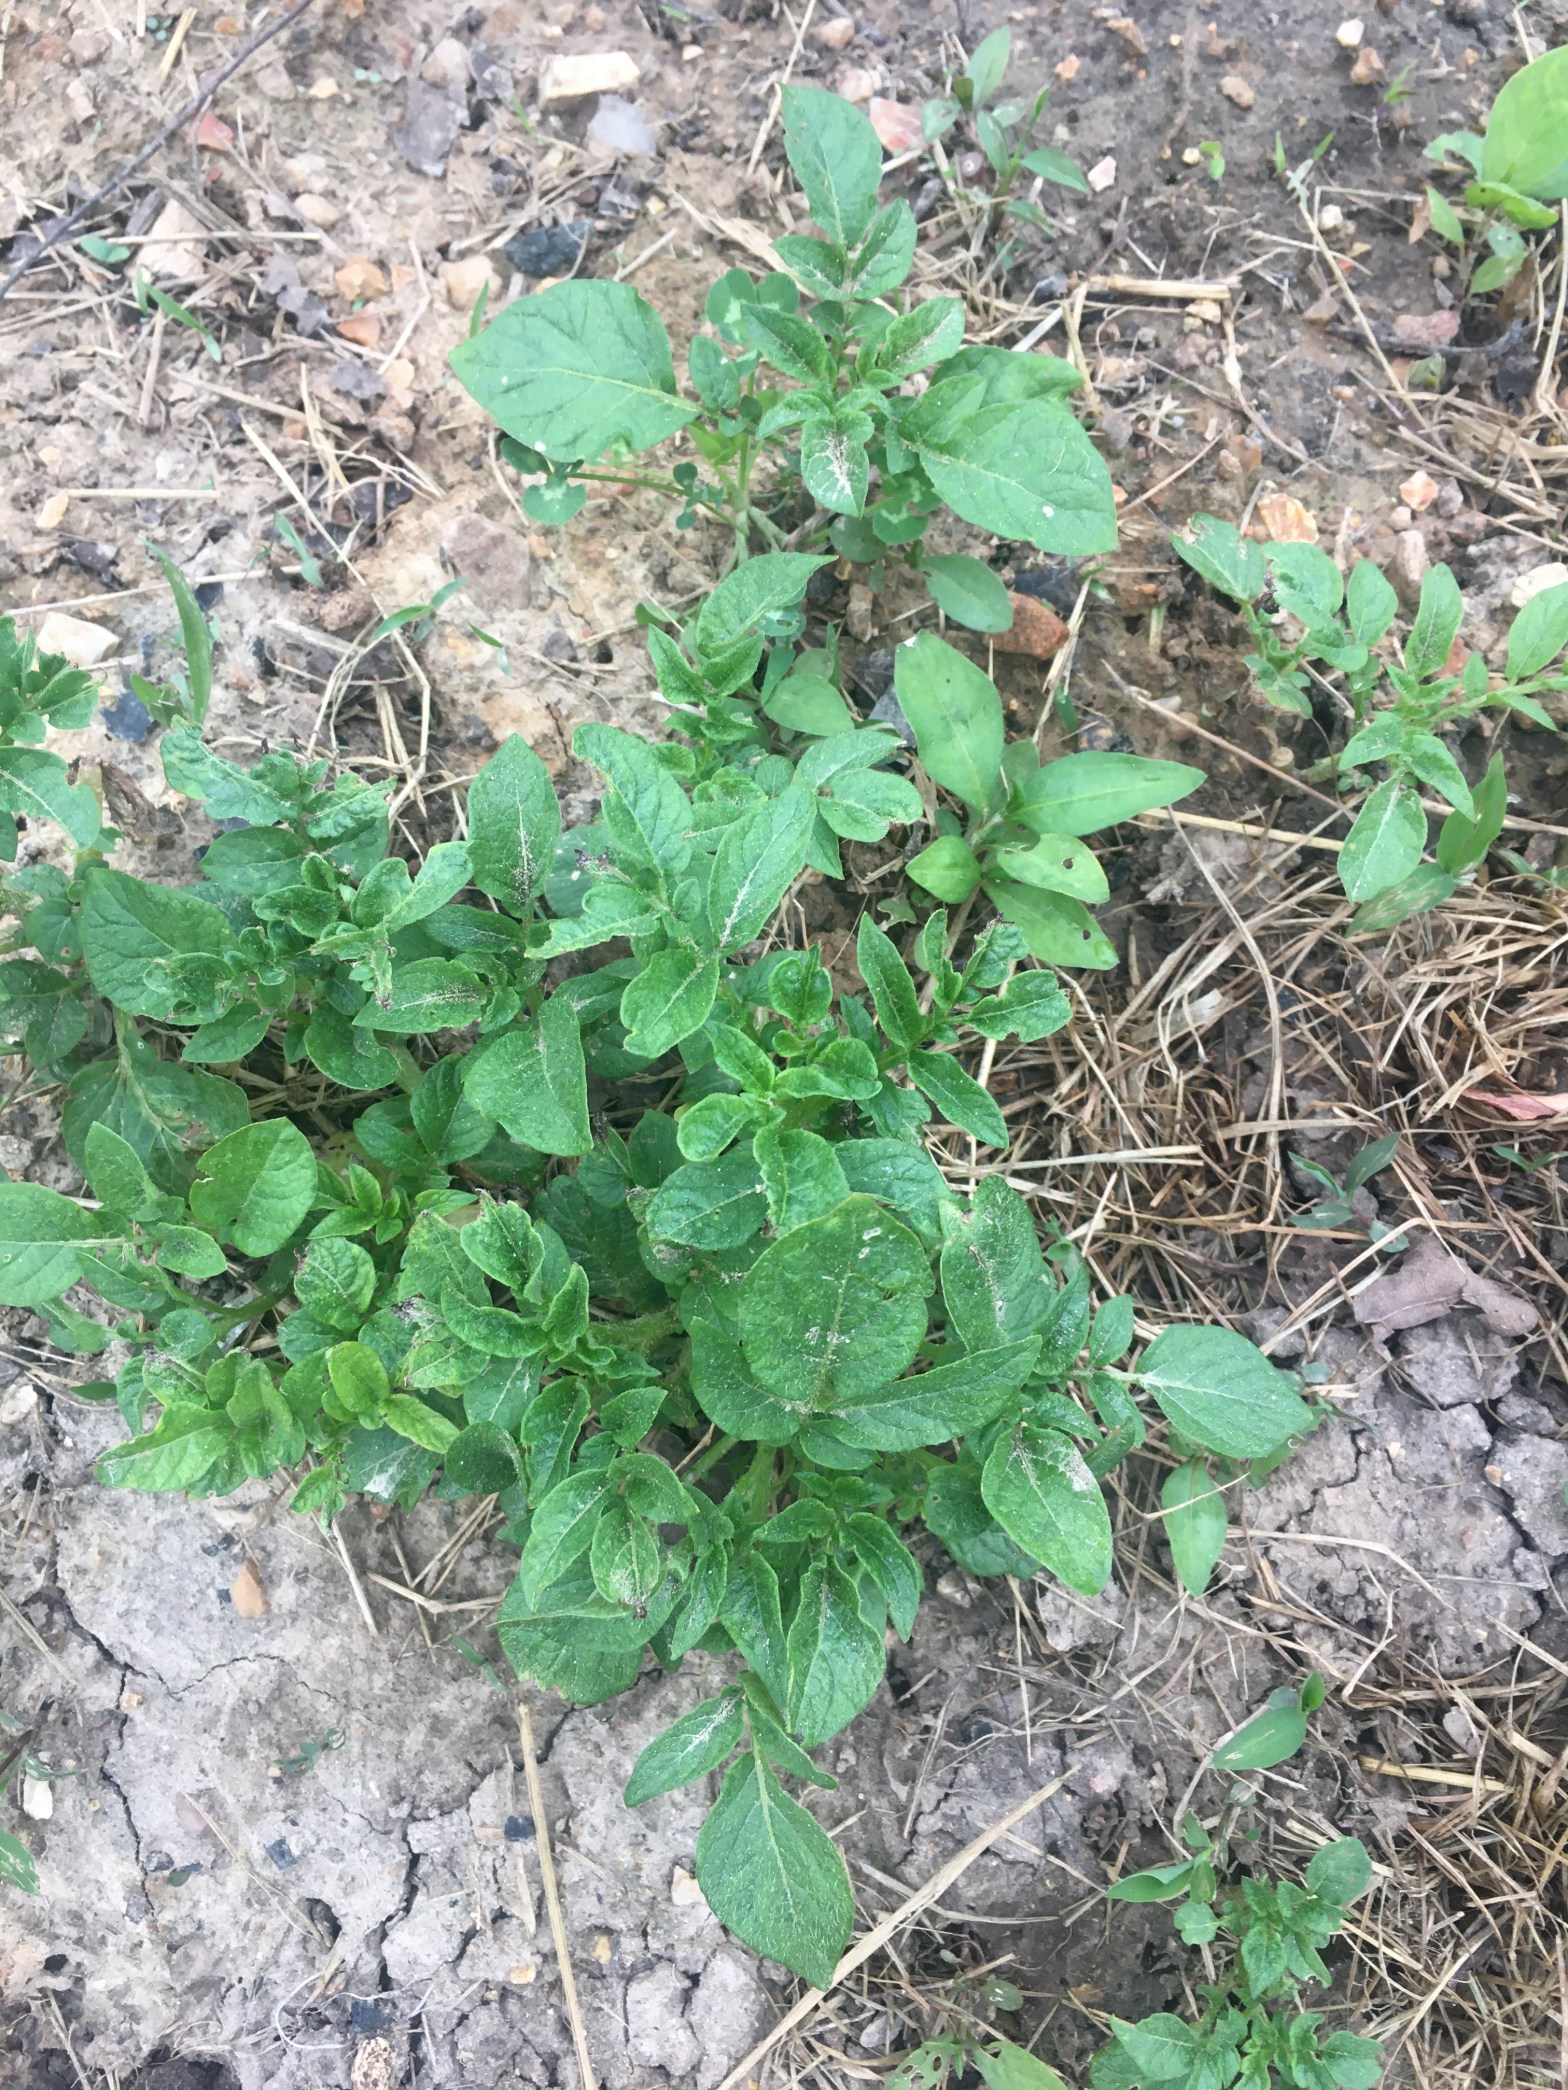
Self-seeded potatoes
Though I planted a lot of potatoes this year, I found that a whole row of self-seeded potatoes also came up in the area where I planted last year. Potatoes, of course, are not usually grown from seed, but from tubers from the year before. It looks as though I didn’t get all the potatoes last year but that’s okay because it just means we’ll have more to eat this year!
I also have some lettuce and radish seeds that seeded themselves and in a day or two, I’ll be able to make a salad from these early vegetables.
If you’re interested in learning more about how you can create your own perpetual homestead, I am working on a book series called The Perpetual Homesteader series that shows tips on how you too can produce a perpetual homestead of your own. In the meantime, check out my other gardening books. Simply Vegetable GardeningThe Survival Garden And my latest book The Four Seasons Garden Get your copies today!
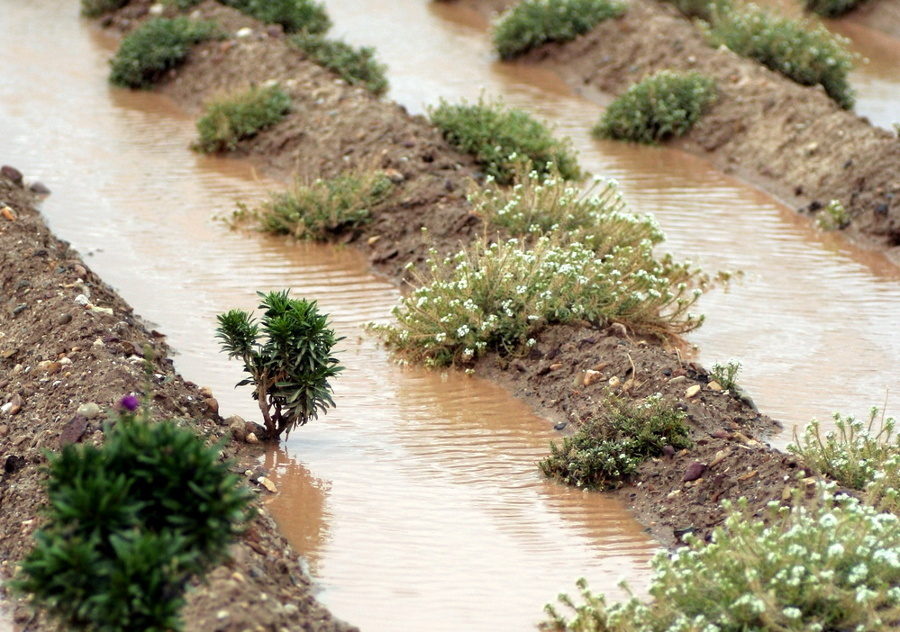
What do you do when your garden is too wet to plant?
For the past month, we have had warm dry weather intermittent with cold wet weather and mornings where frost has nipped certain plants that we were able to get into the garden. That changed this past week. Now the temperatures are perfect, but rain has become the issue. This past week, we have had a lot of rain that inundated many of what we had planted. The water-logged ground prevent us from being able to plant the rest of the garden as well.
Many gardens in the western United States are suffering from excessive dryness and much has been spoken about what they do about excessive dryness. However, not as much is written about flooded gardens and what to do about it. Therefore, if flooding is an issue for your garden, this post is for you. Many people would have just raised their hands in defeat, but here are some ways that I am dealing with the flooding problem in my garden.
Raised Some Garden Beds
Every year, this time of year, we get more rain than what we can use in the spring. Therefore, because we knew this is a yearly occurrence, one of the things that we did earlier this year was build a couple of raised beds for some of our plants. The tomato plants in those raised beds are doing well and are growing, but the ones along the fence in the main garden were swimming in pools of water. We’ll no doubt be growing more of our tomatoes in raised beds next year.
Dig a Trench
Another thing that we have done is dig trenches the length of the garden bed perpendicular to the slope so that the water runs into the trenches and doesn’t wash the soil off the side of the slope. If soil runs anywhere, it will run into the trenches which is why we took an additional step so that the soil wouldn’t just run into those trenches.
Filled the Trenches with Organic Material
Because the soil is still so cool and saturated, we decided that we didn’t want to put mulch around the plants just yet. Instead, we are adding organic material to the trenches. We use these trenches for pathways between the garden beds. We’ve been using sawdust and a small amount of chicken manure as a sort of water collection system. This way, much of the water that sheds off the land into the trenches is absorbed by the organic material. Any soil that washes off the beds washes into the trenches and mingles with the organic material. The water is thereby stored in the garden for the months when the rain stops which around here is just after Independence Day. The organic material and the soil that came off the beds become food and home for soil microbes and earthworms and incorporate into the soil for future gardens.
No Tiller When Planting in Wet Ground
Often around here, the soil this time of year is so saturated that we are unable to plant using conventional methods once the rain does start to fall in the spring. Therefore, we must get a little unconventional in our techniques.
We do a lot of our garden prepping in the winter when it doesn’t rain as much, and we use a broad fork rather than a tiller. We don’t use a tiller partly because we have clay soil that if worked when wet becomes like adobe. Another reason we don’t use a tiller is that tilling destroys the garden tilth. And if that isn’t enough, tilling brings up weed seeds that have long been buried in the soil. A broad fork doesn’t create any of these problems except when the soil is saturated like it is now, so we have to get even more creative if we want to plant our spring garden in the spring which is our rainy season.
Planting in Saturated Ground
Because our soil is primarily clay, we have started to add small amounts of organic sandy loam to our garden in exactly the places where we need it most and that is on top of newly planted seeds. In some cases, for large seeds like corn and beans, I dig a row in the ground, put in a little organic kelp and the seeds, and cover with the sandy loam soil. Sometimes, especially with smaller seeds like carrots and lettuce, I broadcast the seed over the soil and sprinkle the sandy loam soil over the planted area. The plants come up in a few days.
How about you? What challenge is this garden season bringing to you? Please share your questions and comments below.
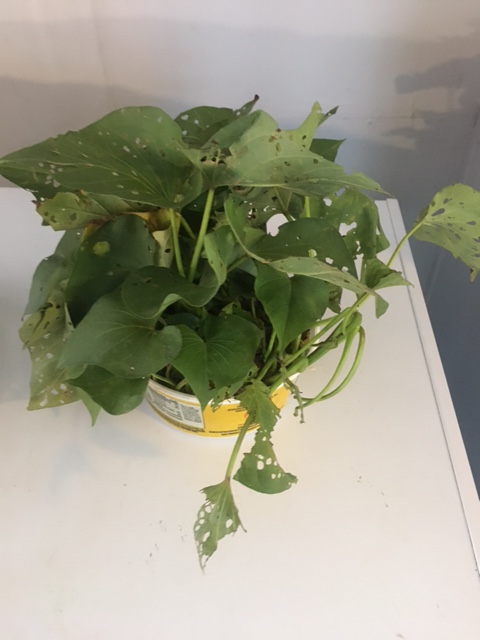
Sweet potato vines and roots from the garden. Will plant vines in tires in the garden in the spring.
Having a highly productive garden doesn’t require a lot of space, but I find gardening very satisfying no matter what the size.
Great If You Don’t Have Much Space
Container gardening might be the answer if you don’t have much space. A few years ago, I lived in a house where the only outside space I had was a concrete patio that faced east. For two years I grew a small container garden on that patio. I grew potatoes, cherry tomatoes, green beans, peppers, lettuce, and strawberries in five-gallon buckets and plastic pots. Of course, I didn’t grow enough to grow everything that my family ate, but it was something.
Use Containers to Get a Jump on the Season
In the later winter and into the early spring of 2020 I started planting seeds indoors that I knew I would plant in my garden at our new place. Even though I had not moved yet I had lots of different seedlings growing from herbs to onions to tomatoes, peppers, eggplants, and even sweet potatoes had been started in dirt ready to be planted outdoors.
That year, I didn’t plant anything to stay in containers but instead grew to plant directly in the ground. The garden was fantastic. I was even able to can some of what we produced there on the property.
Why I Now Grow Both in Ground and In Containers
In 2021, however, I decided to try a little experiment and planted some potatoes in plastic buckets, but most of them I planted in the ground. I knew enough about how to plant each variety. The red potatoes that I planted in the buckets did well, better than the red ones that I put in the ground. When the buckets were ready to harvest, all that I had to do was dump it out on a tarp and collect the potatoes. I then took one of the small potatoes from the pile of potatoes and planted it in fresh dirt to see if I could get another crop from those potatoes. At first, the potato didn’t grow (I guess because the temperatures were too hot, but when the temperatures were optimal, they started growing and I had a crop before frost. I am guessing that the crop might have been bigger if I would have brought them inside when frost threatened.
Planting Sweet Potatoes in Tires
This year, I decided to plant some potatoes in the buckets as well. I intend to plant a bucket every week for ten weeks. (I have done six weeks already). The plan is that this would make it possible for us to have fresh potatoes available to us all summer long. Because I don’t have a lot of buckets this year, I plan to recycle bags that I got potting soil in. I just poked a few holes in the bottom of the bags for drainage and planted like I usually do. In addition, I planted potatoes in tires to contain them so that they are easier to dig as well. I am doing the same with sweet potatoes.
Sweet potatoes are an interesting project for me because I have been saving roots left from one year’s harvest, planting them indoors in containers, and then replanting them outdoors when all danger of frost has passed. I have planted them in two tires one on top of the other and filled with dirt. I plant them in tires so that they stay warm. They are easy to care for. I just make sure they get enough water and they love water. They are easy to harvest. When the plant dies back or frost threatens in the fall, I just kick off the top tire and pick up the sweet potatoes. I gather up a few of the roots and plant them indoors for the next year. They are that easy for me to grow.
Other Containers I am Planting
In addition, I have some sweet peppers planted in containers so that I can get some peppers as early as possible as well. I could do the same with tomatoes, especially our cherry tomatoes, but we already have them in the ground. I am thinking about planting some flowers in pots and putting them around the garden where I want pollinators to come and do their thing. I haven’t done that yet, but I think it’s a good idea.
We are starting to grow our tomatoes and peppers in raised beds this year and plan to do more during the next few years.
Our garden isn’t all that big. We don’t have a quarter acre in vegetable gardens, but we hope that our garden will provide more than enough vegetables for my husband and I this year. We have a 40×40 foot garden that has been in a conventional row system for the past two years, but this year, we plan to put in some smaller raised beds and will eventually replace the conventional garden with raised beds in the same area.
Our conventional garden had a lot of success. However, the garden required a lot of work just to get into shape for the following year. That’s why I am working to advance my entire garden to raised beds.
Why Raised Beds?
If you’re a beginner gardener, raised beds are for you because they remove many of the barriers that you face. Though raised beds require a little more upfront investment, it guarantees better success that first year. Build a box, add some soil, throw in some compost, sow some seeds, sprinkle on some water, and something will grow. This is much better than tilling, fertilizing, tilling again, seeding, weeding, weeding and weeding some more and then bending over or fighting hard rocky soil to get vegetables out of the ground.
A raised bed will up my soil for the easiest possible gardening. The less work, the better. Rather than tilling the soil every year to add fertilizer and amendments, I will be maintaining my raised beds by simply adding materials on top.
It will save me lots of work. Compost, mulches, manures, and other soil conditioners can all go directly onto the top few inches of the soil without the need for backbreaking work. The soil can do its own tilling as worms and roots push their way through. While regular mechanical tilling depletes the soil structure, adding organic material builds up the organic component of your soil over time. Instead of compacting the soil where the plants are growing, I walk on the paths between the beds, and never on the beds themselves.
I am getting older and I can use all the help I can get to continue gardening. A raised bed reduces back and knee strain. A raised bed, especially one that is at least twelve inches tall, can resolve debilitating back and joint pain. Building raised beds is an investment in my health.
Raised beds help keep pests out of the garden too. The tall sides of a raised garden box will slow down the migration of slugs and potentially rabbits into your garden. In addition, some gardeners attach copper flashing to their boxes to keep the slugs out. If you install chicken wire to the bottom of the box, you’ll prevent digging animals, like moles and voles from eating your root crops. Dogs are also less likely to urinate on your box. If deer are a problem, consider placing inexpensive six-foot bamboo fencing around your garden area. Though the fencing is lightweight and easy to move, deer won’t jump the fence because they can’t see through it. Uniformly designed raised beds are easy to add prebuilt plastic hoops to them for bird barriers, cold frames, or row covers.
A raised bed offers better drainage. Early in the gardening season, my garden is prone to flooding. The most popular depth for a raised bed is eleven inches, which is one inch below the sides of a twelve-inch high garden box. For most crops, this is enough drainage and gives plants almost a foot of extra breathing room above wet conditions. Raised beds also tend to drain better in general, even in heavy rains.
My garden will have fewer weeds and crabgrass. This was the biggest reason I am not using conventional rows. My garden became inundated with Bermuda grass, a perennial shallow-rooted grass that doesn’t quit during drought or deluge. This is wonderful grass for my lawn but chokes out everything in my garden if I don’t stay on top of it.
I don’t have to till. Tilling germinates more weeds by burying weed seeds and giving them the perfect opportunity to propagate. It also uncovers weeds that have been buried too deep to germinate. To make gardening even easier, I cover my beds with mulch, and cardboard, after a quick clean-up and dig with a broad fork in the fall to kill any of the plants that might grow during the winter. When it’s time to start planting again, I simply rake off the dead weeds before they have a chance to go to seed. I’m learning that one of the most effective ways to battle crabgrass is with a raised bed. I put cardboard on the bottom of my beds before I fill them to stop the grass from infiltrating.
Raised beds can be planted earlier in the season than conventional rows. Early planting in raised beds is possible because the soil dries out faster in the spring and warms more quickly for planting than soil at ground level. Many gardeners also find a surprising number of plants have overwintered in a raised bed that usually wouldn’t otherwise. This partly relates to the type of soil in the bed. If untilled and fortified with compost, your soil will regulate temperatures better than disturbed, nutrient-poor soil. In addition, raised beds can be retrofitted with a cold frame that helps warm the soil.
Planting in beds save me space because I’m able to plant closer within the bed than I would if I had to weed between each row. The closely planted garden vegetation will require less space than it would if the plants were planted in rows. If a plant gets a disease, I can easily pull it out and replace it with another. I can also plant smaller quicker growing plants between larger slower growing plants and get more than one harvest in that bed.
Other Situations Where Raised Beds Would Benefit
Raised beds look good, especially if the only decent place you find to grow your garden is in your front yard. In the city, a raised bed may be needed to keep neighbors from complaining. I have my garden beds in the front yard because the ground in the backyard slopes to the south and the neighbor’s trees block the sun. Because I planned the bed spacing to specifically accommodate my lawnmower, I’ll be able to mow the pathways between my raised beds and create a distinct separation between the bed and those pathways. This will decrease the need for weeding because I won’t have to weed those pathways. A pass with my lawnmower and my garden path looks manicured. Throw in a few strategically placed flowers in the front garden beds and my garden will become a showplace.
If you’re not in your forever home like I am, raised beds may be the best answer for you. Raised beds don’t have to be permanent. If you don’t own your garden area and you’re not sure if your landlord would allow you to have a garden, talk to them about your plans and show how aesthetically pleasing your raised beds can be. A neat and properly built garden box can enhance property values and be a feature rather than an eyesore. If the landlord still says no, a temporary garden can be built by using a removable garden box. The box is simply set on the ground, cardboard is placed over the grass inside, and the box is filled with soil. When you move, take the box with you, spread out the soil, and throw down grass seeds.
With raised beds, you can avoid soil contaminated with heavy metals. Urban gardeners are at a higher risk of ingesting heavy metals, especially lead. Many different vegetables, especially roots, tomatoes, and greens, can easily absorb unacceptable amounts of heavy metals from contaminated soils. Keep your beds away from the road and research how your land was used in the past. If possible, plant thick between the road and your garden beds. Then bring in new soil for your raised bed that hasn’t been subjected to whatever toxicity may be on site. Toxicity is further reduced by adding compost. As time goes on, you’ll be diluting the concentration of contaminates every year by binding heavy metals to soil particles.