You would think that during this past week I would have been working in the garden, but to tell you the truth, I have been busy doing other things around the farm. One of the things that we did this past week was clean the pantry/garden room in the house. Our trailer has two bedrooms and the second one was dedicated to the pantry and grow lights set up for starting plants for the garden. This spring it proved valuable for the garden. Right now we have a lot of tomatoes and peppers (both hot and sweet) coming on again since our drought ended earlier in the month.
Besides cleaning, we also had to repair the floor because of some water damage that we had last winter when we used the room for growing. I brought home some plans for a cattle panel greenhouse that I hope my husband uses to build hoop houses for us to use this winter and early next spring.
We have been using some canned goods from the pantry that I canned back in 2019 and the plan is to use it up and replace it with jars of the same items we are canning this year. We’ll be making Jeff’s Hamburger Soup soon and we have 3 jars left from 2019 that we’ll be eating soon. It tastes as good as the day I canned it. Here’s the recipe that I put on Hubpages a few years back.
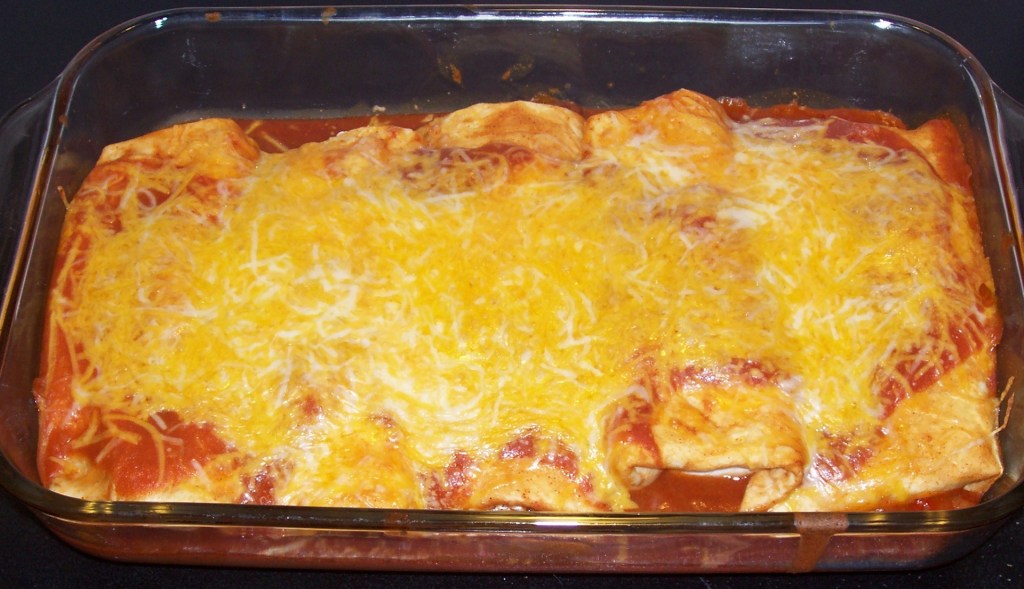
With the weather starting to look more like fall than summer, I have been making more comfort food using canned foods. I mentioned before that I canned enchilada sauce and we decided to try some of it this week to see how well we liked it. I had estimated that we would need half a cup per batch, but I discovered upon using it that we needed a full cup per batch so I needed two half-cup enchilada sauces for each batch. That means that instead of having enough sauce for ten meals, I have only enough for five. That indicates that I need to make much more.
I canned more tomato juice this week so I have as many tomato juices as I have canned tomatoes. I have some more ripe tomatoes on the counter ready to put up. More tomatoes and peppers are in the garden so making more enchilada sauce should not be a problem. That’s the good thing about using some of my canned foods now, especially with new items that I canned this year. I can make more because we like it and we’ll use it.
Other Homestead Projects
In addition, I have started baking bread again. I have sold some at the farmers’ market and we’ve been enjoying it ourselves. I also made my husband some pecan sweet rolls.
I have also started cleaning out various parts of the house and throwing out or giving away items that no longer serve us. Sometimes it’s better just to get rid of things than to keep them “just in case”. We have several places where we can pick up almost any used item that we might need so, why store them?
Now it’s your turn. What are you doing right now to prepare for this winter? I would love to hear what you have to say down in the comments below.
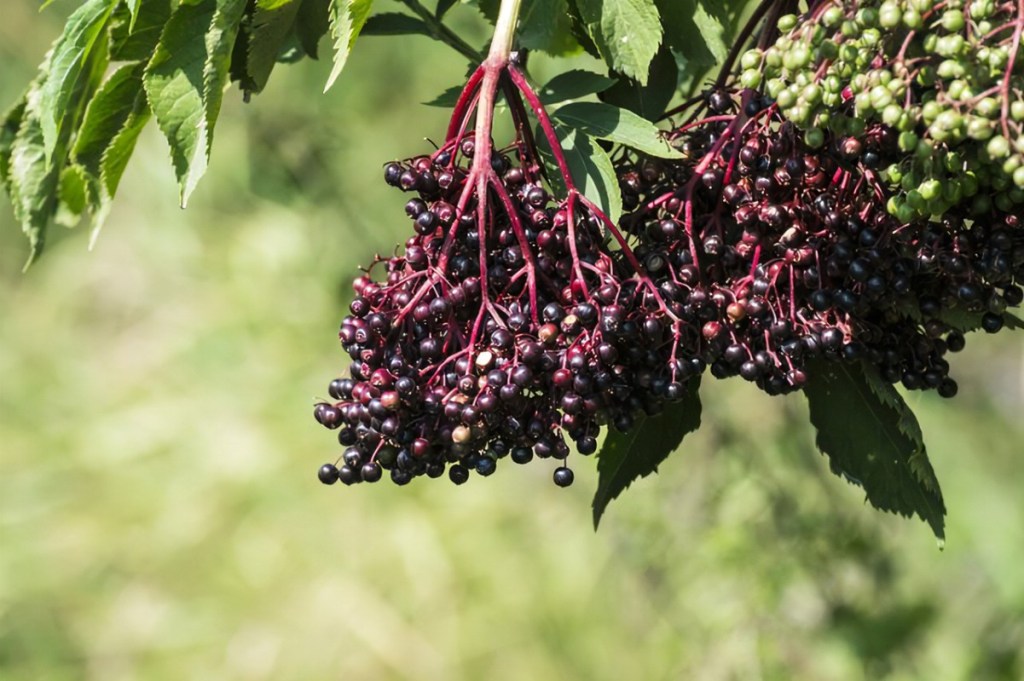
I remember when I was a kid, my mother had an elderberry bush at one corner of the house and every year she would pick the berries and we would have elderberry and blackberry or elderberry and apple upside-down cakes and pies throughout the winter season. She also made elderberry jelly which we ate regularly on toast and on peanut butter and jelly sandwiches.
As an adult now, I don’t have my own elderberry bush, but recently my husband and I have been harvesting some down by the river. Two years ago, we made an elderberry tonic, which not only tasted good but supposedly kept us from getting respiratory illnesses. (Neither of us caught C-19 but that might have also been because we also got our C-19 shots.)
This year my husband wants me to make more tonic, but I really want to make some jelly. He’s planning to go back to the river to get more so perhaps we can do both.
Elderberries are highly nutritious, can be used medically, in personal care, and is also delicious.
Elderberry Nutritional Value
Elderberries are high in vitamin C (52.2 milligrams per cup) and dietary fiber (10.2 grams per cup). One cup of elderberries also has 26.7 grams of carbs, 0.7 grams of fat, and one gram of protein.
Elderberry Uses
Elderberry is an antioxidant, and researchers think the compound that makes it blue lowers inflammation. This same color can be used for food coloring.
If you don’t need elderberries to produce the color you can use them for something else because elderberries have many uses. They can be used medically and made into syrups, tonics, tinctures, gummies, lozenges, pills, and teas.
They can also be used in body lotions, jams, baked goods (with another fruit is best), and wine.
Elderberry Warnings
Always cook your elderberry berries before consuming and never eat any of the rest of the plant or unripe berries because they contain poison. Other parts of the elder tree, including the branches, twigs, leaves, roots, and seeds contain a type of cyanide called glycoside.
Poisoning can cause nausea, vomiting, and diarrhea. Larger amounts can cause more serious poisoning symptoms.
Never consume elderberry if you are pregnant or breastfeeding.
Individuals with an immune deficiency may have reactions to elderberry.
If you get a rash or have trouble breathing after you have some, you might be allergic to it.
Because it’s a diuretic, be careful when you take it if you’re also using medicines that make you pee more.
Always consult your doctor if you’re thinking about taking elderberry.
Planting My Own Elderberries
I want to grow elderberries where I live so that I don’t have to go down to the river to harvest some. One of the things that I just did which might produce elderberry bushes is I threw the elderberries that I am not using for the tonic and jelly into the perennial garden at the edge of the yard and perhaps they will grow. If not, I have other alternatives in mind.
Elderberries are supposed to be easy to grow from cuttings so this fall, we are going to get some of the cuttings from some of our favorite plants down by the river and plant those cuttings along with willow cuttings with the intention of having both root into the soil. Willow cuttings have a natural growth hormone that stimulates growth in other plants including elderberries.
If that doesn’t work, I can still purchase elderberry plants either at a nursery or online and can even purchase elderberry seeds online as well. As you can tell, I want to add elderberries to my own yard.
How about you? Do you grow elderberries? What’s your favorite way of using them? Please share in the comments below.
Baking bread from scratch is one of the most basic skills for anyone who wants to develop self-sufficiency and create a perpetual homestead can learn.
I remember when I was a kid going to Dad’s cousin,s house. She worked out of her home before it was cool and baked bread and rolls for a locally owned store. I always liked to go to her house because it always had the wonderful smells of fresh, baked bread and any time I had a meal at her house, we always had some of that wonderful homemade bread. Sometimes I was there when she was making it and I learned a few of her breadmaking.
As an adult, I have learned that I am able to duplicate her breadmaking process and I am sharing some of what I know now.
Basic White Bread
Into a large preferable glass bowl (glass holds heat better than plastic or metal) put 2 ½ cups lukewarm water and sprinkle in two tablespoons of powdered yeast. Dissolve the yeast in the water.
Once dissolved, add a quarter cup of sugar. Let bowl of mixture set until yeast begins to bubble in the water mixture. Once the bubbling begins to occur, add ¼ cup of vegetable oil, one egg, and 1 ½ teaspoons of salt to the mixture. If the bubbling doesn’t occur, you’ll want to throw out the contents of the bowl and the yeast and get a new batch of it.
Next mix in 8 cups of white all-purpose or unbleached flour. The last of the flour you will probably have to mix in on the counter or a board. Add more or less flour depending on the consistency of the ball of dough.
Once you have the ball of dough at the right consistency and sitting on the counter or board, wash out the bowl and add a couple of tablespoons of vegetable oil to the bowl and place the dough in the bowl. Coat the dough with the oil and cover with a towel. Put the bowl of dough into a warm location to rise.
Once the dough is doubled, punch down and form the dough into two loaves. Place loaves of dough into two greased 9×4 ½ inch bread pans, brush vegetable oil on the top of the loaves and allow to rise until doubled. Preheat oven to 400 degrees Fahrenheit. Without punching down, place loaves into oven. Bake at temperature of fifteen minutes then lower temperature to 350 degrees and bake until bread sounds hollow when tapped on the top. Remove from pan and tap on bottom. If the bread still sounds hollow, the bread is done.
Remove the bread from the pans and brush bread with melted butter to make soft bread crusts. Allow to cool before serving the bread.
Other Types of Bread
You can adapt this bread recipe for other types of bread easily.
For a crispier crust, don’t brush on the butter after baking.
For French bread, make an elongated loaf and sprinkle with seeds or herbs if desired.
For rolls, shape into rolls and place on a cookie sheet.
Whole Wheat Bread
Substitute 4 cups of whole wheat with 4 of the cups of all-purpose or unbleached flour
Rye Bread
Substitute 4 cups of rye flour with 4 cups of the all-purpose or unbleached flour
Potato Bread
Substitute 2 cups of mashed potatoes or dried mashed potatoes for two of the cups of all-purpose or unbleached flour can use in other types of bread as well to reduce over-all all-purpose flour needed.
Sweet rolls or Loaves of Cinnamon Bread
Roll out the dough and spread softened butter onto the dough.
Sprinkle cinnamon over the butter then sprinkle a generous amount of brown sugar over that and then another layer of cinnamon over the brown sugar. Add another generous amount of softened butter on top of that. Roll the dough as tightly as possible. Cut the dough into rolls or just into loaves. Allow the bread to rise and bake.
Tips for Successful Bread Making
Store yeast in the freezer to keep it fresh.
Make sure that the liquid (water) that you use is lukewarm, not hot, and not cold as this can prevent the bread from rising.
In cold temperatures, prewarm the bowl that you’re using for rising the bread.
If your yeast doesn’t bubble after sugar is added, don’t add the rest of the ingredients. If your water was warm enough, discard the water mixture and get different yeast.
Work your dough until it is elastic and not too dry and not too wet to work. If it still sticky and sticking to the working surface, add a little more flour.
If you want a softer crust, brush with butter. If you want a crispier crust, don’t brush with butter.
If you enjoyed this post, be sure to follow this blog: The Perpetual Homestead where you learn skills to become more prepared in an insecure world.
Maybe it is because we have just exited an intense drought and it has been raising, but I have started working on my fall garden and have been thinking about what I can do to extend the crops that survived the 100-plus degree heat.
Last week my post was about the vegetables that I am going to be planting during the next couple of weeks. Here’s a link to that post. My focus on this blog this week, however, is to demonstrate ways that we can extend the harvest past the first frost in the fall.
Extending your garden beyond the normal autumn season is much like extending beyond the normal spring season except that you’re protecting bigger plants.
That’s right, ways do exist to extend vegetables like tomatoes, squash, cucumbers, and peppers beyond the first autumn frost with the use of a season extender.
Many of the early season frosts can be made harmless to a plant simply by using a simple season extender. Often an early season frost would come and then warm weather would come and if the crop is not protected it will freeze and vines and fruits can be damaged. By using one of these season extenders even just one night, frost damage can be put off up to an entire month in which the plants can continue to grow and fruits can continue to mature.
A season extender can be used to trap heat from the sun to keep your plants and soil warmer as the temperatures outside dip down. It also protects your crops from the wind and snow, creating to a micro-climate in your garden.
Recycled Sheets
The first way that I learned to extend the harvest beyond the first frosts of the autumn season was to throw old bed sheets over plants like squash and cucumbers to keep the plants from an overnight frost. This was very effective for this type of plant with early frosts. These do need to be removed every morning, however.
Cold Frame
Another way to extend a harvest is to erect cold frames around plants that are growing. A simple cold frame can be erected by setting square hay bales around a group of plants and then putting old windows in frames over the bales or even covering them with sheets of plastic. Remove the plastic or window frames if the weather becomes warm and sunny or you’ll cook your plants.
Floating Row Covers
Purchased floating row covers do well for protecting long rows of vegetables from frost and these don’t have to be removed every day. These hold in the heat, create ventilation and allow rain to percolate down to the plants. To keep floating row covers from blowing away, be sure to anchor the edges of the row cover with rocks, sandbags, or bricks.
Greenhouse
The ultimate season extender is a greenhouse. Although this doesn’t do much for extending the season of plants that are already in the ground, you can plant a late crop of those same crops in the greenhouse to last you well into the winter months. If you heat the greenhouse, it can last even longer! However, greenhouses are expensive.
High Tunnel
A high tunnel is a greenhouse-like structure that you could put over an existing bed to extend your harvest longer into the winter months and are much less expensive. An easy high tunnel to build is made of cattle panels, supports, and sheets of plastic. They are fairly easy to build, and directions are available in many sources.
Low Tunnel
Another alternative is a low tunnel it is a cross between floating row covers and the high tunnel and can be used in conjunction with a high tunnel for additional season extension.
Cloche
If you only have one or two plants that you want to protect and that plant isn’t too tall like a pepper plant, you can build a simple cloche using a large tomato cage and plastic. Put the large tomato cage around the pepper plant and cover the cage with plastic. Remove plastic if the weather turns sunny and warm.
So what do you use or plan to use to extend your garden into the fall months? Please share in the comments below
Gardening recently has become a popular way for many people to make ends meet and creating a fall garden is a great way to extend your harvest longer into the season.
We’ve been in a drought with temperatures over 100 degrees Fahrenheit for the past two months and rain and the temperatures have fallen so I am feeling that it is time to plan to plant my fall vegetable garden.
What I Have Done So Far
Last week I planted broccoli and cabbage indoors and now I intend to plant them outdoors within the next couple of weeks. If I had any seed for it, I would also have planted Brussel sprouts, but I don’t have any available now. I do have seeds for other vegetables. Here are some vegetables that I will be planting during the next couple of weeks.
Green Beans
One of the first vegetables that I am going to be planting is more bush beans. I already pulled out the bush bean I had grown earlier this season. I would like more fresh beans than the pole beans that I have so another planting of bush beans would be good not only for eating fresh but also to add to what I have canned already.
Greens and herbs
Another group of crops I intend to plant soon is greens. Greens come in many forms. Lettuce, arugula, beet greens, spinach, collards, and kale all can extend the vegetable harvest well into the autumn months. These are easy to plant, but you’ll want to plant them deeper than you would in the spring. Once planted, water every day until the plants become well established. Pick the outer leaves rather than taking the whole plant to help extend the harvest.
Some herbs like parsley, cilantro, and chives love the cooler weather. The cilantro can be allowed to go to seed. The parsley will produce until well into the winter months and the chives are a perennial that will come back season after season.
Root Crops
Root crops are another group of vegetables that grow well in the winter. Carrots, turnips, and beets all do well and will produce edible roots before snow flies. In many cases, you can make several plantings in succession every couple of weeks to guarantee a large harvest that you can keep over the winter months.
Radishes that take a month or less to produce can also be grown in succession and I will probably start growing some myself probably starting in September once temperatures cool down at night. I can also plant these in succession every week and may be able to continue to eat these along with the greens well into December and beyond if the weather stays mild.
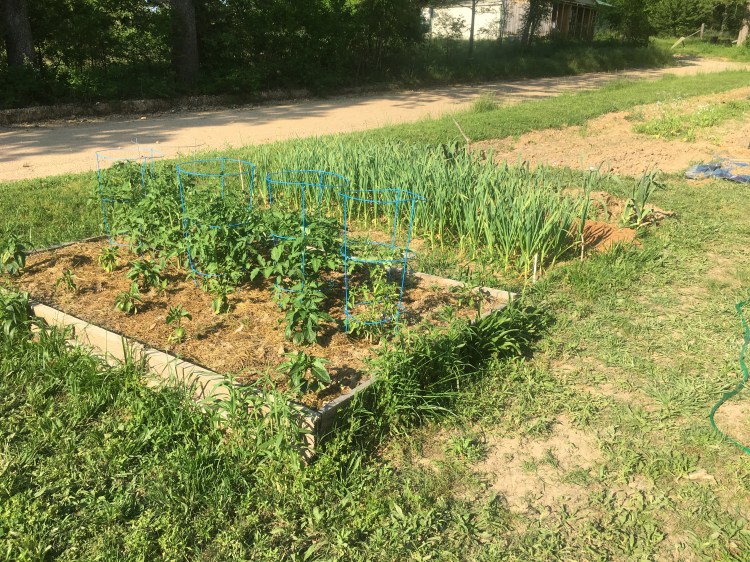
The electrical grid has been pushed to its limits during the month of July. We have also been doing the best we can to beat the heat by avoiding excessive exposure to the extreme weather. We have been careful to ensure that our chickens and cats have had plenty of water and are able to get out of the sun as well. In this month of July so far, there have been thirteen days so far of temperatures above 100 degrees Fahrenheit where we live here in the Ozarks, and tomorrow there may be one more day of temperatures that hot.
Heat Destruction in the Garden
Our garden as well as everyone else’s gardens are struggling as well. We’ve been watering with an over-head sprinkler every other night. But no matter how much we water, that’s not enough for some plants. We pulled our bush beans early to salvage as much as possible. The onions and potatoes have dried up as well. Our summer squash has been a bust because the insects are sucking all the moisture out of the leaves and stems and the plants are dying on the vine.
Some Plants Holding Their Own
The cucumbers, tomatoes, and peppers seem to be holding their own. Though the blossoms of the tomato plants and the pepper plants are not developing into fruit, the fruit that has already been set has been growing well. The fact that the tomato plants are shading the pepper plants has been preventing them from succumbing to the heat. The cucumbers seem to be doing fine even through the heat. I think the trenches filled with sawdust and used as walking paths have been helpful for holding water in the garden as it did at wicking water out of the beds when rain fell in torrents.
For the most part, our winter squash is managing to grow and is producing some. I sold spaghetti squash and butternut squash at the farmers’ market, but deer have discovered that these plants not only provide them with excellent nutrition, but they taste good as well. Saturday, I noticed that deer have eaten the leaves and a couple of my butternut squash. I am allowing my pole beans to go to seed. As long as we can keep these plants alive through this hot weather, we should be able to get more of these vegetables later when the heat decreases.
I am sure the garden could do better if I had the plants covered with shade cloth to protect them from excess heat and insect infestations. A fence around the garden would be great for keeping the deer out of the garden as well, but that will have to wait for another year.
Planted Some Plants Indoors for Fall Garden
This past week I planted cabbages and broccoli indoors so that I can plant them outdoors once the weather has moderated. Planting them indoors offers them the cooler temperatures of our air-conditioned house. Within the next couple of weeks, I will be planting lettuce and spinach indoors as well. In late August I will be planting them outdoors to take advantage of the cooler fall temperatures. At that time I will also be planting root crops outdoors too.
How about you? Will you be growing a fall garden this year? If so, what will be in your garden this autumn?
This past couple of weeks, however, I have been canning. There are certain things that I do want to can for the winter, and this week what I have been canning are tomato products, hot pepper jelly, and green beans.
What Size Jars Do I use?
Although I have used some mayonnaise jars, I mostly use jars made for canning when I can. Yes, it is an investment. Where I live, quart jars are about $12 per dozen. Pints and half pints cost me about $9 right now. The food that goes into the jars are also an investment. Whether it’s purchased food or whether it’s food that I grew or food that I obtained in some other way (see last week’s blog post), it’s all an investment so it makes sense not to waste any of it.
I can in the size jar that I need for each food item that we’re likely to eat in a single meal. I use the size jar that my husband and I are likely to eat. That’s not saying that a family of four or larger should use the size jars that we are using. A family of that size or larger would need to use jars that suit them. However, a family of four could use what my husband and I use as a guide for their own canning in that in most cases they would need jars twice a big as what we are using.
Canning Green Beans
Although we do eat fresh green beans every week during the green bean growing season, and I do leave the beans to go to seed for dried beans and next year’s planting, my husband loves canned green beans, so I am canning as many of these as possible this year. We finished our first planting of bush beans. We picked beans off for a while, but when their started to be insect damage to the beans, we decided to pull up the plants and pull the good beans off the plants.
This year from this first planting of bush beans we have eaten beans fresh and canned pints of green beans. Green beans are one of the easiest vegetables to can.
First, we wash (some people sterilize, but I believe the pressure canner does that when the beans are cooking) the jars, lids, and rings. For green beans we use pint jars for the two of us. A jar of green beans is 16 ounces which is just two ounces more than a 14 ounce can that you purchase at the grocery store. We then snap the ends off the beans and cut them up and put them into the jar. Next, we add a ½ teaspoon of salt to each jar and pour water that has been brought to boiling over the beans up to 1 inch below the rim of the jar and covering the green beans. I double-check the tops of the jars to make sure there are no knicks or abnormalities on the tops and then clean off the tops of the jars with a damp towel to make sure that there’s nothing inhibiting the seal and put on the lids. I add the lids and rings that I tighten finger tight and put them into my pressure canner and process using the instructions that come with the canner. My canner recommends pressure canning pints of green beans at 10 pounds pressure (at my elevation of about 700 feet above sea level) for 20 minutes. I let the pressure go down completely and allow all the remaining air to escape before removing green beans. I then place the jars on a towel to allow them to cool. I leave them in that location for 24 hours before marking name of contents and date on lid and removing rings. I then move the finished jars to their permanent location.
If there is a jar that didn’t seal, I usually put it into the refrigerator and use it in a meal within the next few days. (Almost never have more than one that fails to seal and usually not even one.) I check the jar for defects and throw out the lid.
I learned how to can tomatoes from my mother, and she almost never had a jar fail to seal. To can tomatoes, heat up clean disease-free tomatoes in a large pot of boiling water until the tomato skins begin to split. Now drain and cool the tomatoes in a colander. If you want, add a little ice to the tomatoes to cool them faster. Once the tomatoes are cool enough to handle, remove the skin, stem end, and any excess green area and place into jar. Fill the jar up to 1 inch from the rim and squish tomatoes down into the jar so that there is no air pockets in the jar. Add 1 teaspoon of salt to the top of each jar. Don’t worry about mixing it in, it will mix in during the canning process. The canning process from here on out is the same as with the green beans at 10 pounds pressure except process for 15 minutes (as stated above, canning pressure and time may vary check out your pressure canner for details specific to your situation.)
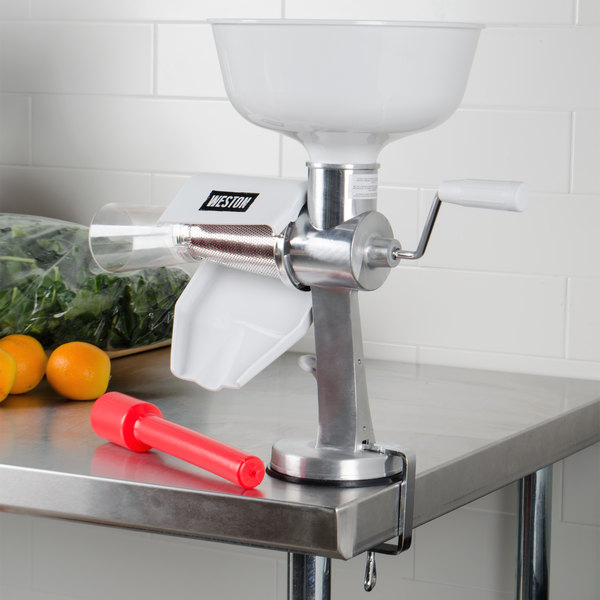
Tomato Juice
Tomato juice is another ingredient I need for Jeff’s hamburger soup, and we also like to use it to drink as well so we are trying to put up as much of this as possible. I make this in quart jars as well. To make tomato juice, I cook clean, disease-free tomatoes in a pot until the tomatoes are cooked through and releasing their juice. Now remove the tomatoes from the water and place them into other containers to cool so that you can handle them. Next, I use the hand-crank tomato strainer pictured above and run the tomatoes through the machine to remove the seeds and skin. I usually run the tomatoes through the strainer several times to ensure that I get all the pulp I can from the tomatoes. I then put the juice I have made into the jars, add a teaspoon of salt and can like I did the tomatoes for 15 minutes in the pressure canner.
Tomato Sauce for Pasta and Pizza
I have started making our own tomato sauce. I can our tomato sauce for pasta in pint jars and tomato sauce for pizza in half-pint jars because as I said earlier, we don’t want any of our canned food to go to waste.
I juice the tomatoes just like I did for the tomato juice and put it into a large pot. If I make a major amount, I use the canner as that pot. I fill the pot with as much tomato juice as I have juice and add finely chopped onions, peppers, garlic, and sometimes zucchini squash to cook. (If you like chunky sauce, don’t chop the vegetables coarsely instead.). I like to fill the pot to the brim when possible and then cook it down to about half the pot. An electric roasting pan also works well for this process. Once the tomato sauce is cooked to about half, for a richer thicker sauce, add tomato paste to the thickness you like. Ladle into jars, apply lids and rings and I pressure can for 30 minutes for both pint jars and half pints.
Salsa
To make salsa, I do much like I do for the pasta and pizza sauce except I dice the tomatoes instead of sauce them. I then add coarsely chopped sweet peppers, onions, and hot peppers.
When handling hot peppers, be sure to wear gloves because the juice from the hot peppers will burn your hands. Remove the stems. If you want a hot salsa, leave the seeds in the salsa. The heat will increase as the salsa sits on the shelf. If you want a medium or mild salsa, remove the seeds.
Put it all into a pot and cook down until the vegetables are completely cooked and add as much tomato paste as you want to thicken the salsa to the desired consistency. Can in a pressure canner for 20 minutes.
How Much Did I Can so far this month?
During the past couple of weeks, I canned 29 jars of green beans, four ½ pint jars of hot pepper jelly, (I used the recipe on the pectin package)14 ½ pint jars of pizza sauce, 15-pint jars of pasta sauce, 13-quart jars of tomatoes, and 6 jars of tomato juice. I haven’t done any salsa yet, but I have the ingredients to do a batch this week.
Do you can and how much have you canned so far? Feel free to comment below.
With a bit of imagination, you can find food in places other than the grocery store or farmers market.
Last week, we discussed how to save food money through gardening. Here’s a link to that blog post. This week I’m sharing some other ways to save on food this year.
Foraging
All over the countryside, there are different ways that you can forage for various wild foods. Many backyard weeds like lambsquarters, dandelion, mustard greens, and wild garlic leaves are tasty, cooked greens among others. Mint can often be found along roadsides and stream beds as well.
A friend of mine used to gather cut grass along the roadside to use as mulch in his garden. However, since a lot of cut grass has been treated with herbicides, he’s stopped doing that. If you’re foraging along the roadside, you also need to know how anything you forage has been treated. You don’t want to be poisoned by your free greens.
Other things that you can forage for are berries. I have foraged wild strawberries along the railroad track (It’s okay if you’re a kid and want a few strawberries to pop in your mouth, but hardly worth the effort.) I also have foraged raspberries, blackberries, and elderberries, which I enjoy, but many people don’t. Just be sure to plan to protect yourself against insects and briars.
Mushrooms also are great forage if you know which kind you are finding. Again, you don’t want to poison yourself. Do more than just get a book about mushrooms or watch a few YouTube videos. Find someone who knows the mushrooms in your area and go out with them before wandering out on your own.
There are numerous foods that you can forage in your area, and it can be fascinating learning what all does grow wild where you live. Be on the lookout for Jerusalem artichoke which is an excellent source of carbohydrates as well as fruit and nut trees and other plants as well. Just remember, not every plant is edible, and not every part of a plant is eatable nor is a plant necessarily edible at all times of the year. Know your foraged foods before consuming them!
Gleaning
When I was a kid, we used to do a lot of gleaning. Gleaning is taking leftovers from a field after the owners came and took out most of the crop. I remember having done this with potatoes and green beans.
One year I also picked up field corn from a farmer’s field to finish feeding two pigs that we were raising. The fact that those pigs were eating the most that they had of their young lives made gleaning field corn a definite win for my purse!
Working for Shares
Another way that I have done several different times over the years is when I have been short on cash is that instead of purchasing fruit and vegetables, I have worked for shares. My most recent time of doing this was this past week. One of the other vendors at the farmers’ market had blueberries and blackberries and I volunteered to work for both berries for fifty-fifty shares. This worked well for me and for my friend because it meant that he would be getting his berries picked without having to hire someone to pick them for him. It was good for me because I was able to obtain tame blueberries and blackberries without having to pay cash for them. It was a win-win for both of us.
Years ago, I did the same with strawberries. I picked several quarts for myself and several quarts for the owner of the strawberry field.
Another form of shares happens when someone who has a garden leaves town and asks you to take care of the garden and to take anything that gets ripe during the time that they are gone.
Working for shares is also possible when dealing with animals like chickens or milk cows. Picking up the eggs or milking the cow and keeping the milk (assuming that you know how to milk a cow) will give the owners a break and give you a much needed protein source.
Several years ago, I had another friend who had several apple trees and a pear tree and I volunteered to pick her apples and pears in exchange for my own pears and apples. If you pass by someplace that has a fruit tree that is loaded down with fruit, you might consider stopping and asking if you can have some of it if you picked it for them. A question not asked is always “no”.
Pick Your Own
A variation of picking on shares is “pick your own”. “Pick your own” establishments used to be more common than they are now because of legal liability and insurance costs, but I remember doing this when I was growing up in Northwestern Pennsylvania with strawberries. We would come and pick as many as we wanted and then we would pay for the fruit at a reduced price because we picked them ourselves. It was a great way to spend a morning and then always ended with a homemade strawberry shortcake with fresh strawberries.
Another crop that we sometimes got from a “pick your own” was corn. We often picked bushels of sweet corn and canned what we picked.
Hunting
One activity that is common where I live is hunting. I personally don’t hunt, but my eldest son does and I am often a recipient of his hunting abilities. Most of the time around here deer is the prize, but I have known people who have eaten possum and groundhog (woodchuck). Some people have even gone after wild pigs. Wild meat can be tough and strong tasting so cooking it in a crockpot with a lot of onions can be the ticket to tastier meat.
Fishing and Seafood
Most of us know that you can take a pole out to a body of water and catch dinner but there are numerous ways of fishing. For instance, there are different types of nets that you can use to catch them. In addition, you can place a string of hooks and line and place them across a stream to catch fish even when you aren’t there. It might not be legal where you want to put your string so make sure you know the laws before putting out your strings.
Years ago, when I was living on the Tidewater in Virginia a friend took me to a brackish area where we went crabbing. They were like mini-lobster, and with butter, they are delicious. At different times of the year, you can get seafood from nature you just have to know what it is and how to get it.
Food Barters
Barters can be made for anything, not just food, but if food is what you need, there are a lot of ways to do that kind of trade.
If you have a garden with a few extra vegetables or chickens that are providing you with too many eggs, you have a source from which to barter. Last year I made a great barter. I had a few extra hens than I needed, and I traded a few for several nice round beef steaks and some lean hamburger. I have traded eggs for meat as well.
Have an apple tree with an abundance of fruit? See if your neighbor with a pear tree would be willing to trade with you. Have okra but need more tomatoes for canning? See if you can make a trade. There’s no end to what you can do for food barters.
There you have it, my list of locations to get food that is not the store. How about you? Do you do any of these to stretch your food dollars? If so, please share in the comment section below. I would love to hear from you!
Looking for Alternatives to canning freezing or dehydrating your garden vegetables? Check out the Survival Garden. Read a Free sample on Amazon!
I hope you’re having a wonderful independence Day!
Happy Independence Day! There’s nothing that says independence more than knowing I can grow my own food!
According to several sources around the world, the current food shortages around the world are going to be worse next year. That’s why I feel that we need to become as food independent as possible. I am not taking any chances! As a perpetual homesteader, I am working on ways to produce as much of my own food and energy as possible so that my husband and I can live more comfortably on our fixed income. This month, we are living as much as possible on what we grow ourselves and this month I am highlighting some of the ways that we stretch our grocery dollars.
Garden Produce
In my book The Survival Garden, I described how I can grow twelve vegetables that I don’t can, freeze, or dehydrate. Also in my book, The Four Seasons Vegetable Garden, I suggest eating food grown while it is in season.
I practice what I preach. Vegetables fresh from the garden are the least expensive way to utilize produce from the garden. Earlier in the season, we had salad fixings like lettuce, onion, other greens, spring onions, and radishes. We ate scapes and radish pods when they were tender and sweet.
Currently, our green beans, tomatoes, and hot and sweet peppers are starting to produce, and soon we’ll have cucumbers and zucchini ready for harvest.
We’ve also started digging up some of the early potatoes to incorporate into daily meals.
For longer-term storage, we dug up our garlic and laid it out to finish drying. We’ll use the smallest and least perfect bulbs to incorporate into tomato sauces and to make into minced garlic to store in the refrigerator.
Canning
Eating fresh first always makes more sense than trying to can everything this summer, but there come times when canning, freezing, and dehydrating make sense. For instance, this past week we had more green beans, peppers, and tomatoes than we could eat before they went bad, so I canned what I had. So far, I have canned 16 pints of green beans. I will probably be canning the first of my tomatoes this weekend!
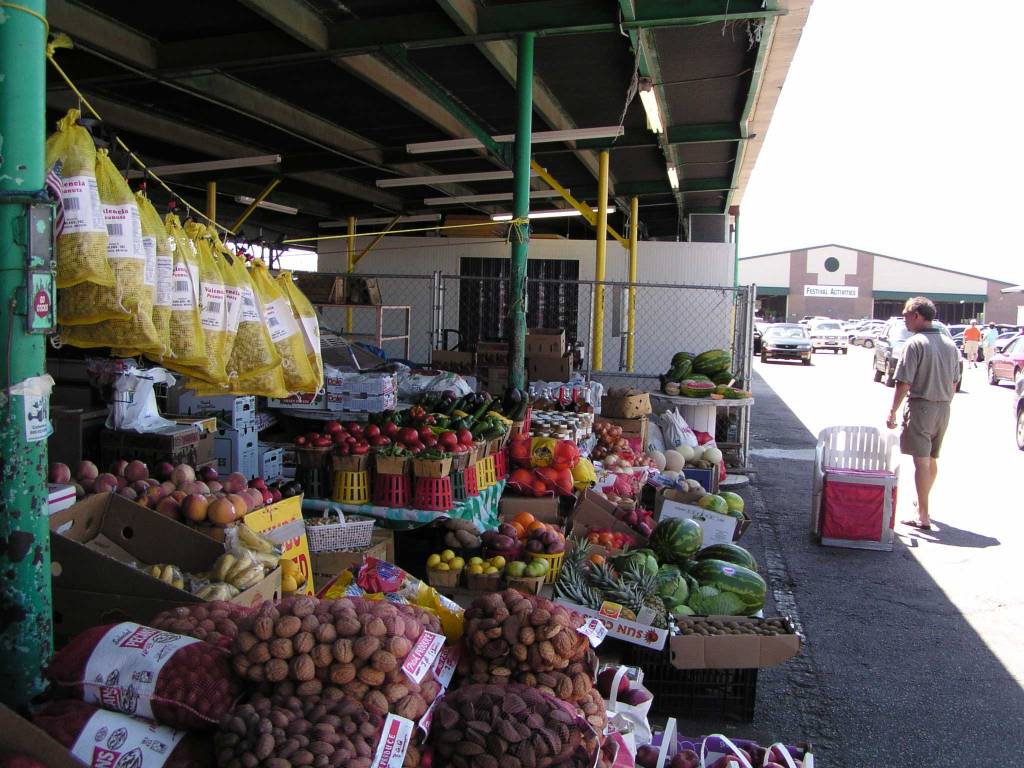
Farmer’s Market
I am a vendor at our local farmer’s market every weekend during the summer. When possible, I sell produce there. Another thing that I do is I purchase from other vendors things that I either don’t have enough of or don’t grow myself. What I sell, pays for what I buy from others. Often, they buy from me as well. Currently, I am selling garlic that we just harvested as well as some green beans, tomatoes, potatoes, and hot and sweet peppers. Right now, blueberries and blackberries are in season, so we are picking those up. Last year I purchased blueberries, sweet potatoes, honey, and squash. This year, I hope to harvest enough sweet potatoes, and regular potatoes from my own harvests, so I don’t have to purchase any.
How about you? Do you have a garden growing this fourth of July? If so, how’s it going? Are you eating fresh from your harvests? Canning? Freezing? I would love to hear from you! Feel free to share in the comments.
What most people don’t know is that most poor soils don’t lack specific mineral content. Here’s a case in point. Here on the Ozark Plateau, we are sitting on a bedrock of limestone. Our water is high in calcium deposits and yet, if you ask most people around here what plants need, they will tell you that most soil here is acidic and needs lime. They can even show documentation that indicates that their soil is lacking soluble minerals indicating acidic soil. How is that possible. It is because the plants cannot get what they needs from the minerals that are available in the soil.
I use dried kelp in my garden because it is chock full of every mineral known in the sea, and it is in a much more ready form for the micro-organisms in the soil to use. It’s not the final answer to
I’m giving kelp to my Chickens
I have given kelp to my animals for many years. When I had goats, I gave kelp to them. I currently don’t have goats, but I do give kelp to my chickens. I don’t do it all the time because right now they have access to all the greens and bugs they want. In the winter, I will supplement their food with kelp to ensure they get the nutrition that they need.
I Eat Kelp Myself
If you want a multi-nutrient supplement that is reasonably priced, kelp is one of the best answers to supplying micronutrients on a budget. I have put kelp into gel capsules and taken them like vitamin pills. Kelp
Kelp is a brown alga. There are probably around 30 varieties included under the general classification of kelp. It is a large seaweed that grows in shallow, underwater forests. Kelp needs nutrient-rich water between 43- and 57-degrees Fahrenheit. It grows rapidly and some varieties can grow over a foot and a half in 24 hours and reach heights of up to 260 feet in time.
Kelp is high in a natural form of iodine. It is also a lipase inhibitor in that it helps the body expel fat via excrement, rather than absorb large amounts. It may prevent diabetes and treat some blood disorders by preventing blood clotting. It may slow down some cancers and works as an anti-inflammatory.