A few days ago, someone asked me why I thought everyone was so angry and unhinged all the time and I said that I thought it was because they weren’t spending enough time getting their hands dirty.
There’s science behind the idea of the emotional benefits of gardening. Scientists have long wondered whether humans boast this kind of magnetoreception like animals do. By exposing people to an Earth-strength magnetic field pointed in different directions in the lab, researchers from the United States and Japan have discovered distinct brain wave patterns that occur in response to rotating the field in a certain way.
These findings, reported in a study published online March 18 in eNeuro, offer evidence that people do subconsciously respond to Earth’s magnetic field — although it’s not yet clear exactly why or how our brains use this information. Digging in the garden, we ground ourselves into that magnetic field.
Gardening offers numerous psychological benefits that can improve mental and emotional health1234. These benefits include anxiety and stress reduction, attention deficit recovery, decreased depression, enhanced memory retention, and improved attention.
Gardening also promotes self-esteem and promotes creativity.
Therefore, if you want to improve your mood so that you’re not so irritable if at all possible, dig up some ground and plant seeds or transplants there. Not only will you have something that you can eat or benefits your view, but you also have something that might work better than a trip to the psychologist’s couch to improve your emotional and mental health.
Need More Gardening Information?
If you’re putting in a vegetable garden this year, I have written several books to help you get started. All are available on Amazon.
Simply Vegetable Gardening
The Survival Garden
The Four Seasons Vegetable Garden
Help From Kelp
Using Diatomaceous Earth Around the House and Yard
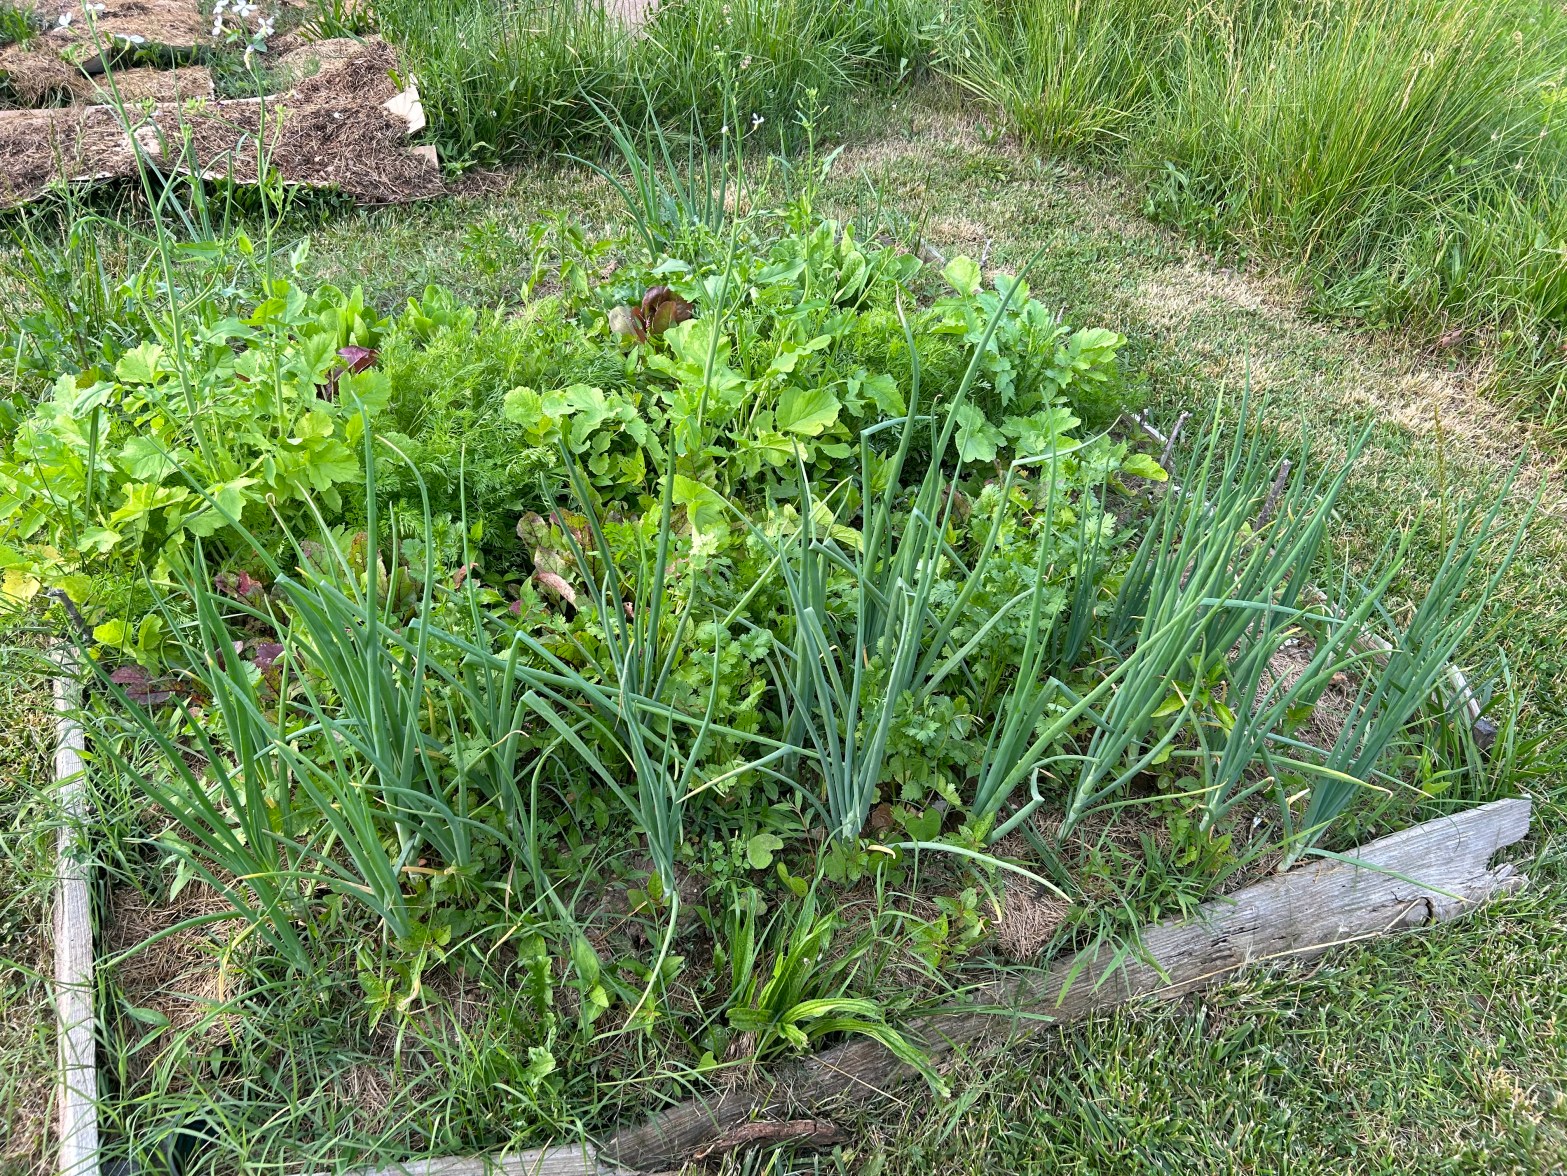
During the past couple of weeks, we have been planting potatoes, onions, lettuce, and brassicas in the garden.
One of the ways that we grow potatoes is in fabric bags. We used the same bags that we used last year and put different soil in the bags. Another way that we planted potatoes was directly in the ground. Right now we don’t have a lot of mulching material with which is why we put the potatoes directly in the ground.
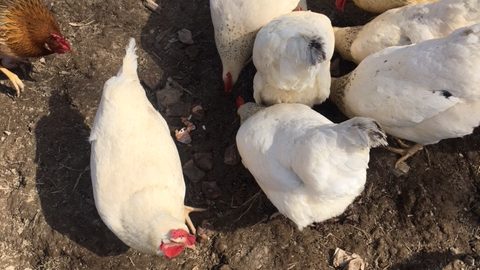
I planted the greens in the garden bed with the garlic that I planted last fall. I don’t have as much garlic this year as I had hoped because chickens loved digging in the dirt around the garlic and now much of it isn’t growing. The chickens in the garden was one of the prime reasons that we erected a fence around the garden.
We planted some of the potatoes in the ground outside of the fence and the chickens have decided now that they would dig in that bed instead. Because of that, we now close up the chickens most of the day and just let them out of their pen in the evening while I clean out their pen, gather eggs, and give them clean water and food. When the potato plants are well established, I’ll let them roam the property again, but until then, they will stay in the chicken house most of the day.
We’ve been putting other plants out on a table on the south side of the house to give them more sunlight during the daytime and then we take them in at night because the outdoor temperatures are too low for plants like tomatoes, peppers, eggplants, and some herbs.
A Spiritual Aspect to Gardening
When I work in the garden, I connect my gardening activities with my spiritual thoughts. This is especially true during religious holidays like the one we’re celebrating this week.
This week is called the Holy Week or Passion Week following the pattern of the Roman Catholic Church. This year the Orthodox Catholic Easter occurs on May fifth. The Christian Holiday is based on Passover even though Passover isn’t until the end of April.
With this in mind, here’s how I relate gardening to a spiritual experience.
Just as the beginning of spring is for these religious organizations. For the Jewish people, the same time of year commemorates their escape from the bondage under the Pharaoh who had enslaved them. For Christians, spring is the time when Christ who was crucified at Passover rose again three days later. This time of year is when winter lets go of its hold on the world around us and allows nature to burst into new life.
I can see God’s gift of eternity through the change in the seasons. He’s telling us that even though something seems dead, life continues. Jesus had said that “unless a grain of wheat to the ground and dies”, the plant could not grow. He was speaking of his own death.
Like the cotyledons (the leaves before the first set of true leaves) that rid the plant of the seed hull, the Passover started Israel’s journey from slave to free people. Lambs died so that their blood could be spread over the lintels of the doors so that the firstborn children could live. Because of this, the Pharaoh had to let the people of Israel go.
If you have enjoyed my gardening rambles, please like and comment below. If you don’t like my ramblings, let me know that too!
Also, if you enjoy gardening as much as I enjoy it, check out my gardening books below.
Simply Vegetable Gardening
The Survival Garden
The Four Seasons Vegetable Garden
Help From Kelp
Using Diatomaceous Earth Around the House and Yard
I know this blog post is different than most of my posts here on The Perpetual Homesteader, but I wanted to get a few things off my chest that I hope will benefit you.
As a gardener and having been a Christian most of my life, I have found certain people unnerving. There are a couple of things that I noticed about people since I have been writing and selling my books and produce at the farmers’ market.
What Some People Say
The first thing was that there are times that people look at the fact that I am selling books and say that there is only one book that they read and that is the Bible. At first, I felt they were trying to make me feel guilty, but then I realized that their attitude has more to do with them than it does with me. I probably have read the Bible more times than they have, and perhaps the only Bible they read is what the pastor reads out in church. It could also be that they are afraid to read anything that might make them question their faith. Perhaps they just have difficulty reading and don’t want to admit it.
In addition, I am on several prepping groups on Facebook and occasionally, there is someone who presents the idea that they don’t have to prep for bad times because they “are trusting God to take care of them” or that they will be “raptured out” so why would they need to prep for the apocalypse.
What Does the Bible Say?
I won’t say anything against the idea of being “raptured out”, because I could write a convincing article myself about the possibility of Christians not having to face the wrath of God, however, is that a good reason for not prepping for a major disaster in the future?
I don’t think so. First of all, if the past is any reflection of the future, there are thousands of examples in history where if a person wasn’t prepared for a famine or whatever, they died. No matter their religious affiliation, if they didn’t have food, God didn’t save them. They died of starvation.
If we’re Christian or Jewish, we should all know the story of Joseph, the son of Israel (Jacob) whose brothers sold him into slavery. Genesis chapters 37-50 and who ended up saving their lives when there was a famine in the known world for 7 years.
If you notice, there’s a part of the story here that few people notice. After the Israelites were rescued by Pharaoh from certain death, they became slaves to the system that Pharaoh had set up.
At first, it wasn’t too bad, but over time, the system became unbearable.
We too may be finding that we are in a system of debt that is enslaving us and that we need to free ourselves from. By returning to our calling of tending the garden, we are better able to be freed from this system.
God’s Past Interventions
I can hear right now where someone is going to point out the fact that God sent manna from Heaven to the Israelites for forty years while they wandered in the desert. They might even point out how Hanukkah began because the Menorah stayed lit for eight days during a particularly bad time in Jewish history as well.
Also, if they know American history, they might point out that the Separatist Pilgrims almost starved during their second winter but were saved when a ship from Jamestown brought a shipload of food to them.
Yes, the Lord provided for them and helped them survive, but there’s more to this PIlgrim story. They realized that they needed to change the way that they produced food. They realized that instead of having a single farm, they each needed to have their own garden areas. After they did that, they learned that they had more than enough to provide for themselves and enough to pay back what they owed for their passage across the ocean.
I can hear you now. Nice history lesson, Donna, but that still doesn’t tell us whether prepping is Biblical or not.
So, let’s look at what the Bible said to others in the Bible.
First, there’s Adam. God told Adam to till the ground even before the fall. By planting a seed and tending the garden, Adam was putting up food for the future.
Here’s another verse from Proverbs
“Go to the ant, O sluggard,” he says. “Consider her ways, and be wise!” (Proverbs 6:6 ESV).
To be a sluggard is to be “a habitually lazy person.” Sluggardly character is like a slothful character, which is also often referenced in Scripture and means a “disinclination to action or labor; spiritual apathy and inactivity.”
Those who do not work hard are not viewed neutrally: “Whoever is slack in his work is a brother to him who destroys” (Proverbs 18:9 ESV). We are warned: “Love not sleep, lest you come to poverty; open your eyes, and you will have plenty of bread.”
The Bible is clear that those who seek to honor God will be committed to meaningful action. “Be doers of the word, and not hearers only,” says James. And Paul agrees, exhorting believers: “Whatever you do, work heartily, as for the Lord and not for men” (Colossians 3:23 ESV) and “If anyone is not willing to work, let him not eat” (2 Thessalonians 3:10 ESV).
It has only been since the 1850s that people have been purchasing more of their food from a grocery store. Before that, most of the food was purchased or traded with those who lived nearby who had something that another person wanted. Here in the US, often the purchasing power came in the form of furs that traders took in exchange for their goods. It has only been since the 1970s that rural Americans began depending more on grocery stores and less on their ability to grow fruits and vegetables themselves.
Whether we purchase what we need or learn the skills to grow our own, the Bible never does tell us not to provide for the future.
Well, you say, yes it does. What about this passage in Luke 12:16-21?
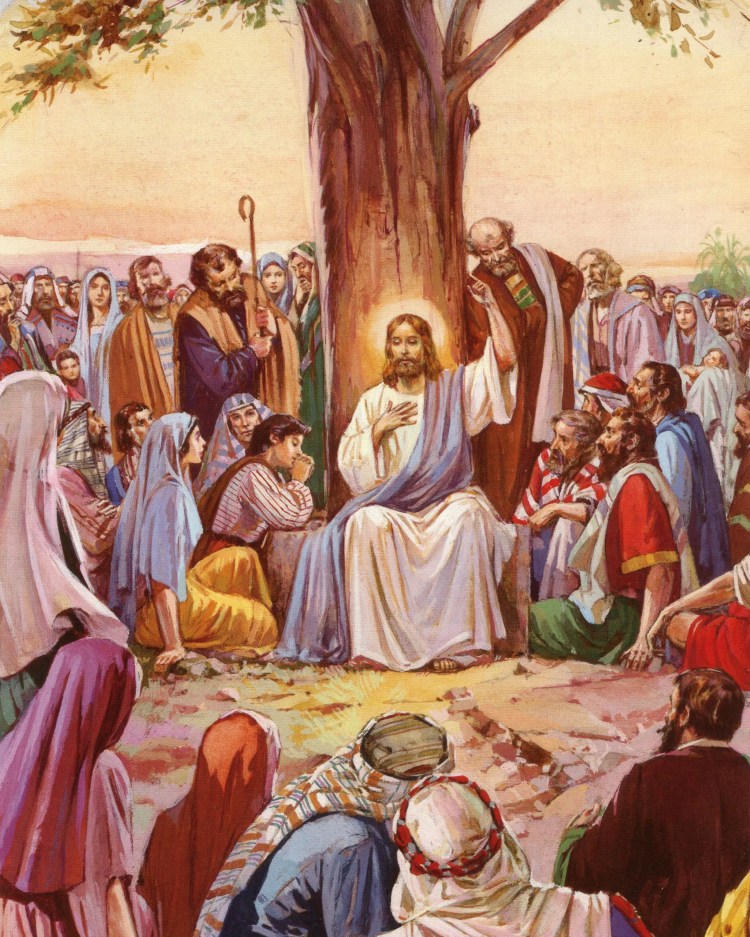
And he (Jesus) told them this parable: “The ground of a certain rich man yielded an abundant harvest. He thought to himself, ‘What shall I do? I have no place to store my crops.’ “Then he said, ‘This is what I’ll do. I will tear down my barns and build bigger ones, and there I will store my surplus grain. And I’ll say to myself, “You have plenty of grain laid up for many years. Take life easy; eat, drink and be merry.”‘ “But God said to him, ‘You fool! This very night your life will be demanded from you. Then who will get what you have prepared for yourself?’ “This is how it will be with whoever stores up things for themselves but is not rich toward God.”
Before the verses stated above, Jesus had been in the middle of teaching when a man shouted, “Teacher! Tell my brother to divide our father’s inheritance with me” (v.13).
The first response from Jesus was to explain that wasn’t His job. “Who made me judge in this case?” He then proceeded to give a warning: “Beware. Guard against every kind of greed. Life isn’t measured by how much you own.”
What is Jesus really saying here? Is saying that you shouldn’t store your extra grain for the future or is he saying something else?
No, what he’s saying is don’t be greedy and be willing to share what you have with those in need.
Be a Giver
Our best bet is to do as Jesus says in Matthew 6:19-21.
19 Lay not up for yourselves treasures upon earth, where moth and rust doth corrupt, and where thieves break through and steal:
20 But lay up for yourselves treasures in heaven, where neither moth nor rust doth corrupt, and where thieves do not break through nor steal:
21 For where your treasure is, there will your heart be also.
We’re not told to avoid saving up for the future, but we are told that when we do save up for the future, we need to do it in a way that helps us and others.
Here are a couple of examples from my own life. My chickens sometimes give me extra eggs. I don’t sell them anymore. I give them away. In addition, I do what I can to teach people what I know. If something bad happens, I’ll share even more, but I will expect others to do what they can as well. It is part of our God-imparted nature to work as long as possible, so I teach others gardening, foraging, animal husbandry, and food storage.
It really all comes down to motive. Are we storing up food and supplies because we are greedy? Are we doing it out of fear? Or are we putting back food and supplies because God told us to do so?
I hope this has helped someone. If so, or if you have any questions, please comment in the comment section below.
If you’re interested in putting in a vegetable garden this year, I have written several books that can help you get started. All are available on Amazon.
Simply Vegetable Gardening
The Survival Garden
The Four Seasons Vegetable Garden
Help From Kelp
Using Diatomaceous Earth Around the House and Yard
During the past several years, we have seen inflation on food go up an average of 25% per year. Eating out has increased even more than that!
Investing in Infrastructure
We have a small piece of land, a house trailer, two vehicles, (one of them is a van), and outbuildings. Our taxes are relatively low compared to the rest of the country. We are building our soil using natural materials so we don’t have to rely on purchased fertilizers.
We have been producing more food ourselves. Since before the beginning of the pandemic, my husband and I have been changing our lifestyle to one where we haven’t felt the effects of the cost of inflation that many others have felt. We raise our vegetable garden, and we raise a few chickens. Although we have seen an increase in the cost of chicken feed, a lot of what we give them comes from food that we otherwise would have thrown out and some food that we raise ourselves. In addition, the price of chicken feed has declined, so we are grateful there. This year we invested money in a woven fence to keep more animals out of the garden. (see They’re Eating My Garden post) We’ve been thinking seriously about getting milk goats, but right now their cost is more than we have right now. Plus, we need to get more fencing to keep them where we want them.
We’re not the only ones. We have friends who raise and sell meat-beef, chicken, and turkeys and have found that the cost of raising those animals has not increased that much. They don’t hire anyone to do the work for them and they raise their cattle on the grass that their farm produces. They also have gardens and sell both meat and vegetables at the local farmer’s market.
We too have been selling at the local farmer’s market. We’ve sold a little produce, but mostly we have been selling baked goods and my books which has helped us meet some of our expenses during the market months.
Eating More at Home
We still eat out a little, but not like we used to do. Instead, we have been producing more healthy meals at home using what we grow in the garden. In addition, we have been cooking more from scratch. We’re using our crockpot and air fryer more as well because they use less energy than the oven does. It’s amazing how much less it costs to eat foods prepared from scratch rather than to eat purchased foods.
This allows us to have more money to invest in our future in other ways.
Purchasing in Bulk
Purchasing in bulk is another way that we invest in our future. We don’t have enough chickens to purchase chicken feed in bulk, but we have been purchasing other foods in bulk and storing them in plastic buckets. (Many of these foods I mention in the blog post Crafting a Stable Bucket Pantry.)
Buying in bulk coupled with cooking from scratch allows us to eat better over time. I don’t just buy those items mentioned in the article either. Sometimes, when I get a good deal at the grocery store, I purchase certain other items in bulk as well. Back in 2019, I purchased meat on sale and canned and stored the jars in my pantry. I also canned broth that I make using the animal’s bones.
For the last several years, we have purchased meat and put it in our freezer as well. When our freezer gave up the ghost, I also canned all the meat we had there. When my son brought in a deer for me to cut up, I canned that as well.
Purchasing canned goods is also a way that we invest in our future. Again, we purchase canned goods on sale, store them in our pantry, and use the oldest cans first. We do the same with different varieties of pasta as well.
There are also nonfood items that we are investing in like personal care items and housecleaning as well as water filters.
Investing in Fuel Sources
Most people think of solar, wind, or petroleum sources when they think of fuel sources, but where I live one of the most renewable sources of energy has been wood. Last fall we purchased an energy-efficient indoor woodstove that has been a game changer for us as far as winter heat has been concerned. This past winter we purchased enough wood at the beginning so that we had enough wood to last us the entire season.
We also have plans to improve our insulation this year and use mini-splits for zone air conditioning this summer.
Where We’re Not Investing
We’re not taking advantage of the traditional investment opportunities that most people will tell you to invest in. We don’t have gold or silver and we don’t have stocks. We have the homestead and my writing business as our investments of time and money.
There are other things that you’ll notice that we’re not investing in. For instance, we’re not investing in MREs or food buckets filled with freeze-dried foods. In our situation, we don’t see a need for them. We own our property and vehicles outright. By growing our food, purchasing in bulk, and utilizing our local energy sources, we’re investing in our future.
You too can do what we’re doing. We’re living frugally so that we can invest in our future and the futures of our adult children. We enjoy our lives. After all, we don’t worry about our futures because we are already preparing for it. I hope we are an inspiration to you to do what you can to invest in your own future!
Speaking of my Writing Business. . .
If you’re interested in putting in a vegetable garden this year, I have written several books that can help you get started. All are available on Amazon.
Simply Vegetable Gardening
The Survival Garden
The Four Seasons Vegetable Garden
Help From Kelp
Using Diatomaceous Earth Around the House and Yard
During the past year, we have had many issues with various insects, wildlife, and livestock (chickens) that have been wreaking havoc on our vegetable garden.
Critters in the Garden
Last year, we kept the chickens in their pen for most of the day and only let them out for a couple of hours per day to eat insects and weed seeds throughout most of the yard. I physically had to keep them out of the garden areas and away from the newly planted and germinated vegetables until the plants were big enough to fend for themselves.
We also had problems with deer in our sweet potato bed. Sweet potatoes seem to be a go-to food for deer. Every morning, I chased a doe out of the sweet potato bed, but sadly, we didn’t have any that survived. Fortunately, one of the local growers at the farmer’s market had sweet potatoes to sell so we got our sweet potato fix after all.
Another big problem we had in our garden last year were raccoons in our corn. I got a few ears to eat, but the raccoons ate the bulk of them.
Finally, we had problems with squash bugs. We tried the usual soap and water treatment, but it didn’t keep the bugs out and we didn’t get any cucumbers, squash, or pumpkins from our garden last year.
First Line of Defense
This year, I talked my husband into helping me put up a fence. Even though we both knew that the fence was necessary, he still tried to talk me into not purchasing the fence. I shook my head, pulled out my credit card, and paid the price for the fence. The fence we bought was a five-foot-tall woven wire fence big enough to fit around all of our current garden beds. This will take care of the wildlife and the chickens, but not the insects.
Nothing for Them to Eat This Year
We have a different plan for the squash bugs this year. We’re not ones to poison our garden just so we can have a few squash and cucumbers so we decided to take a different approach. Those bugs were so bad last year that we decided not to grow any member of the cucumber family this year. I have heard that if you leave your beds fallow with these vegetables for a year, the squash bugs will go somewhere else the next year. That’s our strategy for this year. No cucumbers, squash, or pumpkins. Also, this will give us more room to plant other types of vegetables that we haven’t had enough room to grow during the past few years. Besides, why plant them if you can’t get them to grow?
Want to know more about how we garden? Check out our gardening books!
My Gardening-Related Books
If you’re interested in putting in a vegetable garden this year, I have written several books that can help you get started. All are available on Amazon.
Simply Vegetable Gardening
The Survival Garden
The Four Seasons Vegetable Garden
Help From Kelp
Using Diatomaceous Earth Around the House and Yard
I fill buckets like this one with dry staple foods.
I have a room filled with canned goods that I home-canned. Most of these were foods that I obtained locally, or we grew ourselves. In another location, I have buckets of staple foods, most of which will last me many months. Here is what I store in my stable dry food bucket pantry.
Oatmeal- There’s nothing like a bowl of hot oatmeal in the morning. Oatmeal is versatile. It can be used to make oatmeal cookies. You can also use it for toppings for fruit pies and crisps. It is one of the main ingredients in granola. Here’s a link to my granola recipe. Make Homemade Granola from Scratch
Cornmeal also makes a great breakfast food. It can also be used in making cornbread and hushpuppies. It can also be used when making crunchy toppings for various deep-fried vegetables.
Rice is a staple that is used as the main ingredient in numerous cultural meals. Purchase brown rice if you plan to use it within the next year. If you want to purchase rice for long-term storage, use white rice. Brown rice will likely turn rancid if not used within a year.
Dried Beans and Peas If you find yourself short on other sources of protein, then beans and peas are your go-to when you’re a vegetarian or meat is in short supply. Dried beans are used in various cuisines around the world. Whether it’s pinto, black, red, or cranberry, various colored lentils, or peas, etc., beans are a basis for many meals.
Flour-whole grain flour usually lasts only about six months, before it starts to go rancid. Unbleached flour will last longer, and bleached flour will last even longer than that. For grain that lasts indefinitely, however, whole grain that hasn’t been processed at all will last even longer than the bleached flour does and provides more nutrients as well. Another of my recipes that you will enjoy is How to Make and Store Bread in the Refrigerator
Cooking Oils-lard, tallow, butter, shortening, vegetable oil, olive oil, even bacon grease. These don’t last forever. One to two years tops so these are very important to rotate. Remember “first in, first out”. Buy just enough so that you can use up any that you purchase before the oil goes bad.
Sugar and other sweeteners-white sugar, brown sugar, maple syrup, honey, and the like are used in numerous ways like baking, cooking, candy making, and even in coffee or tea. Most types of sugar will last indefinitely if kept dry.
Salt-sea salt, pink Himalayan salt, and iodized salt are used to flavor food and used in cooking. Canning salt is used in canning, but I often use plain salt in canning instead without any problems. Salt will keep indefinitely if you keep it in a sealed plastic bucket.
Leavenings The obvious leavening that most people first think of is yeast, but many other forms of leavening exist. These include baking soda, cream of tartar, baking powder, and even vinegar. Make pancakes from scratch with this recipe Healthy Whole Wheat Buttermilk Pancakes from Scratch
Spices Whether baking or cooking, many different herbs and spices will spice up your meals and provide a variety of flavors with the other simple ingredients in the pantry.
The Last Word
Of course, some people have allergies and cannot use some of these household staples. If this is you, you’ll need to find a substitute for the items that you cannot eat.
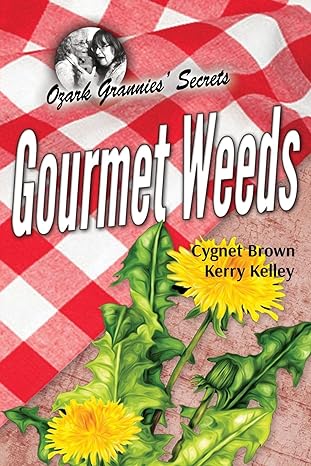
Gourmet Weeds
Of course, you would get tired of eating just staple dry foods day in and day out, so here’s another way to get more variety into your diet. You can use the food you foraged from your backyard! We share some delicious recipes that your whole family will enjoy in our book Gourmet Weeds.
Our chickens are hard at work turning the compost pile
Can you believe that February is over half over? Many people in the Northern Hemisphere are looking out at the winter weather hoping for an early spring. Others, like me, have already started the 2024 gardening season.
What We’ve Done So Far
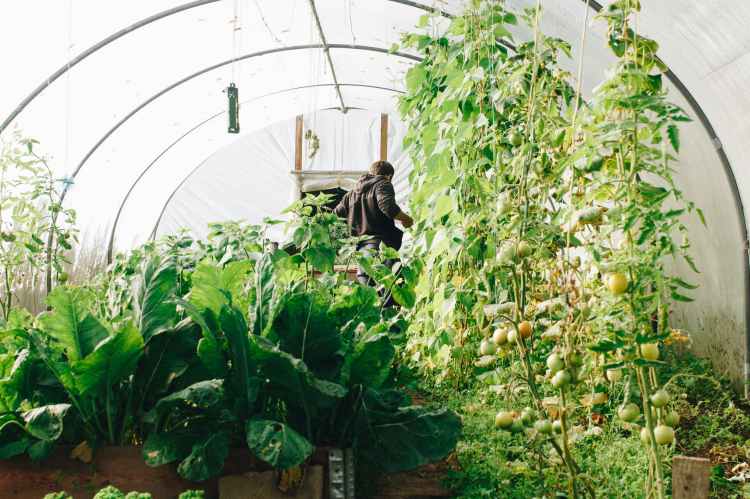
Here at our place, the onions and the herbs that I planted are now up and growing in our grow tent that is set up in our pantry. Since I planted the onions and those herbs, I planted more herbs and brassicas which are also now coming up. This past week, I planted hot and sweet peppers along with eggplants.
In the meantime, we’ve been feeding the wood stove. I am so happy we put in the indoor woodstove and purchased the dump truckload of wood from a local sawmill. Perhaps it has something to do with the fact we’ve had a mild winter, but our heating bill and our electricity bills both are down. We still have so much wood left that we’re wondering where we’ll put what’s left over.
We have a pile of wood ashes and charcoal that we will soon be sifting through so that we can inoculate the charcoal into biochar. Our compost is in process with our chickens doing the turning for us.
Plans for the Near Future
On the first of March, we will be planting tomatoes. This year we’re not planting any type of cherry tomatoes. We plan to just plant tomatoes for slicing and paste tomatoes. The tomatoes for slicing will be Cherokee Purples and Beef Steak. The paste tomatoes will be Amish paste.
We’ll be planting more Amish paste tomatoes because these tomatoes are determinant whereas the slicing tomatoes are indeterminant. The paste tomatoes will be ready all at once so I will have all of them available all at once so that I can prepare the tomatoes for sauce all at once.
You might wonder why we waited so long to plant the tomatoes. I am waiting until March 1 to plant the tomatoes because we don’t want them to be too big before we plant them in the garden. The past couple of years we had to plant the tomatoes too early because the tomatoes outgrew their pots, and we didn’t have space for them in our grow tent. This year by planting them later, we will have smaller plants in smaller containers which will require less room under our indoor lights.
These are all the plants we intend to plant before we start planting the early spring vegetables out in the beds in the garden. Soon too, we’ll be preparing the garden beds for this year. We have the seeds, we have some of the plants and soon the garden will be ready to plant.
Putting in a vegetable garden this year?
I have written several books that can help you get started. All are available on Amazon.
Simply Vegetable Gardening
The Survival Garden
The Four Seasons Vegetable Garden
Help From Kelp
Using Diatomaceous Earth Around the House and Yard
When I saw the above photograph and the quote that came with it, I knew that I had to write about this.
I have followed the prepping ideology for many years and I often see how commercialized the movement has become. podcasts, videos, blogs, and books all seem to try to scare us into believing that SHTF could happen at any moment and that we need to hurry and purchase what they have to sell before it is too late.
People who really can’t afford what is being sold purchase buckets of freeze-dried foods that were prepared at a high price. They are told to purchase nonperishable foods and store them in mylar bags even though these same people don’t have a month’s worth of food in their pantry. They buy all kinds of survival equipment and medical equipment that they don’t know how to use.
A hundred years ago, we were all preppers. We didn’t purchase a bunch of food buckets and we didn’t go to the grocery store. Instead, most people raised their own food. They knew that they could grow most of their food in less than two acres. If they had a farm, the rest of the farm paid for everything else they needed to survive.
A hundred years ago, they didn’t just grow their own food, they produced a lot of other things as well. they cut down trees to build and then heat their homes. They took some of that wood and built furniture to use themselves or to sell or trade for other things. Blacksmiths built the parts to repair the simple cars of their day as well as shoe the horses that the cars would soon replace.
A hundred years ago, neighbors worked together. When they worked together, they made it a party. They had husking and quilting bees. They had house and barn raisings. If a neighbor was sick or someone died, everyone was there to help the family deal with it.
What We’re Doing
Rather than just looking wistfully back at the past, we are taking what we liked about the past and emulating that. Here is a sample of what we are doing.
Gardening-We’re growing a garden where we can grow most of our own calories and nutrients. We’re not just growing vegetables, but we are growing herbs as well for culinary and medicinal purposes.
Growing an Orchard-About three years ago, I planted five fruit trees. Last year I was able to harvest one apple off one tree, but I know that I will soon have many more apples as well as pears and peaches.
Foraging have been foraging a lot of foods that I don’t grow. I either forage from the wild or forage in the form of gleaning (picking what the owner allowed us to pick after they had what they wanted).
Hunting and Fishing-Where we live we have lots of opportunities for getting meat from the wild.
Raising Chickens We raise chickens for eggs. We have plans to get other animals soon, but right now we just have the chickens. We have raised our chickens from eggs in an incubator. We’ve also raised chicks that we bought from the store.
Butchering We’ve butchered chickens. We don’t usually butcher our chickens though. We’d rather get them from the grocery store since it’s still available from that source.
Freezing We have a small freezer and store some food there. This allows us to purchase food less often.
Canning I can a lot of our food. I probably have enough home-canned goods to last us for a year.
Heating with Wood We heat with wood. We used to have an outdoor woodstove but we decided that the outdoor woodstove used too much wood and required electricity to run. We have an indoor woodstove now, and we have not only reduced the amount of wood we’re using (by 66%!) we also reduced our electric bill by 25% as well!
Utilizing Skills I Have Learned I learned numerous skills that can be used if life becomes more difficult to live.
I know how to handle a weapon.
I spent numerous years working in healthcare including being trained as an 8404 Navy Corpsman, an EMT, and an LPN. In addition, I have learned some information about medical herbs and I have delivered one of my own children at home.
I can cook, bake, and sew.
There are probably a lot of other skills that I haven’t mentioned.
Learning New Skills I am always learning new skills. I read to learn about new skills. I also watch videos to learn other new skills. I sometimes go to events where skills are demonstrated.
Books By Cygnet Brown
I’ve written books to help others learn some of those skills that I have learned. Feel free to check them out!
If you’re interested in putting in a vegetable garden this year, I have written several books that can help you get started. All are available on Amazon.
Simply Vegetable Gardening
The Survival Garden
The Four Seasons Vegetable Garden
Help From Kelp
Using Diatomaceous Earth Around the House and Yard
In recent years, many commercial fertilizers have been in short supply and what we can purchase is so expensive. What if I told you that you don’t need to purchase fertilizer to get rich soil that offers so many different types of fertilizers? What if I told you that the fertilizer that your soil needs doesn’t have to cost you a single dime?
A pile of leaves provides a lot of brown material to a compost pile
Building Compost-The Garden’s Backbone
One of the most known forms of fertilizer you can get is from using compost. Building compost is a simple process.
You need a form (or several forms) of brown material. Brown material includes dried leaves, hay, straw, wood chips, paper, or sawdust.
Next, you’ll need a form of green material. Green materials include household kitchen garbage, green matter from the garden, and fresh grass clippings. Don’t add unprocessed meat, bones, or milk products to your compost. Animal manure is another green compost material that will help break down the pile more quickly if they are added.
The first step in building a compost pile is to shred the plant material into smaller pieces. The smaller the pieces, the more quickly they will break down.
The next step is to place a layer of brown material on the ground and a layer of green material on top of that. Make your layers about three inches deep. Keep layering until you have a pile that is the size of a four-foot cube. You can layer inoculants every few layers, but they aren’t necessary, especially if you use manure. You can also layer in finished compost to do the same thing.
Next, you’ll need to add water to get the pile to heat up. You’ll want to add enough water for the pile to be like a rung-out sponge. Not too much and not too little. The rule of thumb is to add the water at the end of the piling process. When the water starts running out of the bottom of the pile, you have watered enough. Once the pile is done, you will want to cover the pile with a tarp to keep the moisture level in the pile and prevent rain from washing the nutrients out of the pile.
Another component of creating compost is air. Remember when I said that shredding the plant material makes it break down faster? Well, it also causes it to become anaerobic faster. Anaerobic compost stinks. Two steps to take to get rid of that stink are to turn the pile and to add brown material to the pile. Some people recommend adding lime to the compost, but it can make the pile too alkaline so I don’t add it. A compost with balanced ingredients will balance its own pH.
A hot compost pile breaks down more quickly than a cold pile. The difference between a hot compost pile and a cold one depends on how much air you add to the pile, proper moisture, and how small your material has been chopped. Regular turning of the pile makes all the difference in how fast your compost pile will finish out. Your compost is finished when it looks and smells more like fresh soil than the original ingredients.
Here’s my vermiculture bin. I topped it off with dried grasses to protect the worms from cold weather.
Vermiculture
Another way that I produce fertilizer for my garden is by producing vermiculture to produce worm castings. Last year I bought some earthworms, put them in some bedding, and fed them with household peelings and coffee grounds throughout the growing season. We take the worm castings and make worm casting tea and use it in the garden where we need it for a plant quick pick me up.
Wood ashes
We heat with wood in the wintertime, so we have a lot of wood ashes. These wood ashes we spread over our garden and yard.
Animal bones and Eggshells.
We burn animal bones in a fire which makes them brittle. We then break them up into powder and spread them around the garden and yard as well.
Eggshells are pulverized and added to the worm bin to help neutralize the soil.
Here’s our cat Ziggie checking out the quality of the compost we started last summer! Do you think it’s ready for the garden yet, Ziggie?
Wood chips and Grass Clippings
Wood chips and Grass Clippings are the primary forms of mulch that we use around the garden and in the orchard. We have found that if we put down a layer of grass clippings and top it with wood chips, the wood chips will not negatively affect the growing plants because of the added nitrogen of the grass clippings that are closer to the soil surface.
Chicken Manure
In late winter, before planting the garden, we spread composted chicken manure onto the garden, orchard, and added some to the compost pile as well. To keep our chicken house from smelling like one, we remove the previous year’s chicken manure layer and add a thick layer of wood chips into the chicken house. This layer of brown material keeps the chicken house from stinking during the heat of the summer.
Green Manure
Keeping a layer of living green plants growing in the garden during the off-season not only keeps the soil from erosion, but it also adds organic matter, nutrients, and microorganisms to the soil. There’s a lot to this process that I plan to explore during the next year.
If you’re interested in putting in a vegetable garden this year, I have written several books that can help you get started. All available on Amazon.
Simply Vegetable Gardening
The Survival Garden
The Four Seasons Vegetable Garden
Help From Kelp
Using Diatomaceous Earth Around the House and Yard
Every year, millions and probably billions of people around the world go out and build a vegetable garden. They dig. They prepare the soil. They plant seeds and work diligently throughout the summer to get a vegetable crop.
In recent years, there has been a movement called permaculture where people take an ideology started by Bill Morrison and they produce a gardening system in which they don’t have to dig and plant regularly. In this system, fruit, nut, and nutritionally support trees, climbing plants, brambles, bushes, tall plants, herbs, and root crops. Among these plants are perennial vegetables that come back year after year.
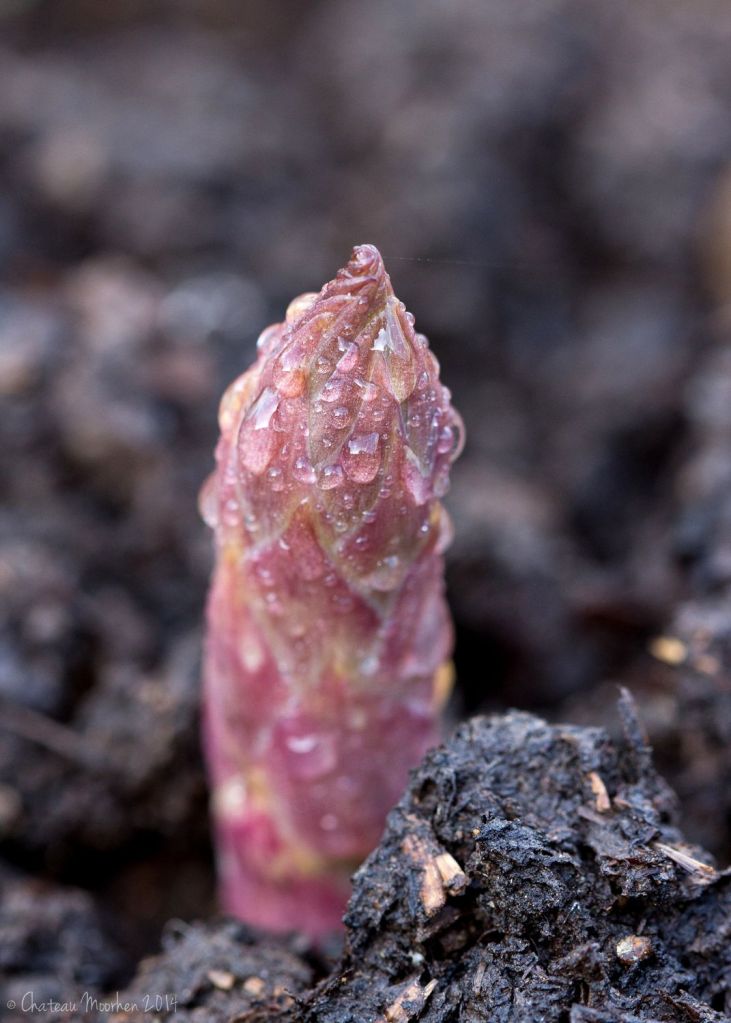
It takes at least three years to produce a decent asparagus plant, but you’ll have perennial growth for about 20 years
Asparagus
Asparagus is probably the best-known perennial vegetable. It is one of the first vegetables ready to harvest in the spring. Since it will be in the same place for years, it’s important to find an area with all the growing conditions they need. Asparagus plants are slow to mature, taking three to five years to fill in, but they are worth the wait. Once they start producing well, you will be harvesting asparagus spears for more than a month every spring before the rest of the garden starts producing
Though I grew the ones I have from seed, most people find it easier to grow asparagus from crowns, which are widely available in the spring. Asparagus plants grow best in full sun. Without enough daily sunlight, you will wind up with thin spears and weak plants that are prone to problems. We had this problem with the asparagus that I am growing. It grew under an old maple tree. Last fall we cut it down so the decreased shade should help my asparagus develop better spears.
Rhubarb
Another common vegetable that can be grown easily is rhubarb. Yes, rhubarb is a vegetable. However, it’s usually prepared and eaten like a fruit, turned into pies, jams, and jellies. This cool-season vegetable is grown for its leaf stalks that can make a wonderful tart treat. It also is a beautiful ornamental plant with its large, textured leaves and chunky stems. Rhubarb plants are hardy and live as long as 20 years or longer.
Rhubarb is also grown partial to full sun so if grown in a permaculture setting, these plants should be grown in an area where they have more than six hours of direct sunlight.
Sunchokes
Sunchokes are harvested at the other end of the growing season. Sunchokes (Jerusalem artichokes) (Helianthus tuberosus) are root vegetables that can be prepared much like potatoes but have a lower starch content.
They produce a sunflower-like flower that adds a bright cheery aspect to the perennial garden. However, if you want a better root harvest, you’ll want to remove the flowers to allow the plant’s energy to focus on producing larger tubers. Best planted in the spring a few weeks before your last frost date, Jerusalem artichokes will grow at a moderate pace and reach maturity in about 20 weeks.
Perennial Greens
Many types of perennial greens exist that can be added to the garden space. Among them are dandelions, burdock, dock, and lambsquarters. Some do best in cool shady areas while others do better in sunny locations.
Peppers
In warmer parts of the world where frost isn’t an issue, peppers are a tropical perennial that will produce fruit as long as they are kept picked.
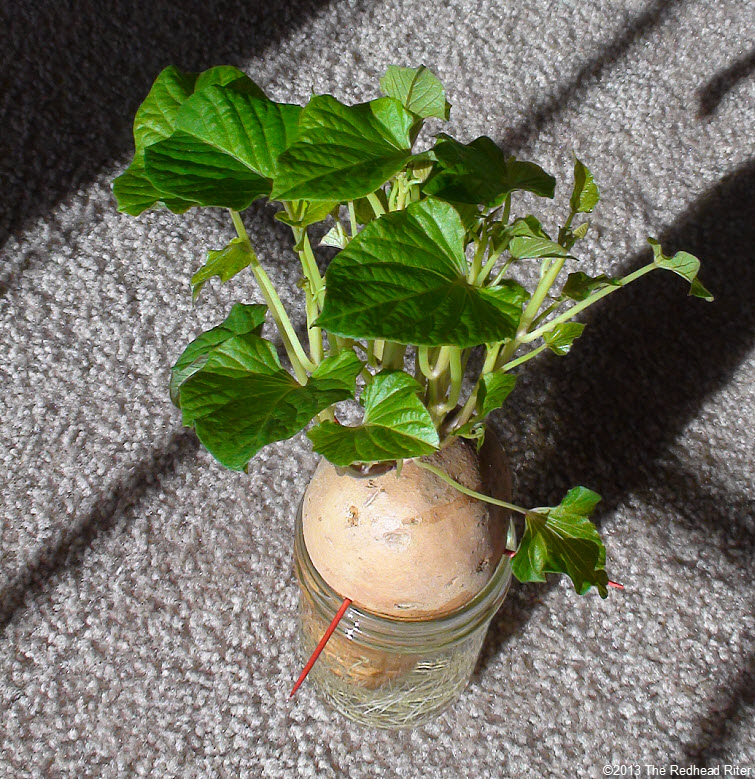
Sweet potatoes
Sweet potatoes are another tropical perennial. These plants are so easy to grow especially when hot summers are the norm in your area. Roots or the tubers from the sweet potatoes can be brought in before the first frost and then planted indoors. I have done this many times with good results.
If you’re interested in putting in a vegetable garden this year, I have written several books that can help you get started. All are available on Amazon.
Simply Vegetable Gardening
The Survival Garden
The Four Seasons Vegetable Garden
Help From Kelp
Using Diatomaceous Earth Around the House and Yard