Ten Things You Can Do this Fall to Begin Preparing a Survival Garden

In my last post, I suggested the first two things that you can do to begin preparing a survival garden.

The first one is to purchase my book, The Survival Garden. Here’s the Amazon Link to the eBook. Here’s the link to a paperback copy.

The second is to purchase a supply of the vegetables suggested for your winter nutrition from your local market so that you can have them throughout the winter to begin your own survival vegetable experience.

In this post, I will show you eight other ways that you can begin your survival garden this fall.  

Allow Livestock to Help Clear and Fertilize the Garden

Chickens in winter
Chickens clear away weeds and overwintering bugs.

The first one is to allow livestock to help clear and fertilize the garden.

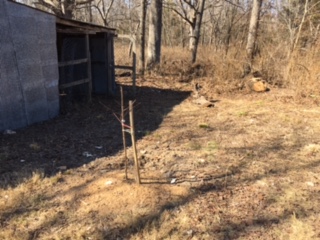
Most of the time we try to keep the animals OUT of the garden, but this time of year, having animals in the garden is helpful.

The idea is that once your crop is harvested from the land, you can send your animals in to clean things up a bit before winter. You can even send in more than one animal type to do even more of your garden work.

Send in cows to clean out what they want, send in sheep to eat what they want, then send in pigs to eat what they want and finally send in chickens to pick out what’s left and to get rid of any bugs that are thinking about over wintering in your garden.  

If all you have is chickens, it’s okay. Just run them through your garden and see how much “damage” a few birds can do!
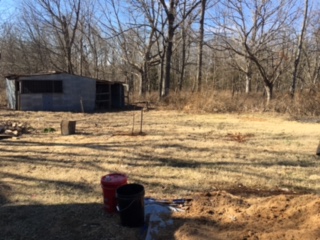
Preparing the Soil

winter time garden
This is a photo from last winter. Much of this garden was cleared and mulched, ready for this season.

Don’t wait until spring to prepare your garden beds for planting. If you have the time before winter sets in, prepare your beds now. Once you have allowed animals to benefit from your garden wastes, it’s a good time to prepare the soil. This way you can tailor each bed to the needs of the plants that you’ll plant in that area in the spring.

Only dig up the areas that you are going to actually be planting in the fall. Any areas that the animals dug up that is on a slight slope, rake evenly and sprinkle cover crop seed in that location to prevent erosion.
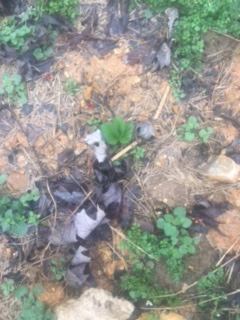
Cover the Soil

Once your ground is exposed, it is a good idea to cover it to prevent erosion and nutrient depletion. There are two fantastic ways to do this. You can either mulch the area or use a cover crop. Both are good choices. Mulches and cover crops are both composed of biological mass, either once-living or still-living, used to optimize soil conditions.

Mulches consist of dead plant material like compost, leaves, spoiled hay, grass clippings and pine needles. During the summer they keep the soil moist and control weeds that could rob water from the crop. During the winter months, it helps protect the soil from harsh weather fluctuations and keep water from running off. Mulches are best used on level beds or terraces. One of the best mulches and most readily available mulches in the fall is autumn leaves.

Plant cover crops in areas of the garden that are on sloped areas and are also a good choice for pathways during the winter months. Cover crops help prevent soil erosion because the roots hold onto the soil to prevent erosion. In addition, the foliage above ground, even when not growing, protects the soil from extremes in weather and breaks up rain droplets before hitting the ground. The roots absorb the rain and hold it in place so it can be used by garden plants later.
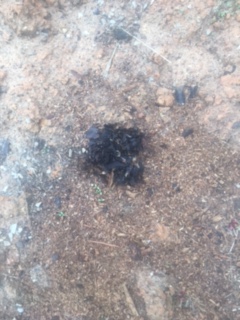
Make Compost

Compost can be made in many different ways. A cold compost consists of layering compostable materials as they come and allowing nature to take its course.

A hot compost is a science experiment that can offer high quality nutrition for garden plants and is produced from yard and house wastes that would otherwise end up in a landfill. You can create hot compost quickly, so you really want to wait until early spring to actually start creating hot compost. However, now is a good time to start piling your brown composting materials in preparation for combining with the green materials in the spring.

Fall can be a fantastic time to start cold composting, however. Starting compost can be as easy as burying a pile of shredded brown and green yard and kitchen wastes in a garden bed and covering it with mulch. By spring, the wastes will be black gold compost that you can use immediately.

Save Garden Seed

If you have garden plants that are going to seed, now is the time to collect it, air dry it and get it ready for next season.

Plant Biennials to Save for Seed

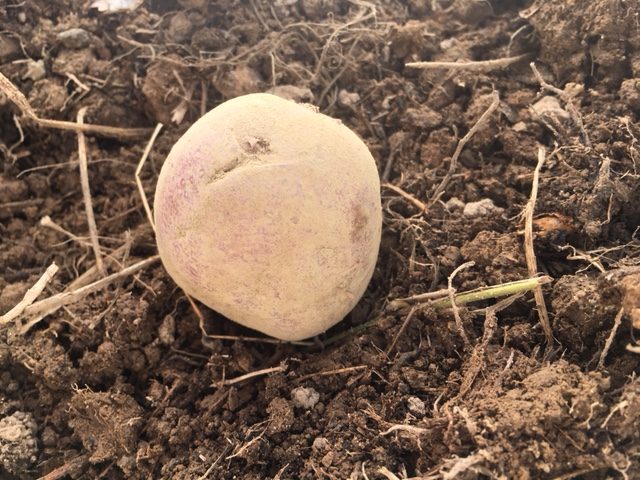
In addition to seed saving, if you’re in an area where this is possible, consider planting biennials that you might be able to get seed from next summer. Begin planning in the early in the fall months and allow them to grow until well after the first frost. Later, you’ll be deeply mulching or digging up these vegetables for the winter. If you dig them up, you’ll be re-planting these same plants in the spring. If you leave them in the ground, you may instead wish to use these vegetables in the early spring before your garden begins producing in the new season. Use them before they begin growing again in the spring.
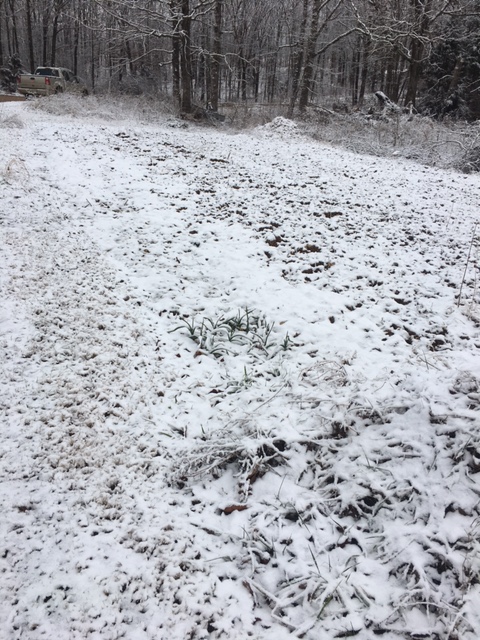
Plant Garlic

Fall is the best time for planting garlic.

Once you have some ground prepared for your spring garden, take some of that to plant garlic. Garlic produces better, more reliable bulbs if planted in the autumn months rather than in the spring. Plant garlic when you plant daffodil and other early spring bulbs.

Plant Sweet Potatoes Indoors

This is how most people grow sweet potatoes. I, however, bring in the roots and plant them in a grow box.

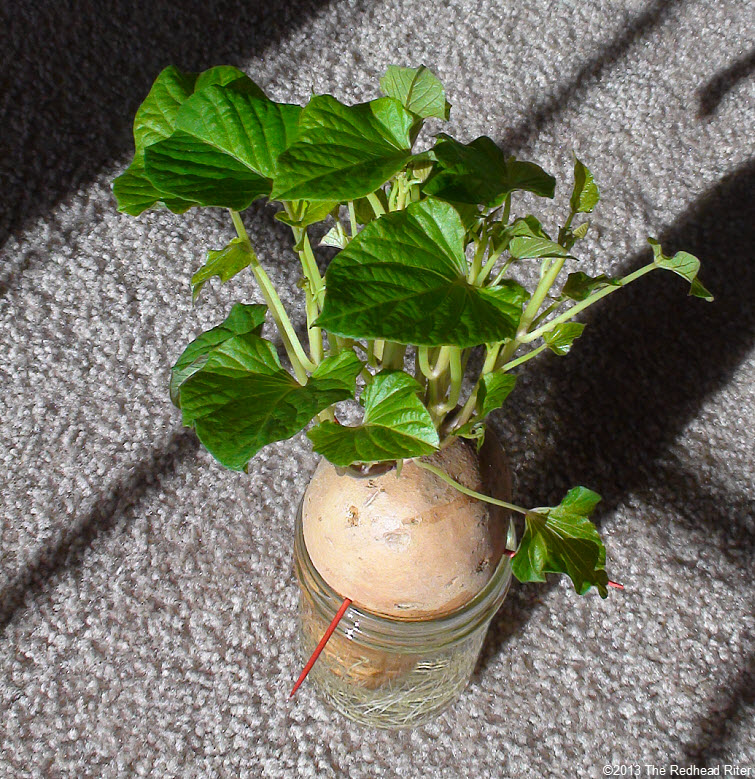
Rather than waiting until spring to create slips from sweet potatoes from a sweet potato root, I started collecting sweet potato roots with the stems and leaves attached in the fall and planting them in containers in the house to last all winter.

Sweet potatoes are perennials so, the roots have the same genetics as the sweet potato. This enables me to eat the big sweet potatoes rather than keeping some back for producing slips.

Because I am growing the roots all winter, the plants produce more slips in the spring and uses parts of the sweet potato plant that I don’t usually use. I also get the added benefit of access to the sweet potato leaves that I can use during the winter months. These leaves are delicious and can be eaten raw or steamed and provide even more nutritional value than the sweet potato tubers.

With the days shortening and the nights lengthening, you often don’t have enough time in the day to get everything done, but if you’re able to do these ten things this fall, you’ll have a head start toward producing your own survival garden.

The Survival Garden is now in print!

A few weeks ago, I made The Survival Garden available as an eBook on Amazon. Now, it is available as a paperback as well! Get your copy today!

Why I Wrote This Book

As I mentioned in my previous post about the fact that The Survival Garden was available as an eBook, (see that post here), I told how this book idea came about because my brother told me how people in Pennsylvania couldn’t find canning lids or jars last year.

What I didn’t mention was that gardening as a whole had been part of my preparedness goals for a number of years and that my big goal is to write a series of books called The Perpetual Homesteader which is what this blog is all about. I started with this book because I feel that it is imperative that as many of us as possible start producing our own supply of food by growing food that will help supply healthy calories throughout the winter without needing freezer space, canning equipment, or even a dehydrator (although I do use a freezer, a canner and a dehydrator as well!)

Should You Wait Until Spring?

Definitely don’t wait until spring to start thinking about growing these foods! You can start right now by purchasing The Survival Garden and read it!

Next, start purchasing those vegetables in the book from your nearest supplier whether its a grocery store or a local farmer! This time of year they are readily available and you can often purchase them in larger quantities.

Finally, start implementing those vegetables into your daily diet.

Is there more you can do now? You bet there is, but those are subjects for future blogs.

Over the next several weeks I’ll share what you can and should be doing now so be sure that you’re following this blog to keep updated on what you can do to maximize the produce of your own survival garden!

The Survival Garden

Last year, I called my brother in Pennsylvania and he told me that a lot of people in his state started growing gardens because they were afraid of what could happen during the pandemic. Their plans were to garden and freeze or can what they produced. The problem was that though they were able to find seeds in the stores, canning jars, lids, and freezers were in short supply. Their garden produce grew well, but because they had no way to preserve their food, what they couldn’t eat rotted and was wasted. Numerous people tried to capitalize on their bounty by selling it, but that too became a problem because everyone else was doing the same. The countryside was littered with little roadside stands that had produce that no one wanted.

That was what gave me the idea for The Survival Garden: Plant a Garden for Food to Last all Winter that You Won’t Need to Can, Freeze. or Dehydrate. This short little book shows you how you can grow and preserve a huge percentage of the calories that you and your family will need to survive the next winter or any winter of the future even though food is in short supply in the grocery stores for whatever reason. These are foods that you don’t need any canning equipment. You won’t need to hunt all over town or get gouged with internet prices on canning lids. You don’t have to worry about purchasing a freezer or concerning yourself with the fear that the electricity could go out and ruin your produce. All twelve of the vegetables in this book can be raised in your garden and stored without any of these worries.

In this book, you’ll learn everything you need to know about growing, harvesting, and preparing these vegetables to last well into the winter months and potentially until the next harvest!

Currently The Survival Garden: Plant a Garden for Food to Last all Winter that You Won’t Need to Can, Freeze. or Dehydrate is available on Kindle. (Paperback will be available soon) Get your copy now to see how you can actually get your survival garden started today!

When the Weather Doesn’t Cooperate with My Gardening Plans

rhubarb crown
The black blob in the middle of the photo is of a rhubarb crown. It didn’t green up few days it will green up or begin to grow.

Tuesday morning started out beautifully. There wasn’t a cloud in the sky and the temperatures were already in the fifties here on Act III Farm. I knew that we were going to get a frost that night, but I didn’t expect to see snow on the ground when I got home from work that night.

No one that I know thinks that the weather that we have been having this winter is par for the course. If anything, it is way over-par. If I were a golfer of weather, I would lay down my clubs and say that this just wasn’t worth it.

The Damage from the Deep Freeze in February.

In February I got perennial plants just before we had the deep freeze that froze our pipes for the next week and a half and made it so we did not have running water in our house for a week beyond that! I planted the plants as soon as was humanly possible, but many of the plants did not survive. All of the Ozark Beauty Strawberries gave up the ghost as did the rhubarb. If I want to get more this year, I will have to replant both.

The potatoes that I planted last fall did not come up either. I am guessing that they didn’t grow for the same reason that I lost the perennial plants.

On the plus side, I had chicks that hatched right after the deep freeze and all that survived the first night, are still alive. For that matter, they are currently trying to integrate with the big chickens in the main chicken yard.

The Damage from this Last Freeze

Because I knew the cold snap was coming, I did cover my corn, but I didn’t think about covering the potatoes. The corn, which is starting to sprout survived, but the Russet potatoes (the ones I planted this spring) were severely damaged. Will they make a comeback? Only time will tell. The Red Norlands I planted have not yet sprouted so doubt they will have any problems when they do.

The peas, the garlic, and the onions all look good as do that lettuce, radishes, beets, and carrots. The freeze didn’t seem to affect them one bit.

Like a Farmer, I Still Remain Optimistic

I sold the seven chicks that hatched early last week to one of the neighbors. He has an 800-egg incubator, and we were talking about making a deal regarding my eggs and his incubator. I have been saving eggs this week.

Next weekend (May first) I will be attending Farmer’s market for the first time. Last weekend I purchased a canopy for this purpose. I am excited for this venture. I might have a little produce like lettuce and radishes and oregano, so I am going to try to sell some baked goods in addition to the produce. I was going to include the chicks I have, but they seem to be integrating so well with the adult chickens that I think I’ll let them hang around.

How about you? What do you do when weather is adverse? Do you persevere or do you give up?

Three Sisters and Their Cousins-The Best Known Companion Planting

A typical three sisters garden

This is the week I am starting my three sisters’ garden or in this case, we are going to make it a four sisters’ garden. The Three sisters include corn, beans, and squash. To make the fourth, I am adding sunflowers.

Planting the Corn

Saturday, I planted the corn. One way to do it is by planting it in the Iroquois way. What they used to do was plant in their corn in hills or flat circles. Some of the Native Americans put a fish under every hill. And then put five corn seeds in a circle and watered each hill. They waited a week before putting in beans, the second of the sisters.

I decided to plant my corn in rows rather than in hills. I planted four rows relatively close together so that they have guaranteed pollination. Instead of using fish for fertilizer, I spread a generous layer of chicken manure on the bed back in January so that it would not be too hot by the time I planted the corn. The night before I planted the corn, I soaked the seed so that each kernel was full of water before going out in the garden. By soaking the seed the night before, the corn has a better chance to germinate.

The corn that I planted in my garden is an early heirloom variety called Delicious. The supplier that I bought the seeds from no longer carries this variety, but because I saved the seed last year, I have plenty not only to grow, but to grow in succession planting. The corn takes less than sixty days from planting to harvest. Last year I planted the corn, let it go to seed, and then planted a few seeds again in late summer and had a small harvest. This year I have enough seed that I can plant some of it every couple of weeks for eating fresh, selling at farmer’s market, and even for putting some in the freezer.

This first planting of sweet corn, I’ll use to sell at farmer’s market (maybe eat an ear or two myself), but the best ears I am going to save for seed to plant next year.

Planting the First Beans and Sunflowers in the Four Sisters’

Once the corn germinates, I will move onto planting pole beans and the sunflowers. I will plant the beans along on the south side the corn. The beans will climb the corn stalks and help fix nitrogen for the corn.

I will plant the sunflowers along the western and northern edges of the corn patch. The sunflowers will keep Bermuda grass from growing into the garden. They will also provide wind protection for the corn from western winds.

Planting Squash in a Four Sisters’ Garden

When the beans and sunflowers germinate, I will plant the squash. I have a lot of choices on what squash I will want to plant. However, I think I will plant the luffa in this four sisters’ garden.

This week I started growing the first of the succession plantings of corn for sweet corn. For this, I worked a small amount of chicken manure into the bed and planted the corn in three small rows fairly close together. Each week for the next few weeks I will plant another bed of corn until I run out of seed corn.

Sorghum Sisters, Another Four Sisters

The next major companion planting that I will be growing I call the Sorghum Four Sisters. I created this grouping last year and had excellent results. I am going to repeat the same structure this year and see if I get the same results.

In this grouping, I am planting sorghum. Like corn, sorghum is a C-4 grass. It grows sturdy and tall and makes a good climbing pole for the bean. The legume (bean) I will plant with it are cowpea, and rather than squash, I am planting watermelons. The fourth and final sister I will plant is okra. I think these four are better suited for the south than the corn three sisters because sorghum handles heat better than corn does and handles drought better. Sorghum is best known for making sorghum molasses. However, I plan to use the seeds of the sorghum and the cowpeas to help supplement the chickens’ feed this year.

Do you have a favorite way to companion plant in your garden?

How to Grow a Better Crop of Potatoes

potato in garden
One little early potato can lead to many a summer meal

Container Planted Potatoes for Early Crop

A few years ago, I grew potatoes in buckets on my patio at my townhouse when I lived in Springfield.  I had mixed results. One of the reasons that I had problems was because I tried to grow what I later learned were indeterminant potatoes whereas what needed to grow were determinant varieties. The basic difference between indeterminant and determinant potatoes is that if indeterminant potatoes have good conditions, they will continue growing all season whereas determinant potatoes grow a short time and then die off leaving behind a specific crop to harvest immediately.

As I understand, determinant potatoes have a short growing season (as little as seventy days) and can be planted in succession throughout the growing season.  That is what I want to try to happen this year.

Another problem I had was that I put too many seed potatoes in my buckets. The buckets soon became crowded, so the potatoes stayed small. This year I am planting just one potato per bucket.

I want to try to grow potatoes so that I have a continuous crop coming in all summer long. The variety of determinant potato that I will be growing is Red Norland which has a growing season of just 70 days! I want to see how many buckets of potatoes I can grow during the summer and how many I need to keep myself supplied in potatoes for the entire growing season.

If I have more than enough Red Norland potatoes to supply me with potatoes throughout the growing season, and I have more than enough to sell at Farmer’s Market, I’ll take what extras I have and can some of them. I don’t think that will happen this year, because I only bought five pounds of this type of seed potatoes.

Because I only had three buckets available this year for the early determinant potato, I planted most of them in the ground in the main garden.

How to Plant a Bucket of Early Potatoes

To plant early potatoes in buckets, begin by putting holes in the bottom 1/3 of the bucket. I only put holes in the top of that bottom third of the bucket so that water would drain out only if it reached that part of the bucket. The lower part of that bottom third of the bucket would be used as a wicking bed of sorts. This way I wouldn’t have to water the buckets of potato plants quite as often.

I fill half of this bottom third of the bucket with sawdust, add a half shovel full of aged chicken manure and then cover that with more sawdust and filling that remaining bottom third of the bucket. Over the sawdust I put a one-inch layer of soil. In the center of the bucket on top of the soil, I set the potato or potato piece so that the rose end with the majority of the eyes was facing upwards in the bucket.

half filled buckets
I put in a layer of sawdust, a layer of chicken manure, another layer of sawdust, a layer of soil and set the potato in the bucket.

Once the potato piece was in place, I filled the remainder of the bucket with soil so that only two inches of the brim showed.

Once the potato plant surfaces above the soil line, I will fill the remaining space with grass clippings. I use grass clippings at this point because the grass clippings contain nitrogen so that if gives the potato plant’s leaves a little bit of a boost early in the growing process, but not so much to prevent the potatoes from producing the root vegetable.

Companion Planting for Potatoes

I am planting a companion plant with the potatoes in the garden. Because the potatoes take up a lot of growing space, I like to plant them with bush green beans. One reason, I like to use green bush beans is because bush green beans are a legume and while legumes are growing, they store nitrogen from the air in their roots that potatoes have access.

Another reason is that potatoes and bush green beans are harvested about the same time. I am able to harvest the potatoes and harvest the bush beans together and remove them both and replace them with a later crop like cabbage or spinach.

A final reason is that potatoes and bush green beans have a symbiotic relationship where they protect one another from insect pests. Green beans repel the Colorado potato beetle and potatoes protect green beans by repelling the Mexican beetle, a nasty pest that can quickly destroy a lush crop of green beans.

A Late Potato for Winter Storage

In addition to growing determinant potatoes for use during the gardening season, I am growing an indeterminant variety as well. The indeterminant potato variety that I will be growing will be White Russets. I know that they are good storing potatoes because I stored them in a cool place in my kitchen over the winter. I am experimenting with them as well. This experiment is that I planted some in the autumn and hope that they will start growing this spring. I also have some that I planted this spring. These potatoes are considered late-growing potatoes and should keep me supplied during the winter.

I have some idea about how many potatoes I will need this next winter because this past winter I bought 100 pounds of potatoes to use this past winter and there was enough in that my husband and I were sufficiently supplied with them throughout the winter. Therefore, if I can grow at least that many for the winter, it should be a sufficient supply for the upcoming winter.

How about you? Do you grow potatoes and if so, what do you find helps you improve your potato harvest?

Getting a Jump on the Spring Garden

lettuce plants
Lettuce is an early spring crop that can be either grown as transplants or directly from seed

This Season’s Garden Started Last Fall

My garden this year didn’t start when when I planted my first seed in the ground this spring. I started prepping the early vegetable garden last fall just after I finished harvesting the first rows in the first bed of the garden. I did this by digging up the ground and then putting grass clippings and then leaves on the beds. Also, I planted elephant garlic and regular garlic.

I also decided that I would experiment with starting indeterminant potatoes (Russets). I read that if I dug down two feet, laid a layer of leaves and grass clippings down, laid a potato on top of that, laid another layer of leaves and grass clippings on top of that and covered it with the rest of the soil and then covered that with another layer of leaves and grass clippings that it would insulate the potatoes enough to protect them until spring when they would sprout. I’ll let you know how that experiment works out.

After I planted the potatoes, I worked to finish digging that main part of the garden. Because I was doing the job exclusively by hand with a broad fork and I had to dig out Bermuda grass, the work took me until January twenty-sixth to complete.

Soil Preparation

Many people are not familiar with the broad fork. At first, I too was skeptical about getting one, especially when you consider that to buy one cost between $100-$200. Then someone explained to me how much better for the soil using a broad fork was than using a tiller.

  1.  First, it is more cost-effective. A broad fork costs hundreds of dollars less than a tiller.
  2. It easier to use than a regular garden fork because it covers more ground, it takes less time.
  3. Using a broad fork is good exercise.
  4. A broad fork doesn’t require gasoline or oil and it won’t break down.
  5. Most importantly, a broad fork doesn’t turn over the soil, but simply loosens it and allows air to penetrate deep into the ground without causing soil impaction as tilling does. Besides, it doesn’t destroy soil tilth. nor does it disrupt the healthy microbial environment as much as tilling does.

After digging, because our woodstove was in operation, we took the ashes leftover from heating our house and spread it on the dug-up ground. I then added some composted chicken manure to the beds. I made sure that I didn’t add too much though. Too much manure gives the plants too much nitrogen which would produce too many leaves and not enough fruit.

Making Permanent Garden Beds

After January twenty-sixth, the weather turned cold and rainy for a while so I didn’t start building garden beds until early March. I planted the garden in beds last year, but this year I intend to make them more permanent. This means that I am building each bed in the same location with pathways between the beds will be in the same place too. This way I can avoid walking on the beds and can continue to improve the soil on the beds without wasting amendments in the pathways.

To make the beds I dug the good soil out of the pathways and onto the beds. Then I took sawdust and put them in the pathways to keep weeds down between the beds. The garden is now ready to plant with my early garden vegetables.

Planting the Early Vegetables

The first thing that went into the ground was to plant the next round of potatoes. Because I have planned to compare potato planting methods later, so I’ll go into how I did this in a later blog.

Next, I planted small onion sets. This is easy enough to do. I marked the rows and pressed the onions into the loose soil covering them just enough to allow the tops of the onions above the surface of the soil.

After the onions, I planted two short rows of carrots mixed with radishes, a row of beets, and a half a row of spinach and a half row of lettuce. I just marked the rows and barely covered the seeds with loose potting soil and watered the rows well.

Finally, I planted peas, but not in the garden, not yet anyway.  Instead, I soaked the seeds overnight. In the morning, I filled a garden flat half full of soil then scattered the soaked peas over the soil.  I covered the peas with another layer of soil and watered it the flat well. I allowed the peas to germinate before putting them in the garden and covering them with an inch of good garden soil.

How about you? What are you doing to start a garden this year?

Planting Perennial Vegetables

asparagus plant
It takes at least three years to produce a decent asparagus plant, but you’ll have perennial growth for about 20 years

A garden is good insurance for making sure that nutritious, delectable vegetables are available throughout the year, wouldn’t it be nice if you could plant a vegetable that you plant once but it keeps offering you its produce year after year. Well, you can do this with perennial vegetables.

Perennial vegetables like asparagus, rhubarb, Jerusalem artichokes, and horseradish among other vegetables can be planted once and with little care offers a crop year after year.

Asparagus

Native to Western Europe, but a hardy perennial here in the US, asparagus, is probably the most popular perennial vegetable. With good reason, asparagus plants are viable for up to twenty years and nothing compares to the taste of homegrown fresh asparagus.

I grew my asparagus last year from seed. Growing from seed takes a lot of patience, but it’s worth the wait. However, if you don’t want to wait, you can also buy two to three old crowns.

I started my asparagus plants in January 2020.  I put the seed in the refrigerator for a couple of months so that the seed would chill. I soaked the seeds overnight and then when I was ready, I planted them indoors in flats. This way I was able to control their growing conditions. Also, the asparagus didn’t need to combat weeds just to get started. (It takes anywhere from 2-8 weeks for asparagus seed to germinate).

I planted the seedlings in the garden bed behind the shed in April last year and kept them reasonably weed-free so that they could grow. Their roots are well established now, but it will still be a year or more until I am able to get a harvest.

Rhubarb

rhubarb crown
The black blob in the middle of the photo is of a rhubarb crown. In a few days it will green up and begin to grow.

Pioneers called this perennial “pie plant” because rhubarb pie was a favorite among them. Though used like a fruit in pies, rhubarb is actually a vegetable. I planted my rhubarb in the part of the herb garden where I had grown kale, greens and late corn last year. I planted it here for a couple of reasons. One, the garden had been deeply dug and lots of organic material had been added and perennial grasses had been removed. It is a sunny enough location (more than 6 hours of sun per day).

I have two plants so I planted them on opposite sides of the four foot long bed. To plant them I dug a hole and positioned the bare root rhubarb plant so that the crown was 2-3 inches below the surface. I tamped the soil down lightly over the rhubarb and watered it thoroughly.  

Jerusalem Artichokes

<p value="<amp-fit-text layout="fixed-height" min-font-size="6" max-font-size="72" height="80">Also called sunchokes, Jerusalem artichokes grow wild where I live, but I decided to grow them in my yard, because I love to use them in stir fries in place of water chestnuts. They can also be used in place of potatoes. The tubers look like ginger root and provide a starch (inulin) that converts to fructose in the digestive tract and is better tolerated by diabetics than the potatoes would be. The flowers look like sunflowers and produce edible sunflower like seeds. (the seeds are smaller than sunflower seeds.)Also called sunchokes, Jerusalem artichokes grow wild where I live, but I decided to grow them in my yard, because I love to use them in stir fries in place of water chestnuts. They can also be used in place of potatoes. The tubers look like ginger root and provide a starch (inulin) that converts to fructose in the digestive tract and is better tolerated by diabetics than the potatoes would be. The flowers look like sunflowers and produce edible sunflower like seeds. (the seeds are smaller than sunflower seeds.)

This hardy perennial prefers cool weather and grows best in poor soil. I planted mine in the yard across the driveway from my perennial herb garden. They will flower during mid-summer. I planted it in the late winter just after the really cold weather. I added wood ashes and planted the tubers 12 inches apart and covered them with 3 inches of soil. I then added sawdust around the outside edge of the bed and placed rocks on top of the sawdust to ensure that I knew where the plants were when I mowed the lawn later in the season.

Horseradish

This vegetable is a hardy perennial and grows in all planting zones except the hottest desert regions. For perennial planting, I gave mine plenty of space and planted it at the edge of my herb garden next to the frost-free faucet. Because I have three plants, I planted them in a triangle and planted them 3 feet apart. It thrives best in sandy soil, but since I have clay soil, I amended it with plenty of organic material. Because it loves potassium, I dusted the area with wood ashes. It does not like too much nitrogen, so I did not add composted chicken manure.  I buried the horseradish so that the crown was placed in the hole at an angle, not straight up and down with the top two inches below the soil level and backfilled the remaining hole. I then covered the horseradish bed with sawdust for mulch and so that I knew where the horseradish was planted.

So, what is your favorite perennial vegetable? Is it similar to what I am growing or do you have something else that you like to grow year after year?

Planting Berries

early spring strawberry plant
The June-bearing strawberries are coming to life after a fall planting

So far, my perpetual homestead has the start of a perpetual garden. In addition, it has an orchard that will produce peaches, pears, and apples but those will not bear for a few more years. What I have that will all begin bearing in the next couple of years is the berry patch.

There are, of course, many other berries that could be planted, but I decided not to over-extend myself this first year. One berry, you might notice, isn’t included on my list is blackberries. The reason for this is that I am able to get out and pick wild ones that are growing nearby. I hope, next year, to get some elderberries. They not only are good in pie baking, but they have excellent medicinal properties as well. I would also like to add currants, gooseberries, and goji berries. For now, though, I am growing June-bearing and everbearing strawberries, blueberries, and yellow raspberries.  

June-Bearing and Everbearing Strawberries

The first berries that I started growing were the June-bearing strawberries. The reason that they are called June-bearing is that they put on one crop of berries in a short period. They generally produce one large harvest in late spring or early summer. I started growing these in a container garden while I still lived in Springfield. Last spring, I moved them out here with me, planted them in a temporary location in the garden. In September I finally transplanted them into a more permanent location where I am able to give them more room. I should be getting some berries from them this year because they had all winter to develop their root systems.

To plant the June-bearing strawberries, I planted them so that they were planted 12 inches apart in staggered rows twelve inches apart. After harvesting the berries, the strawberry plants will produce runners. Instead of allowing these runners to develop roots in the ground where they want, I am going to be putting pots under each of them and coaxing the roots to develop in the pots. That way I can move them and keep their roots more intact when I transplant them. My plan is to sell some of the plants and to plant the rest between the trees in the orchard to create a fruitful ground cover for the trees.

Just planted everbearing strawberry plant
Doesn’t look like much but this strawberry plant will be producing strawberries late this summer.

A second type of strawberry are everbearing strawberries. These produce two to three crops over the course of the summer and into the fall, with the larger crop coming in the summer. The berries on the everbearing strawberries are smaller and sweeter that the June-bearing plants and produce fewer runners. Like with the June-bearing, I planted the everbearing in two rows, with staggered plantings twelve inches apart. I planted them so that the strawberries roots are completely covered, but the crown remains above the soil line.

I planted the strawberries in late winter, so I spread a thin layer of partially decomposed chicken manure on top of the soil around the strawberry plants. This way, the manure will filter down to the roots during the spring rains and help nourish the plants’ roots. If I would have planted them in the spring after things started growing, I would have watered the plants with compost tea.

Next, I used sawdust to mulch the patch to reduce weed growth, hold in moisture and keep the manure from washing away or dissipating into the air. I have heard of people using plastic for mulch around the strawberries but because it can facilitate diseases such as leaf spot and anthracnose, I don’t recommend it.

Once things start growing in the spring, I will give the patch one inch of water per week if the soil is dry. It is important that strawberries get enough water until they are established. During production, Strawberries may have up to 2 inches of water a week.

If I would have planted the June-bearing strawberries in the spring, I would have removed blossoms and runners in the first year. However, because I planted them last fall, I don’t have to do that. For everbearers, I will remove blossoms and runners only until July 1. This will enhance strawberry plant growth and production.

.

Blueberries

newly planted blueberry plant
A freshly planted blueberry plant.

I planted my blueberries in the ground where I grew potatoes last year. This way the soil was loosened with the broad fork several times and rocks and weeds were removed as well. Because I had mulched the area heavily with leaves and grass clippings, the ground was light and highly organic. Because blue berries prefer much more acidic types of soil, measuring a little closer to 4.5 to 5.0., I am continually adding coffee grounds to quickly increase soil acidity.

I planted two kinds of blueberries. One was Patriot and the other was Jersey. Blueberries should be planted during the early springtime or just when the winter season is about to come to an end. Choose a part of your garden where your blueberry plants get access to sunlight for most of the day, but without it being harsh and full sunlight.  Companion plant with strawberries and thyme. I planted the blueberries to the depth that they grew when they were at the nursery.

Yellow Raspberries

Yellow Raspberry plants
Don’t let their appearance fool you. Those sticks poking out of the ground are raspberry plants.

I decided to grow Fall Gold raspberries. I may grow red and black raspberries in the future, but for now, I’ll stick to the yellow ones. One reason is that (I am told) that the birds are less likely to eat them than they would the red or black raspberries. 

These berries are a primocane type which means they bloom and fruit on first-year wood. Sometimes people refer to the primocane varieties as “everbearing” because they produce two crops on each biennial cane (unless pruned otherwise). The fall crop comes on current-season canes, at the top 1/3 of the canes. After overwintering, and if not pruned, a second crop will be produced in late spring to early summer at the bottom 2/3 of the canes. If I wanted a single heavier crop, I would prune all the canes to the ground every year before growth started in the spring. This way the new cans would produce fruit in late summer or fall that same year.

To plant yellow raspberries, I Choose a planting spot for my raspberries where they had plenty of room to grow and lots of sunlight. I only have three plants right now, but that number will grow every season, so I planted them on the south side of the garden. Plants tend to grow toward the sun so by putting them south of the garden, they will grow away from the garden and not toward it.

Because the raspberries are at the edge of the garden, I didn’t have to worry about breaking up hard ground. I worked some aged chicken manure into the top couple of inches the soil for a nitrogen boost. If I were limited on space, I would have put the raspberries on trellises, but since I am just growing a patch right now, I will let the raspberries grow naturally.

I dug a wide shallow hole for each bare root raspberry plant. If they would have been potted raspberries, I would have dug a hole big enough to accommodate the entire contents of the pot. Each raspberry plant was planted about 2 ½ feet apart.

I trimmed off damaged roots from the bare roots and spread them out. I would removed the plant from the pot and would have left the soil intact if I planted a potted plant. Prepare the raspberries for planting. Trim any damaged roots from bare root plants. Spread the roots out. Remove potted plants from the pots, leaving the soil intact around the roots.

I set each plant in a hole, bare roots spread out, into the soil. I didn’t plant the roots deep put left them less than two inches below the ground. I buried the roots and firmly pressed the soil to remove any air pockets. Potted plants should be planted so that the plant is buried no deeper than the surface of the soil in the pot.

I cut the canes to about six inches tall. I watered the raspberry plants just enough to settle the soil and mulched them to suppress weeds, hold in moisture and keep soil cool from the heat of the sun.

Now I have several berries that will soon offer me fruit from June until late summer and with a little maintenance work, they will do so year after year.

Now its your turn. Are you growing berries where you live? If so, what’s your favorite?

Starting the Orchard

the beginnings of an orchard
The orchard doesn’t look like much, but if I properly planted it and maintain it, it should do fine.

This past week I finally planted the trees in my permaculture orchard. I decided to plant semi-dwarf trees because they tend to be heartier and live longer than dwarf trees but produce in a smaller area and produce more quickly than standard trees.

I bought bare-rooted trees from GrowOrganic.com for my mini-orchard. Bare rooted fruit trees are those sold without a pot and the type purchased by tree nurseries, but they can be purchased by individuals too. Bare-rooted trees will save me money and are available in a much wider selection of varieties and sizes than those sold in pots. Also, they are less expensive to ship. Because bare-rooted trees don’t have an extensive root system, they do require proper planting and careful treatment during the first year to establish healthy root systems and provide a reliable harvest.

I bought three apple trees, a pear tree, and a peach tree and I purchased them so that I would have tree fruit from mid-July to November.  

First, we have the Red Baron Peach. This tree is the earliest of all the trees in the orchard. It is self-pollinating. It blooms early to mid-season and harvest from the middle of July to August first. It produces a rich juicy, large yellow freestone fruit. It is a vigorous tree that needs fertile, well-drained soil and regular pruning and thinning.

The pear is the Pontiac Pear. It is self-pollinating and has a superior resistance to fire blight with good-quality fruit. This fruit harvests in August-September.

The first apple that I chose was the Golden Delicious. The reason I chose it, is that it is not only self-pollinating, but it also pollinates other apple trees too. It resists woolly apple aphids and collar rot.  This is the earliest of the apples that I chose and produces ripe apples in early September and is a sweet eating apple.  

I chose the Braeburn apple because it can be kept in long term storage and I like the fact that it was grown from a “wild-seedling”. It doesn’t hurt that it originated in New Zealand too. This apple is harvested in mid-autumn.

Finally, I picked the Liberty apple because this apple is low maintenance. It has a natural disease resistance to apple scab, powdery mildew, cedar apple rust, and fire blight. Its fruit has a crisp white flesh, yellow with red overtones, a crisp white flesh, and a tart but sweet taste. It harvests in late autumn.

Properly planted peach tree
The Red Baron peach tree was properly planted, staked, and mulched.

Where I Planted My Trees

I put a lot of thought into where to plant these trees because once they are in the ground, they can’t be moved. Our land is on a south facing slope which is great for gardening, but not so good for orchards. South facing slopes heat more quickly than north facing ones which wouldn’t be a problem, but late spring frosts can destroy the tender buds on those south facing trees. Therefore, it is necessary to protect the trees from a direct southern exposure, but how do I do this on a south facing slope?

I made the use of a microclimate created by the buildings on our place. I planted these trees along the western boundary of the property on the north side of the trailer just north of the hen house. This way, sun shining on a frosty morning won’t cause sunscald. There’re large trees on the western side of the yard so the trees are protected from westerly winds. Also, the north side of the yard will stay cooler than the south side of the yard and will prevent the trees from budding too early. The fruit trees will bud later, preventing late frosts from destroying the flowers and therefore future fruit.

How I Planted My Trees

Here in this part of Missouri, we are able to plant trees any time that we can work the soil during the late winter.  In more northerly climates, trees would need to be planted later in the season either late winter or early spring but definitely before the trees bud.

For each tree I dug a hole about a shovel’s depth and at least three times the side of the bare-root stock. I made the holes square because a square hole is better than a round one as it encourages the roots to push out into the surrounding ground. I kept the soil I removed on a tarp.

I added a few inches of good garden compost and worked it into the soil around the hole.  I mixed the compost into the top two inches of the soil out to what would be the tree’s dripline.  I placed the tree in the center of the hole and spread out the roots. As I put the soil back around the tree, I made sure to mix some compost into the soil as I replaced it around the tree. I made sure that I planted just to the slightly darker junction on the tree’s trunk that indicated where the soil level was when it was first grown. I made sure that the soil around the hole wasn’t planted deeper or shallower than when the trees were first grown. Since my fruit trees were grafted onto rootstock, I made certain that the joint was above ground.

Before I buried the tree roots, I put a thick wooden stake a few inches from the center of the hole and on the side of the north wind (As I said earlier, I have trees for a windbreak.) I hammered this firmly into the ground using a mallet. I firmly pressed the tree and post into the ground with my heel, careful not to damage the roots. When the hole was half full, I pulled the tree up an inch and then let it drop to help the soil fill in around the roots.

When all the soil was added and firmed, I attached the tree to the stake with a soft tie and left enough room for the tree trunk to grow. I plan to add a protective fence around the trunk of each tree.  At this stage I  covered the area which would be the dripline with sawdust to suppress weeds.

I watered the soil well to stop the roots drying out and to further settle the soil around them.

Further Care During the Spring/Summer/Fall

Until the root system is at least as large as the tree it supports, the trees are particularly vulnerable to environmental stress. During this first year, the trees can easily die from not getting enough water or nutrients. I will need to keep the trees well-watered, especially during dry weather. A good soaking once or twice a week is much better than surface watering daily, though during extreme heat it can be worth doing both. It’s also vital to keep the area around the tree completely free of weeds and grass as they will compete with the young tree, which is why the sawdust mulch will be highly effective.

<p value="<amp-fit-text layout="fixed-height" min-font-size="6" max-font-size="72" height="80">I will also have to remember to remove any and all blossoms from the trees this first year and not let any fruit develop. By keeping the trees from bearing the first year, the trees will have less stress and become healthier and produce greater bounty in the future.I will also have to remember to remove any and all blossoms from the trees this first year and not let any fruit develop. By keeping the trees from bearing the first year, the trees will have less stress and become healthier and produce greater bounty in the future.

I am looking forward to sharing more about this orchard in the future. If you have any questions about growing your own home orchard, please let me know by commenting below.

<p value="<amp-fit-text layout="fixed-height" min-font-size="6" max-font-size="72" height="80">If you have anything you would like to add, feel free to add it in the comments below as well!If you have anything you would like to add, feel free to add it in the comments below as well!