
Often the best time to evaluate what we need to do to prepare for cold weather occurs after we have just gone through a bout of bitter-cold winter weather. So today, I am going over what we did, how it worked, and what we’d like to do to improve our ability to beat the cold.
During the past two weeks, we have had the coldest weather that we have had all season. We have an extreme cold almost every winter. Last year it was in December, but this year, January has seen the polar vortex swoop down from the Arctic to bring sub-zero temperatures down here to the Ozarks.
Cold weather like we have been experiencing this year can cause numerous issues that make life difficult.
Frozen Pipes
Frozen pipes can cause severe damage to our plumbing system. When water freezes in the pipes, it expands and can cause them to burst, resulting in costly repairs and water damage. It is essential to take preventive measures to avoid frozen pipes during cold weather by insulating them properly and keeping a steady flow of water through them.
For the past four winter seasons, we have consistently had the water pipes freeze every year and it stays frozen for 1-10 days. Fortunately, we use rural water rather than having a well. We also installed a frost-free hydrant out by our water meter, so we’ve always had access to water from there even though the water is frozen in the house. Daily, we bring in water from the hydrant and flush the toilet, do dishes, and provide drinking water for our cats, chickens, and ourselves.
Every year we have had to replace pipes that burst during the extreme cold. My husband and I have been discussing what we need to do to avoid frozen pipes in future years.
We know that increasing the insulation under our trailer along with adding skirting will help with this problem. We have also talked about adding heat tape along the pipes. The heat tape probably doesn’t need to be placed along the whole length of the pipes either. I think it would be best to wrap a length around certain junctures along the pipe. For instance, we could place the heat tape where the pipe comes out of the soil at the back of the house and around the elbow where the hot and cold water pipes turn toward the kitchen sink at the front of the house.
Keeping water in front of our chickens is another challenge during extremely cold weather. Right now, I am taking hot water out to their pen and pouring the water into pans rather than their watering containers because if the watering containers freeze they are likely to break. I could purchase a water heater for the watering containers, but I haven’t done so, at least, not yet.
No Electricity
It didn’t happen this winter, but some years ice caused electricity to go out. Since I first moved here, we have experienced two seasons when electricity went out during ice storms. The first time was for about a week and the second was for ten days. We managed fine because we had flashlights and a wood stove. We put our refrigerator food in a cooler out in the yard to keep it cold.
For years, we used the wood stove to heat the house, and when the electricity is out we use it for heating water and cooking food. This is an option if this happens again this year. In addition, we also have a butane cook stove and an outdoor propane grill to use for cooking if need be.
We didn’t have a generator back when the electricity had gone out in the past, but we do now, and we plan to use it if we are faced with similar situations. We just haven’t been put to that test since we got the generator. We make sure we have fresh gas any time there’s a threat of the electricity going out. We’ve also been talking about getting some deep-cell batteries to store electricity. Once we have those, we will also look at getting a solar setup as well.
This past Christmas I bought my husband a rechargeable battery charger and a weather radio to get local weather if the electricity goes out. The radio also has its charging abilities and a couple of ways to get light.
Heating our Home
Three years ago, when we got our trailer, we bought an outdoor wood stove because we thought the benefits might outweigh the problems. We decided that we didn’t like the outdoor wood stove, so we decided to put in an indoor wood stove. The indoor wood stove made it easier to load because we didn’t need to lift heavy blocks into the firebox instead, we could use smaller ones.
In addition, we found that we needed less wood to keep the house warm. We have already used a third less wood than we had previously, and it looks like by the end of winter, we may reach as much as half the wood. If that’s the case, the indoor wood stove may pay for itself in less than two years.
We have other ways to heat the house as well. If we need them, we have a buddy heater and an extra electric heater.
Different Options
In various areas of the country, there may be other options that I don’t have or the options that I do use for battling the cold might not work. Whatever your situation, it’s a good idea to look over the possibilities so that I’m not left in the cold.
Are you looking for something to do when winter storms bring bitter cold and keeps you indoors? Check out one of my gardening books!
Simply Vegetable Gardening
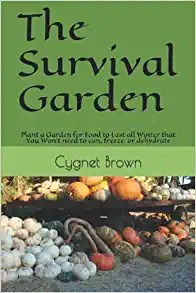
The Survival Garden
The Four Seasons Vegetable Garden
Help From Kelp
Using Diatomaceous Earth Around the House and Yard