Featured

My Garden Supermarket

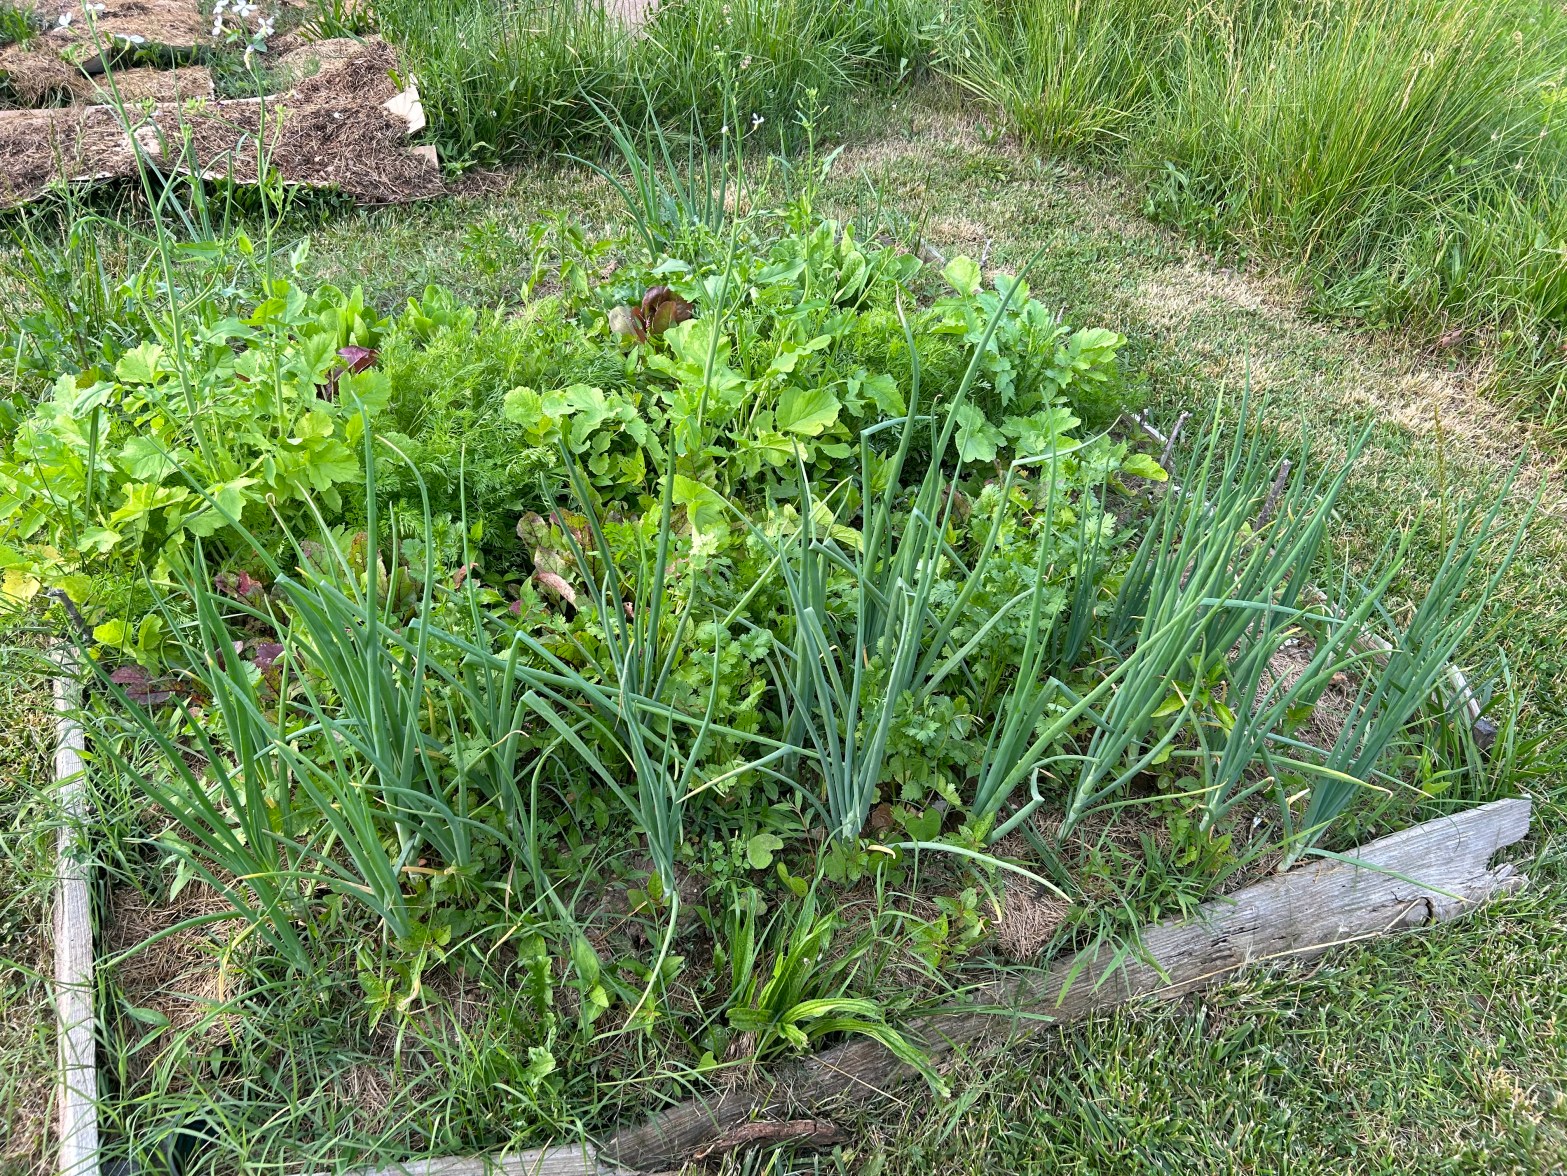
This week has been a week where we have been harvesting a lot of food from the garden. I haven’t been canning, freezing or dehydrating anything that I am harvesting right now. Some of it will keep without refrigeration and others we are eating as soon as we pick it from the garden.

Why Not Can, Freeze or Dehydrate?

My mother used to do a lot of canning and freezing, but often she didn’t cook the food she grew immediately. Instead, she put it up so that she could brag about how much she had canned or frozen. Often she would say, “You’ll be glad this winter that we have this.” Often, however, the food that she froze or canned didn’t get eaten at all. Too often, the food in the freezer would get freezer-burned and had to be given to the livestock or thrown into the compost pile.

My dad often commented on this flaw in her thinking and suggested that we should eat the vegetables when they were fresh rather than let them waste away on the shelf or in the freezer. I try to take this advice and utilize as many fresh homegrown vegetables in my diet as possible.

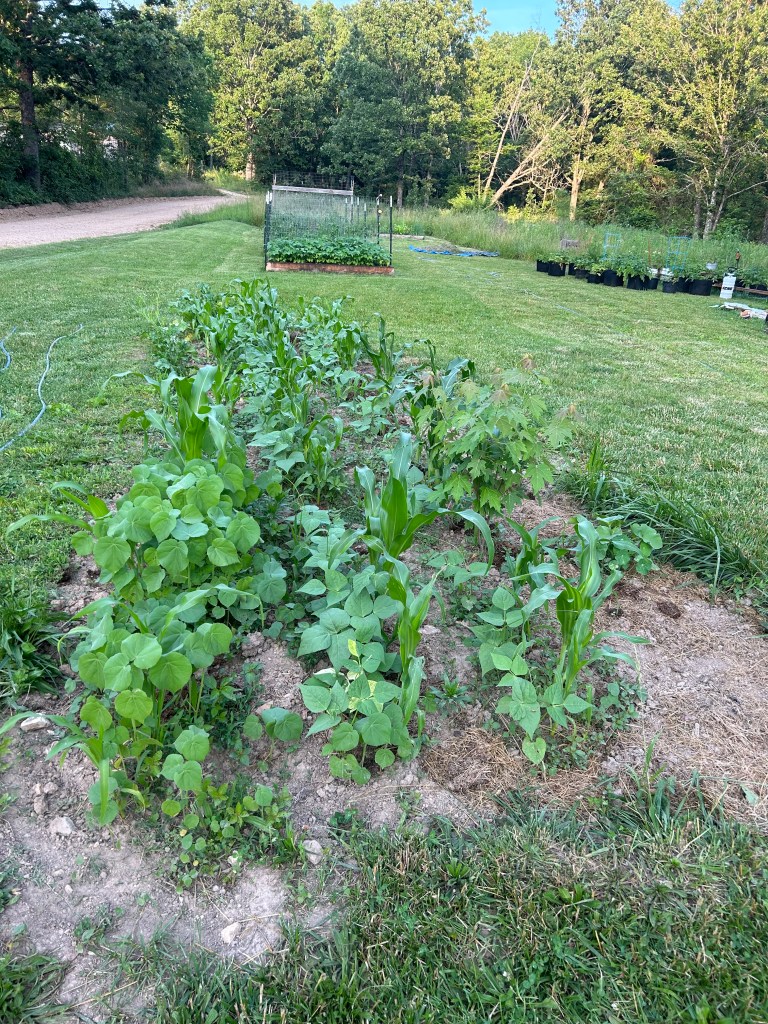
Right now we have a variety of vegetables that we are using. Here’s what we had coming from our garden that we have used this week.
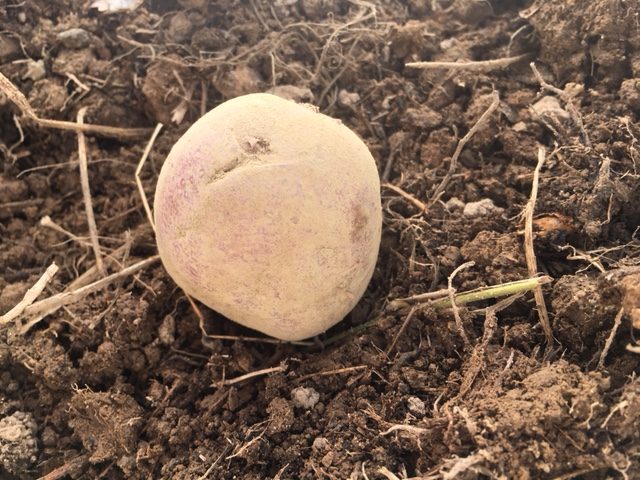
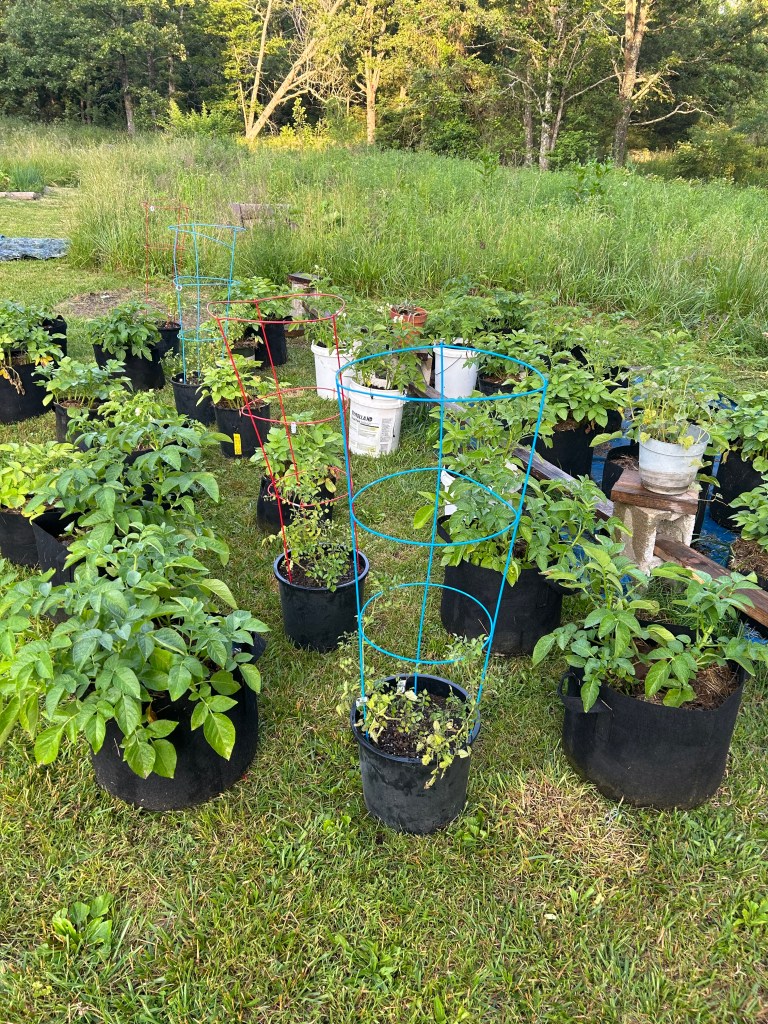
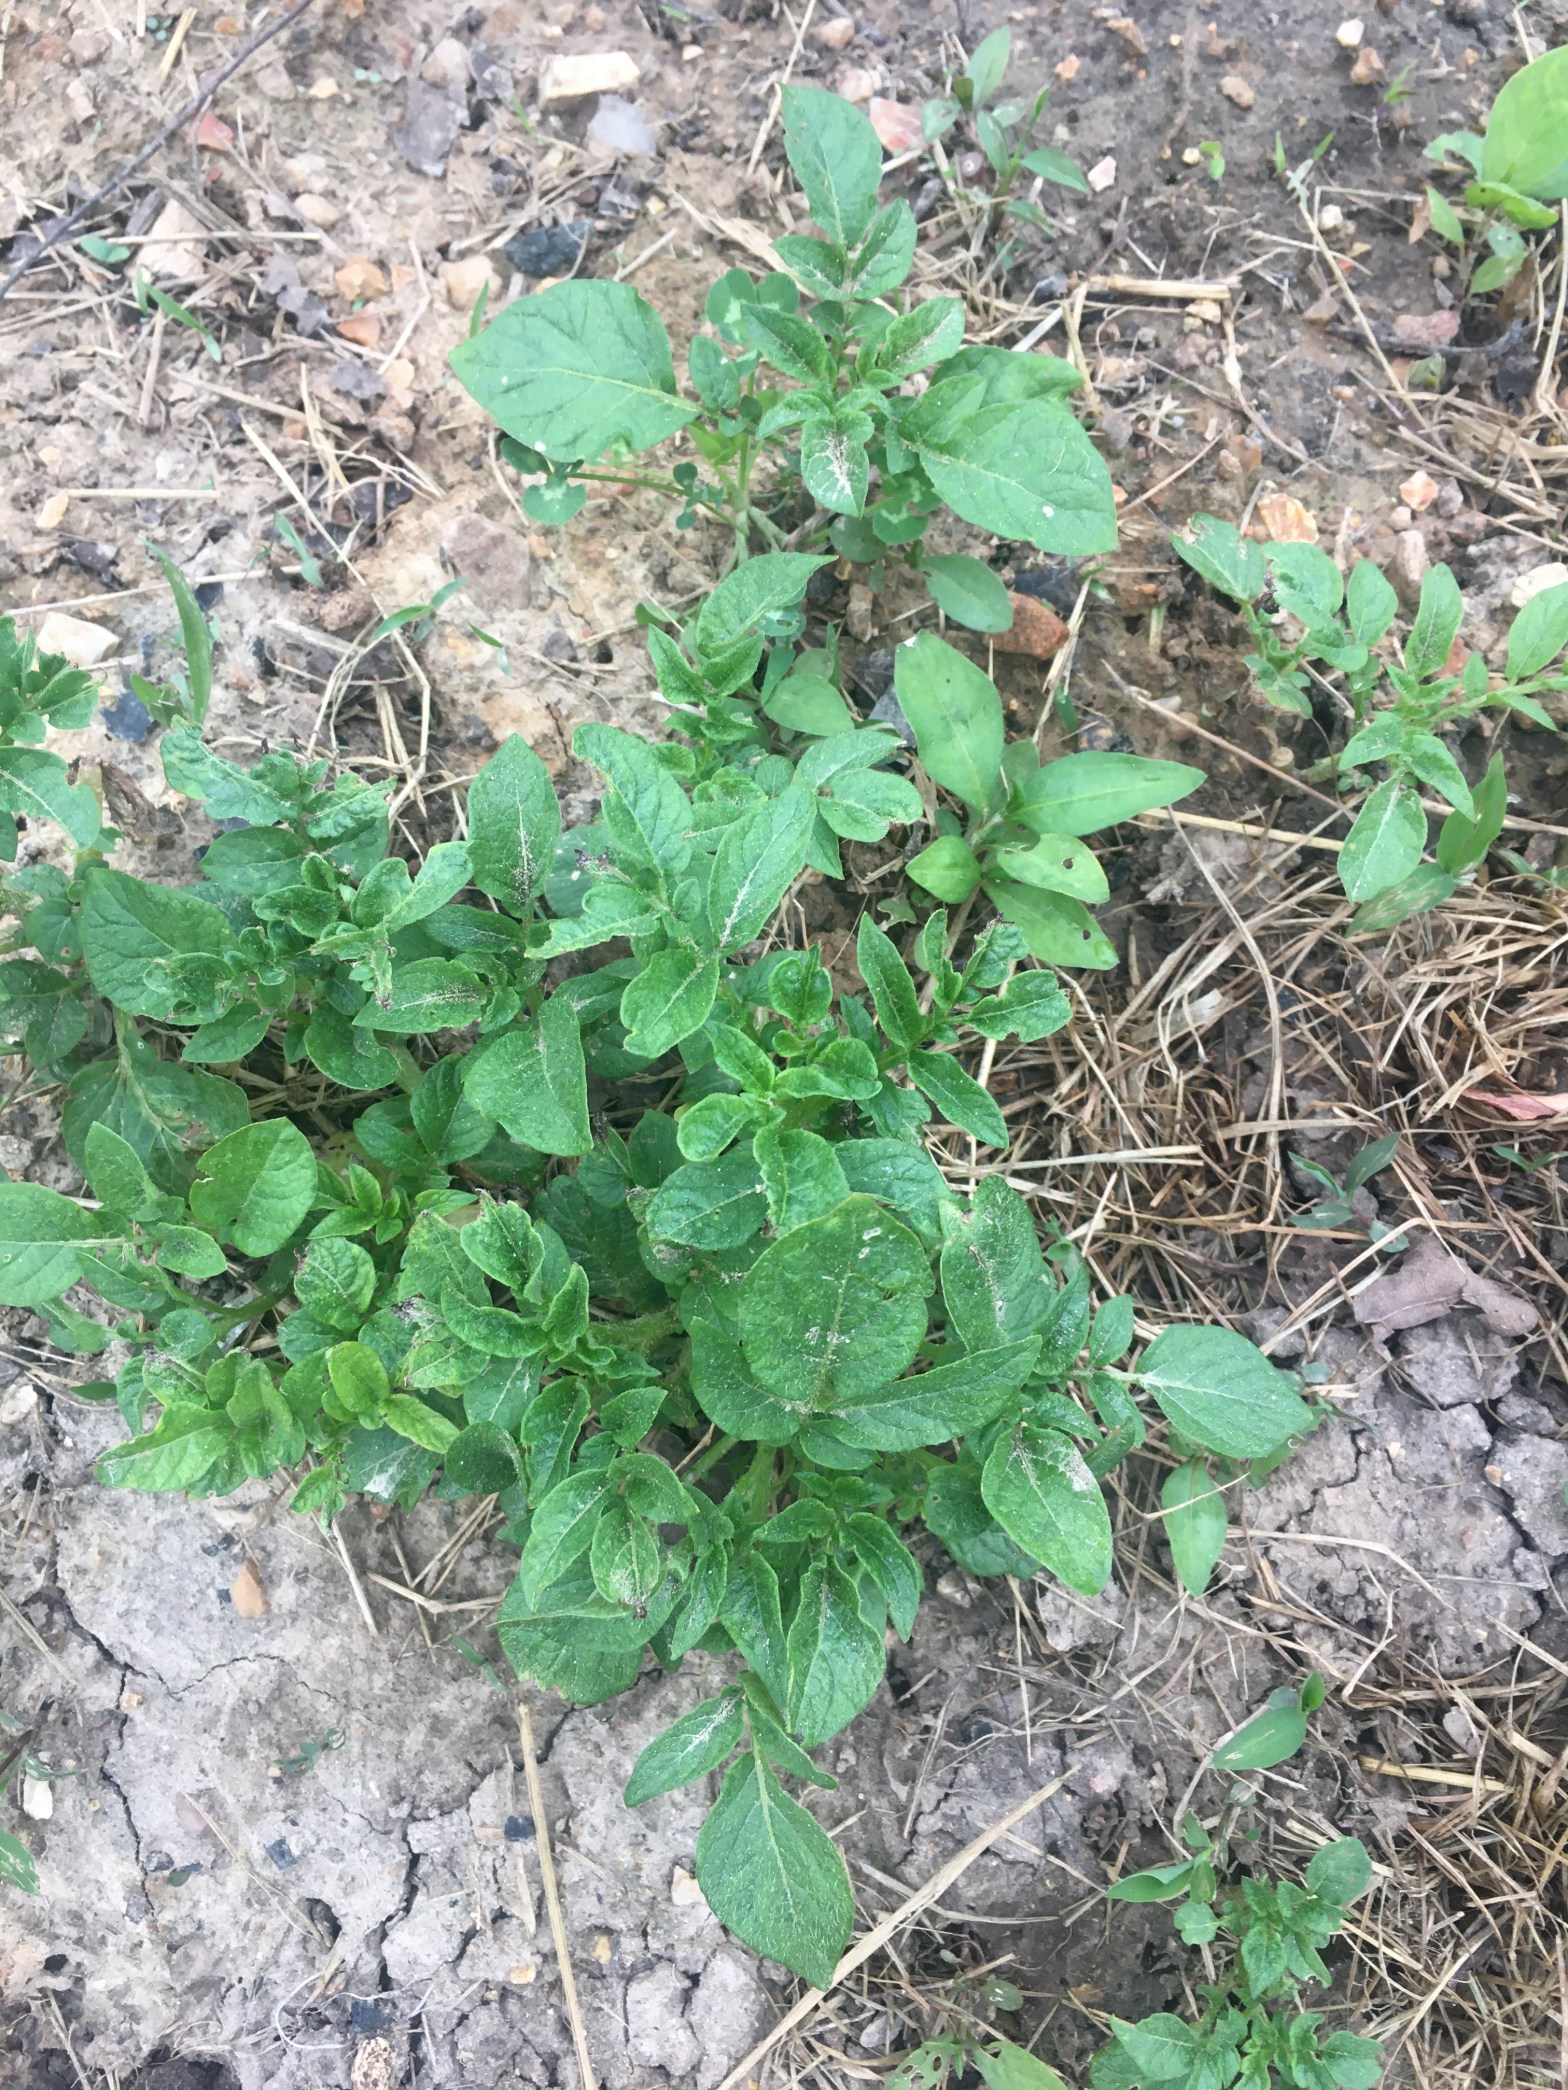
Potatoes

We have two different crops of potatoes growing. Some are growing in fabric bags and others we planted in the ground. The ones growing in the ground are still growing, but we’re harvesting the early red Norlands grown in the bags. We are harvesting two to three bags every day and eat them with other vegetables. These potatoes are early varieties that don’t store long term so we either need to use them if possible. If we can’t eat all of them, I will need to either can them, freeze them, or dehydrate them for long-term storage.
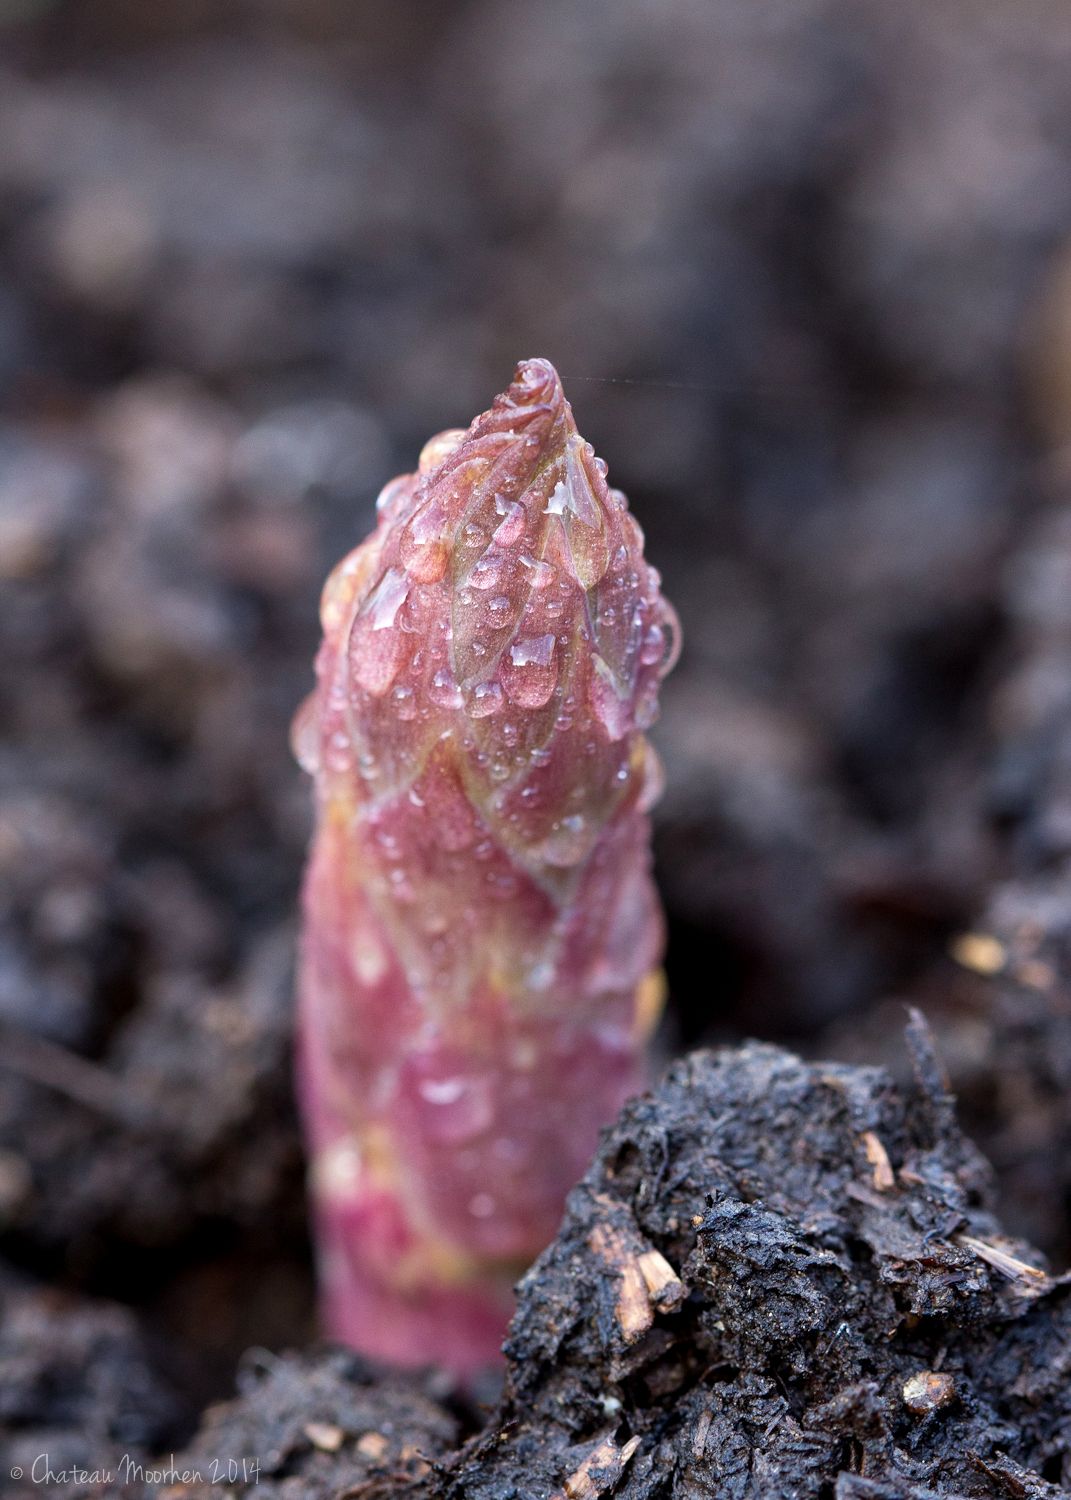
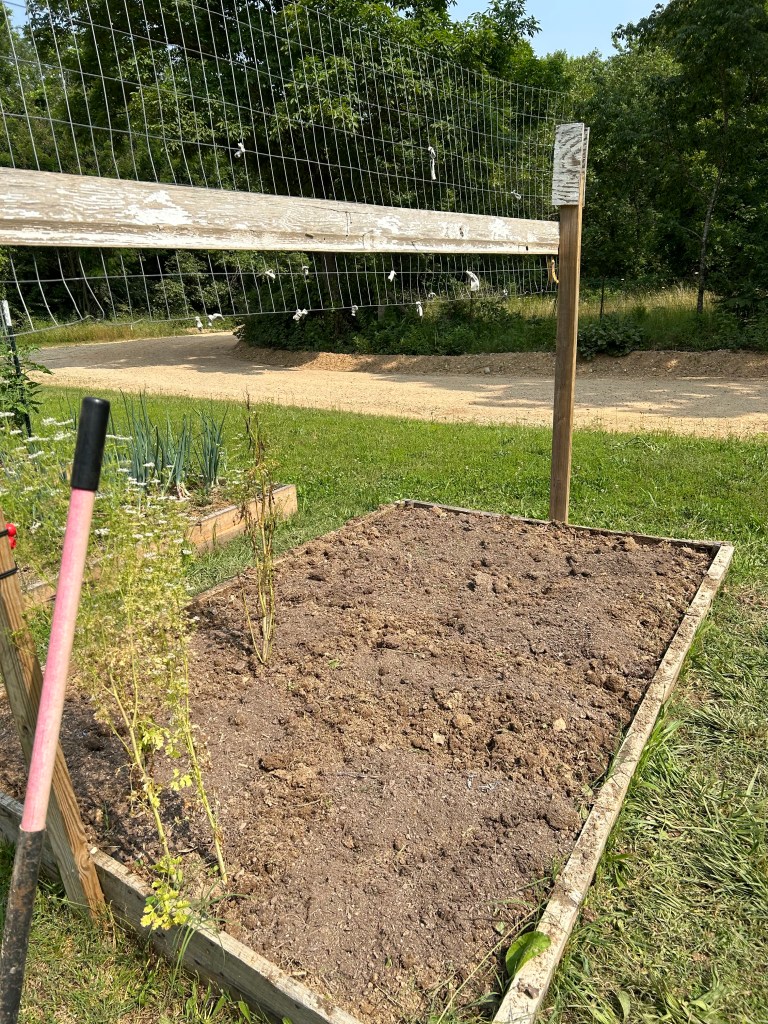
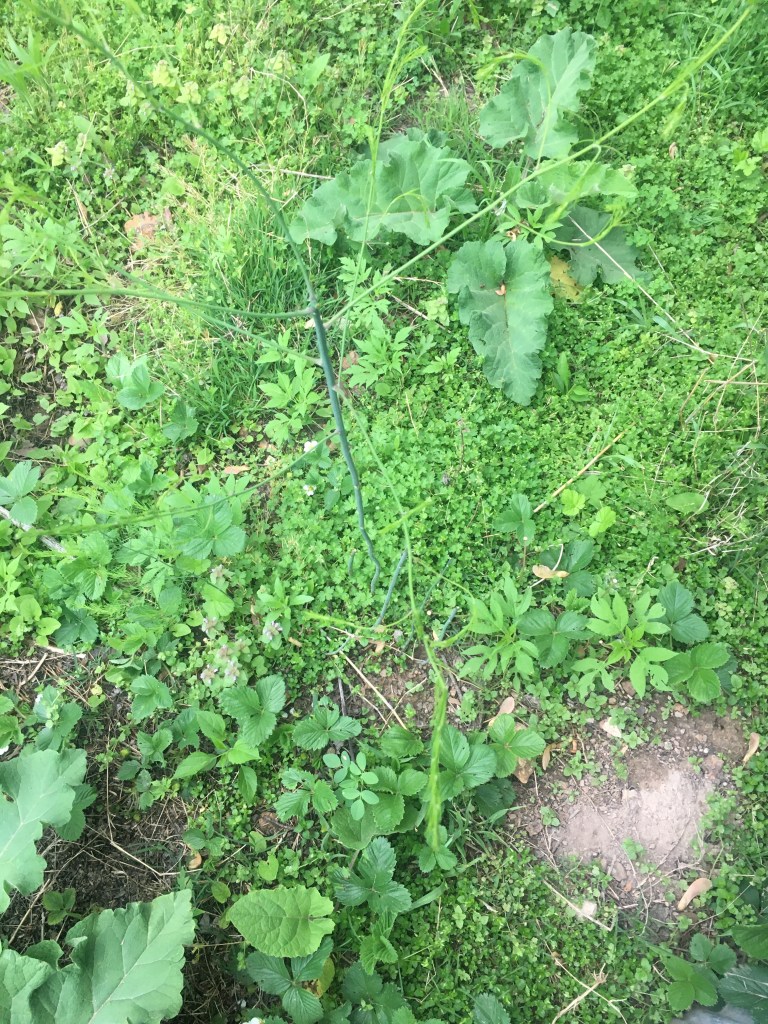
Garlic Scapes

We grow hardneck garlic which provides us with scapes every year. Scapes are the flower stalks of the garlic and they come out a few weeks before the garlic harvest. I have learned to use these scapes in cooking. They add a mild garlic flavor in stir-fries and other cooked garlic dishes. I love sprinkling chopped garlic scapes on casseroles. They are a great addition to scalloped potatoes.

Scapes will keep in the refrigerator for a week or so. I did put some in the freezer to save for later. Freezing them is as easy as chopping them and throwing the chopped scapes into a freezer bag or container.
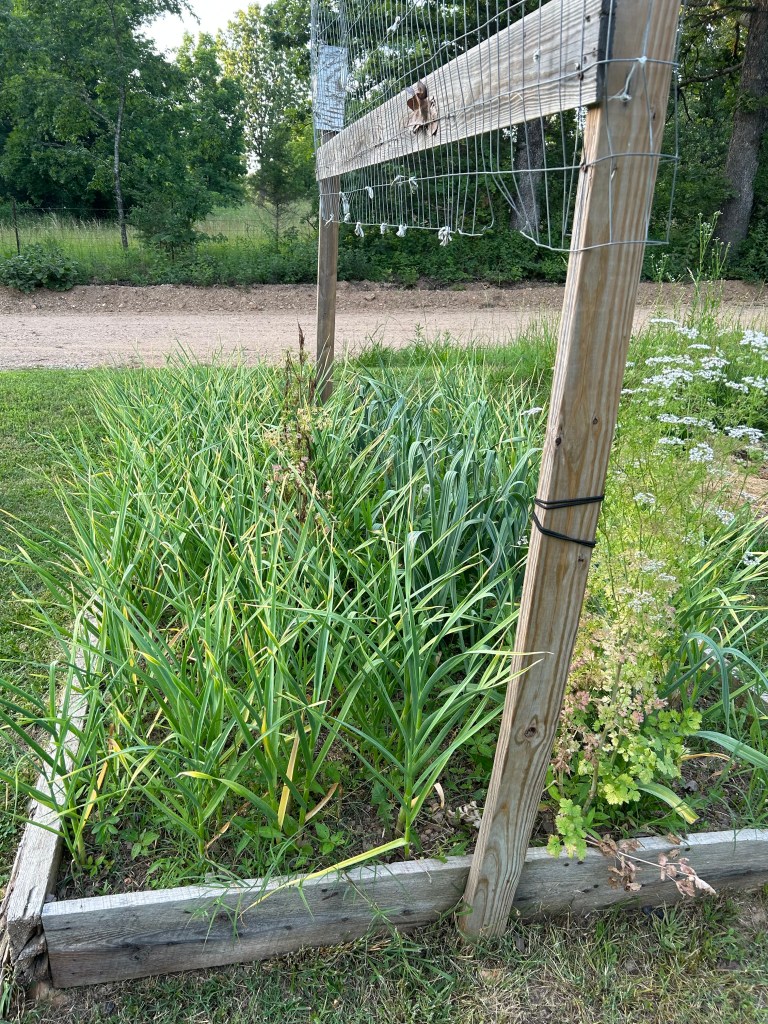
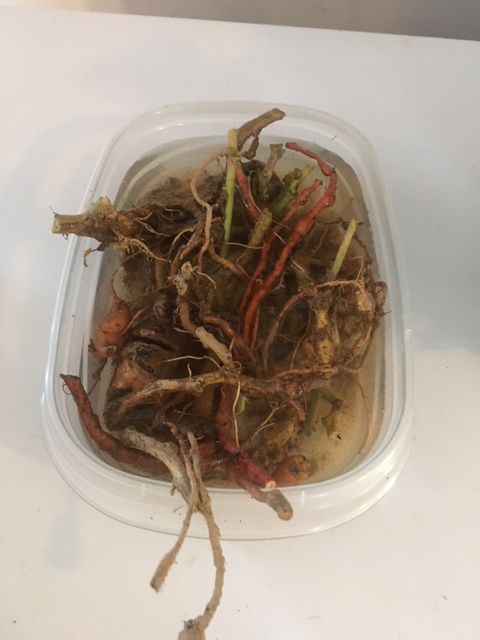
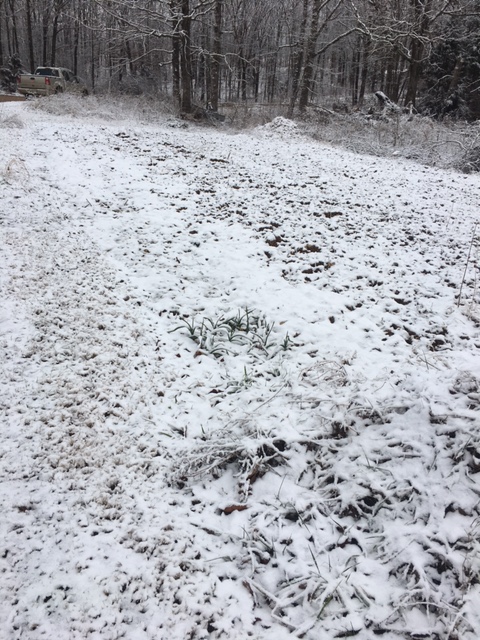
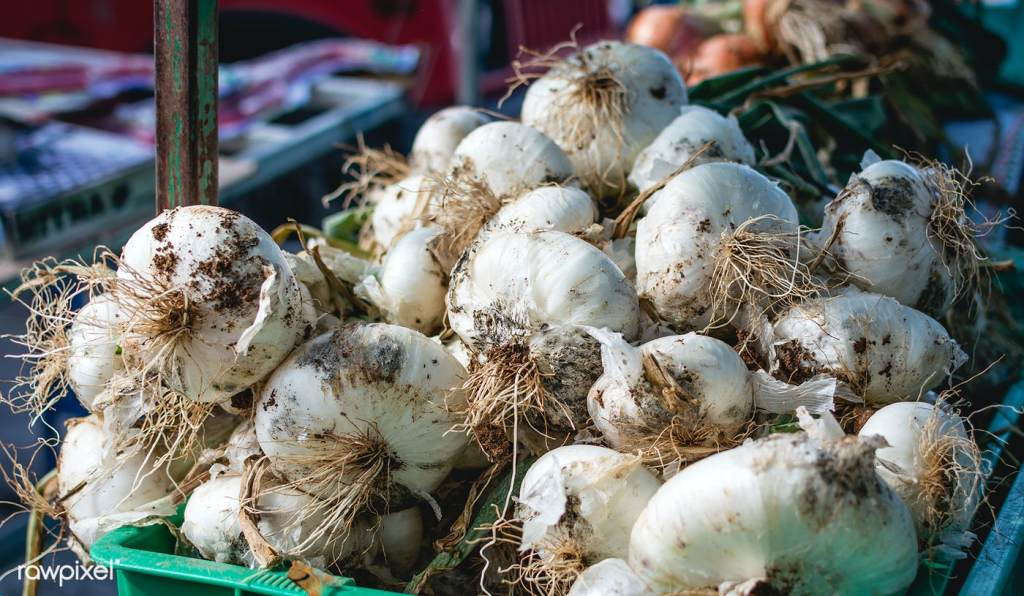
Garlic

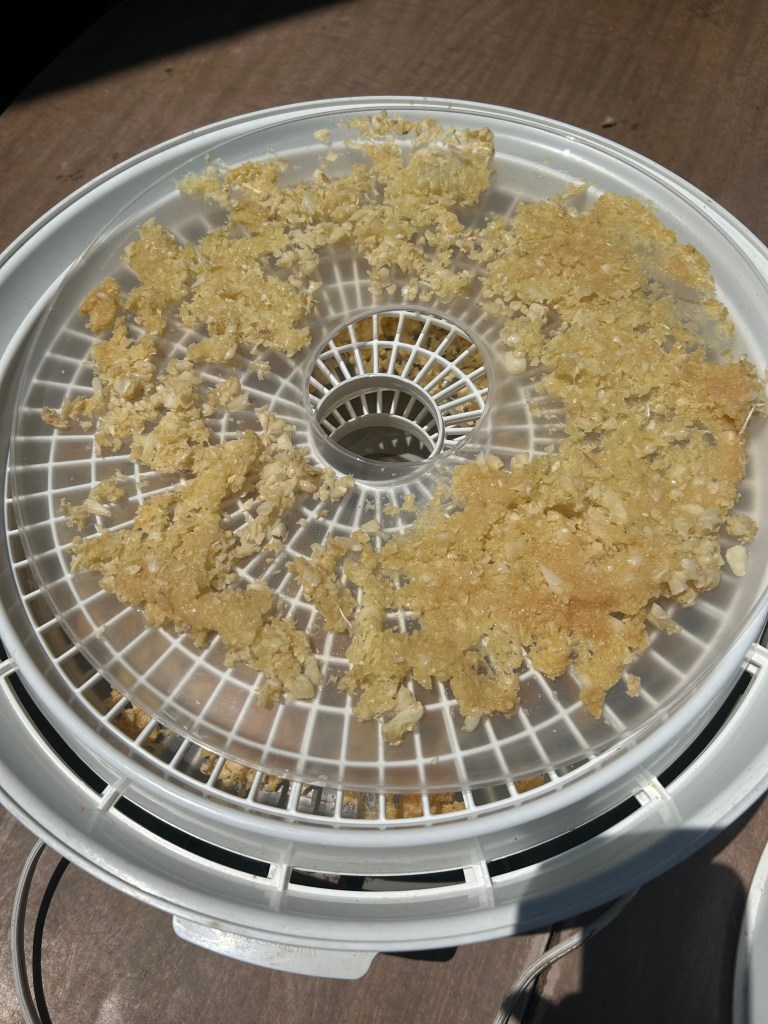
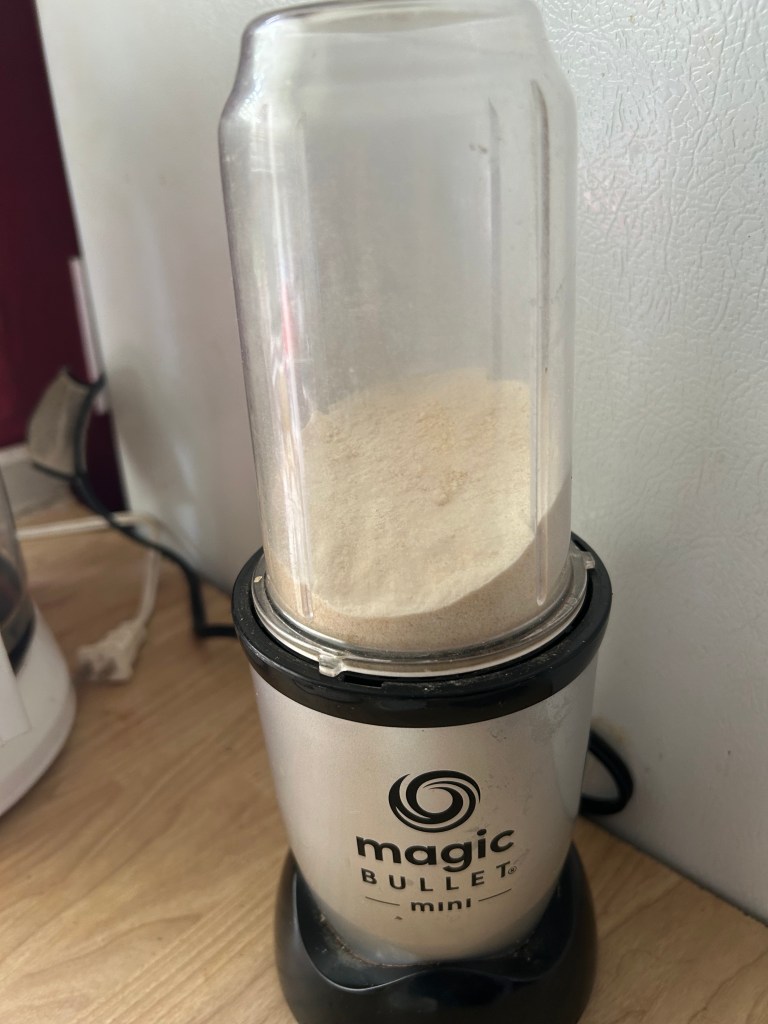
We harvested our garlic this past week. The garlic takes a while to prepare to keep throughout the winter. I pulled it from the garden and laid it out on a tarp in the sun and rain until the leaves were dried and then cut the bulbs. I then cut the roots from the bulbs and cleaned off the majority of the dirt from the bulbs. I then laid the garlic in a single layer to dry. Some of the garlic that has been nicked or otherwise damaged, I will use immediately or I’ll dry to make garlic powder, but most of it I’ll use fresh in cooking or when canning tomato products.

Cabbage

We have a cabbage that we have harvested this spring and We’ve used it cooked in a couple of meals already. I still need to use some of it to make cole slaw. Because there is only two of us, the cabbage goes a long way. We’ll be growing more this fall.
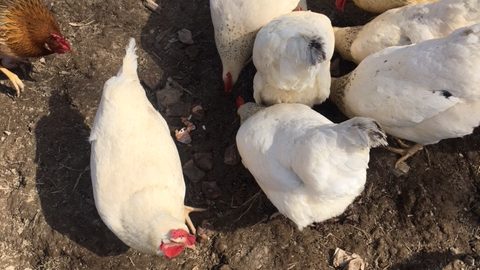
Chinese Cabbage

We grew too much of this all at once and ended up not being able to use it up all. We had one meal of it, and it seemed bitter. We gave most of it to the chickens. We will try growing some more later in the fall.

Lettuce

Our head lettuce came on all at once and we couldn’t use all of it before it turned to mush. What I did have, I enjoyed. I will plant more in the fall, but I will try to stagger the harvest more.

Broccoli

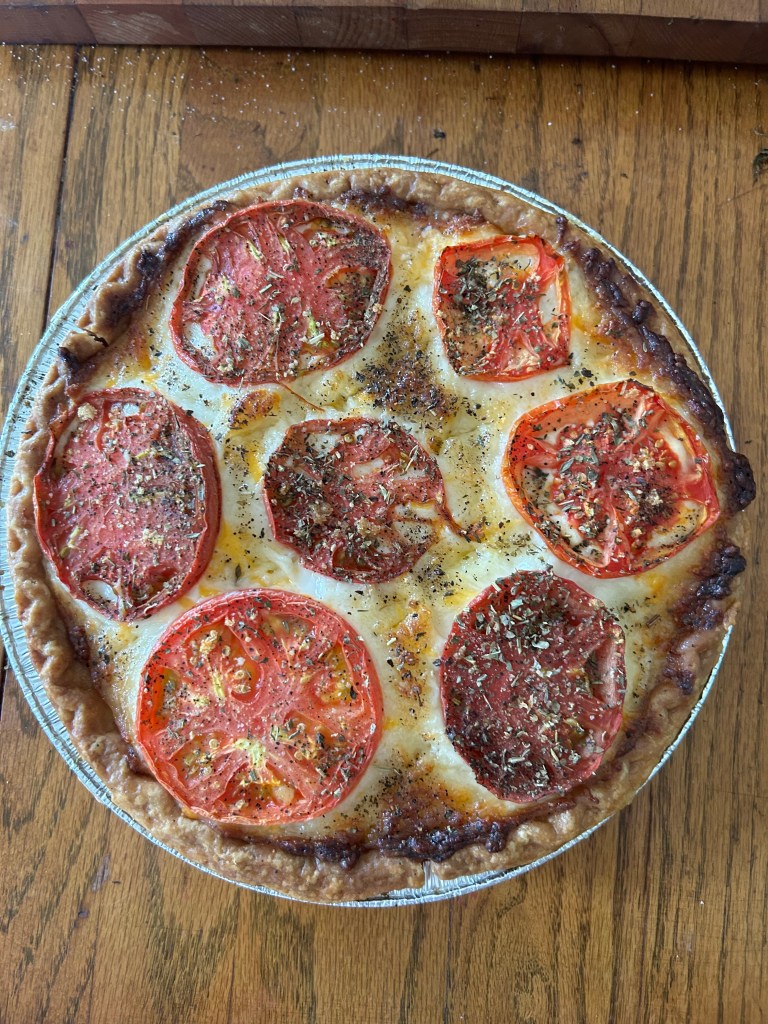
We had two plants from which we harvested the main harvest a couple of weeks ago. Since then, I have been harvesting side shoots. I’ll be making a quiche with these this week.

Again, I intend to plant more of this brassica this fall.
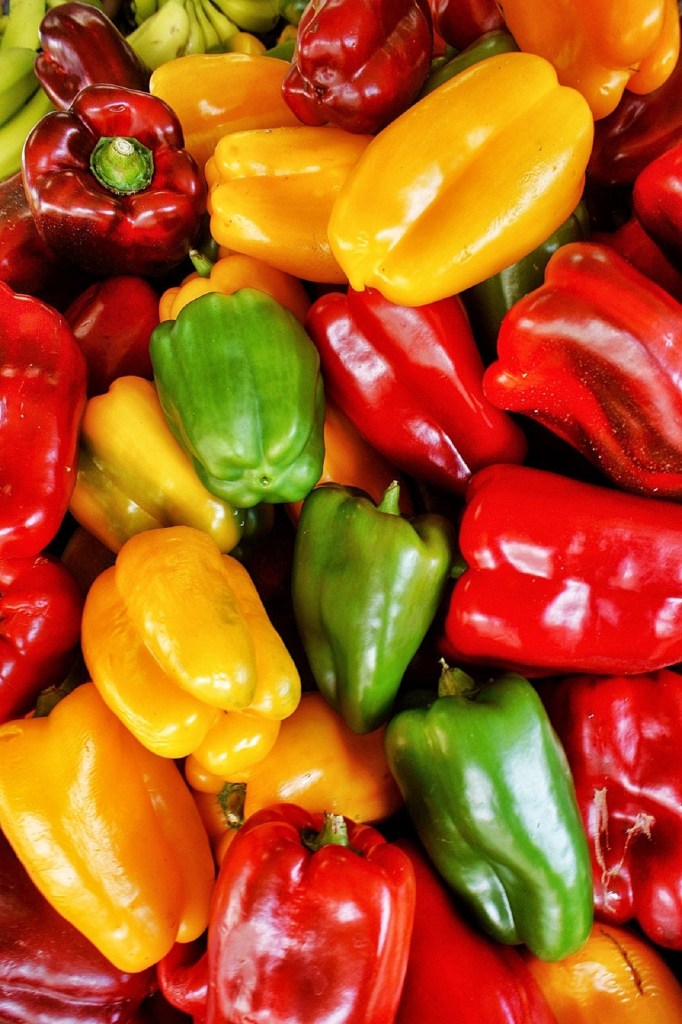
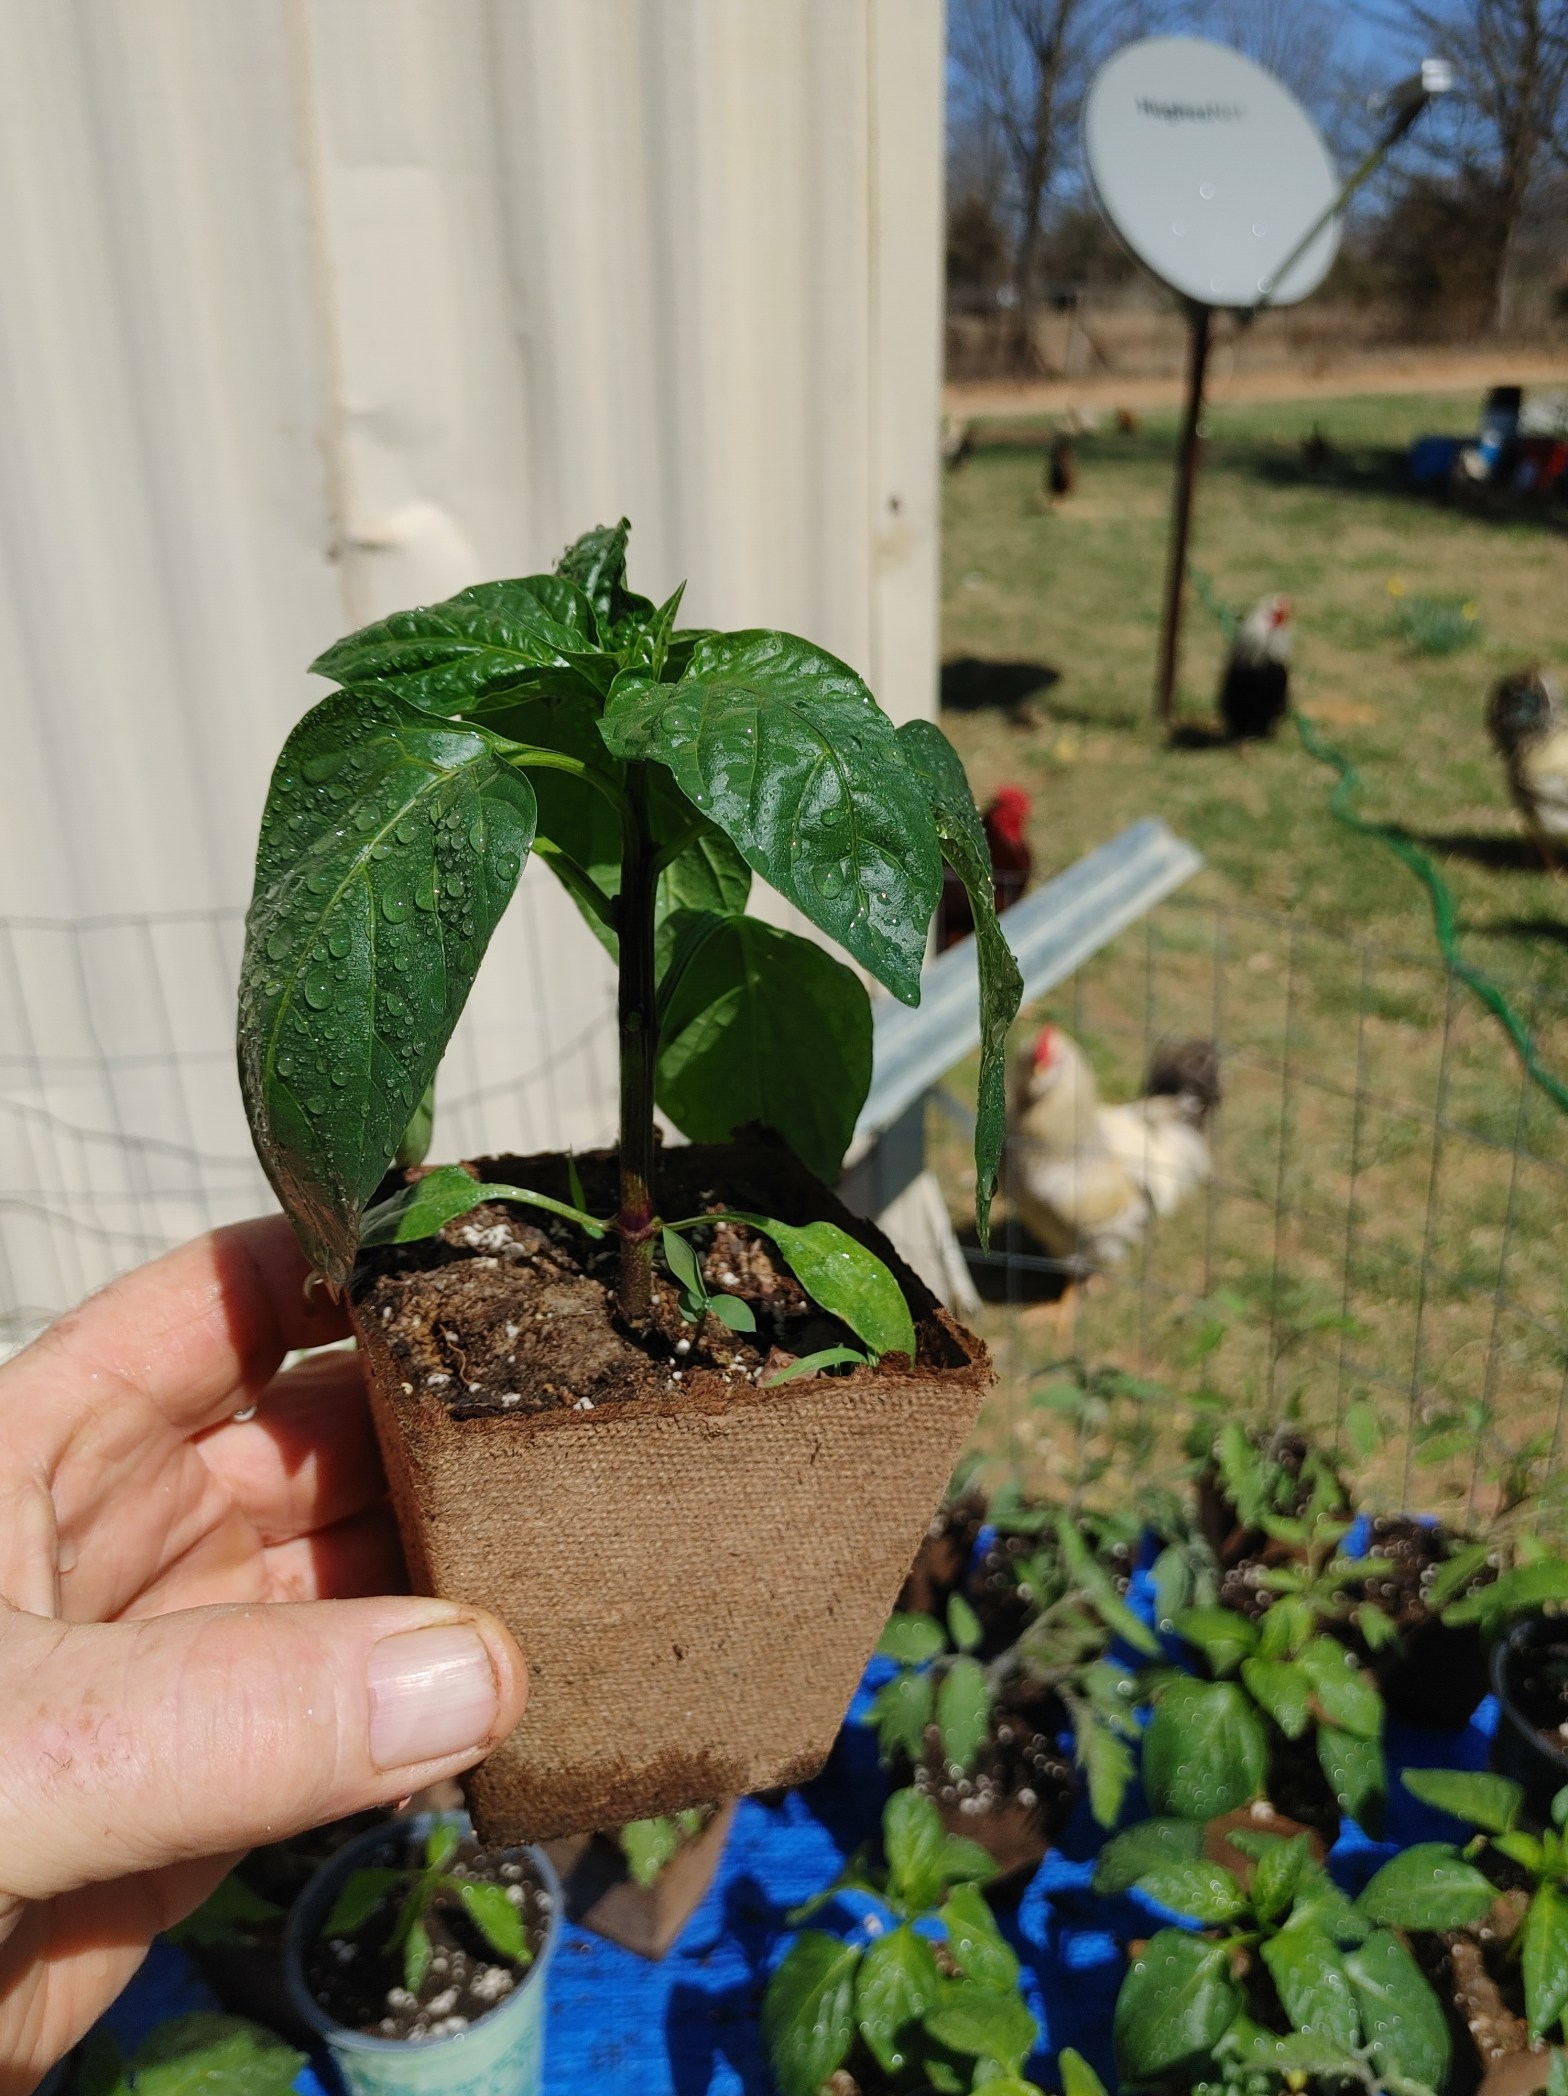
Hot Peppers

We’ve picked a couple of ready hot peppers already so we have used them to season several dishes especially Mexican dishes. There’s more of these to come.

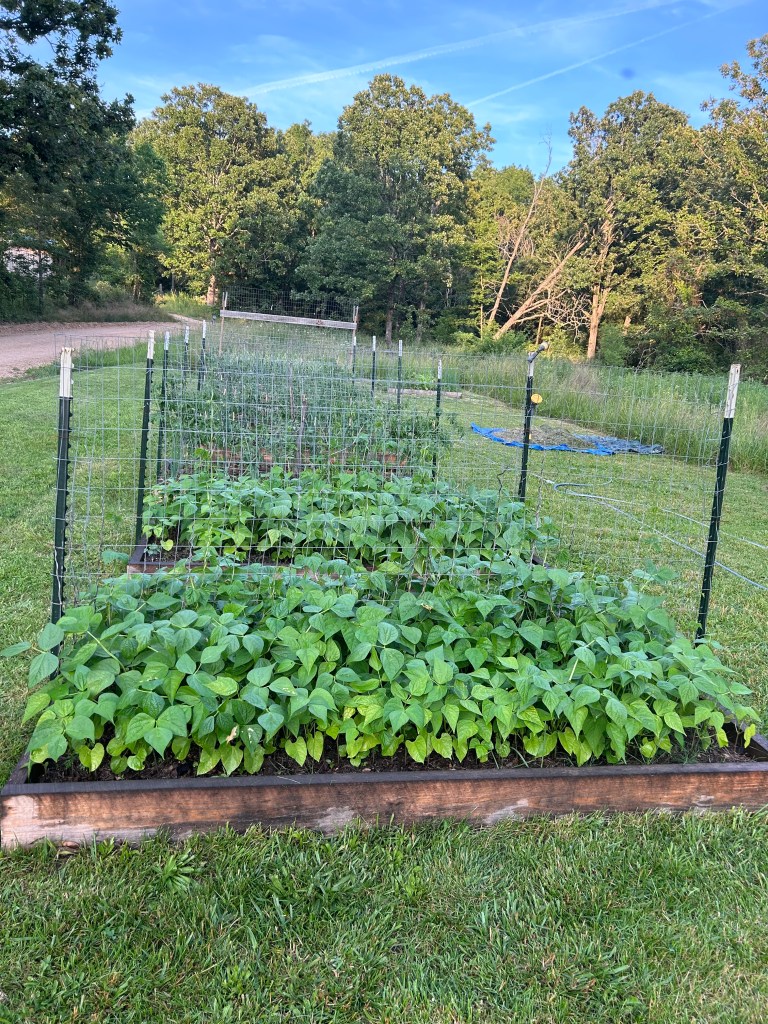
Not All Are Ready to Harvest

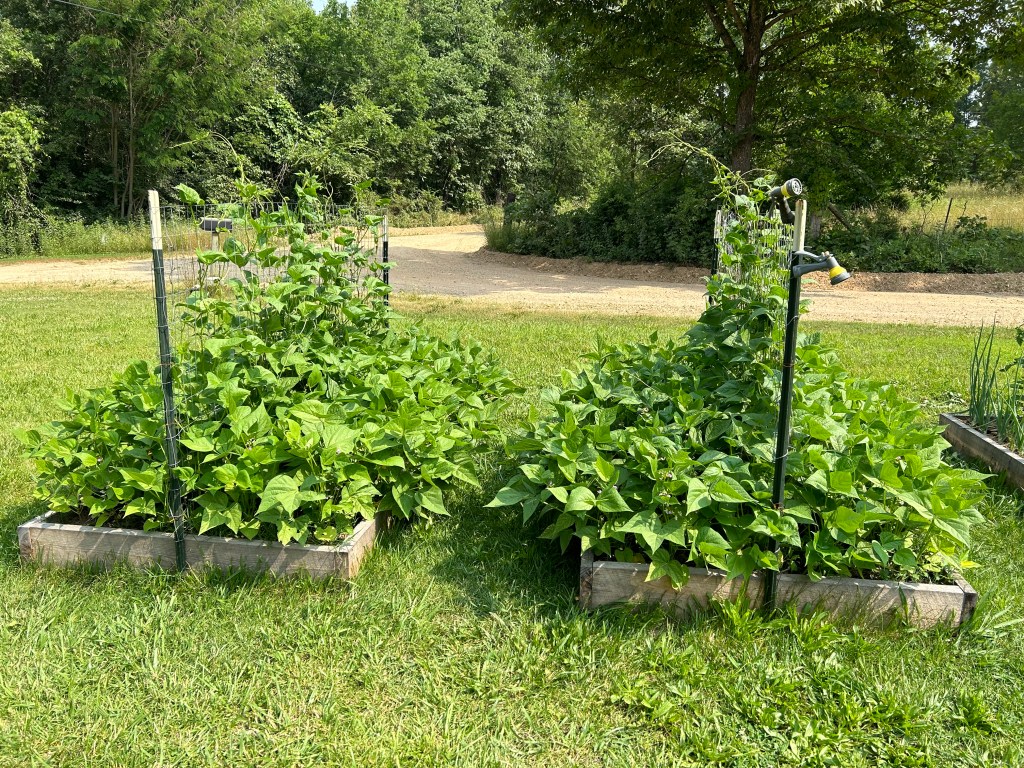
As you can see, we have a variety of vegetables coming from the garden already, and even more to come.

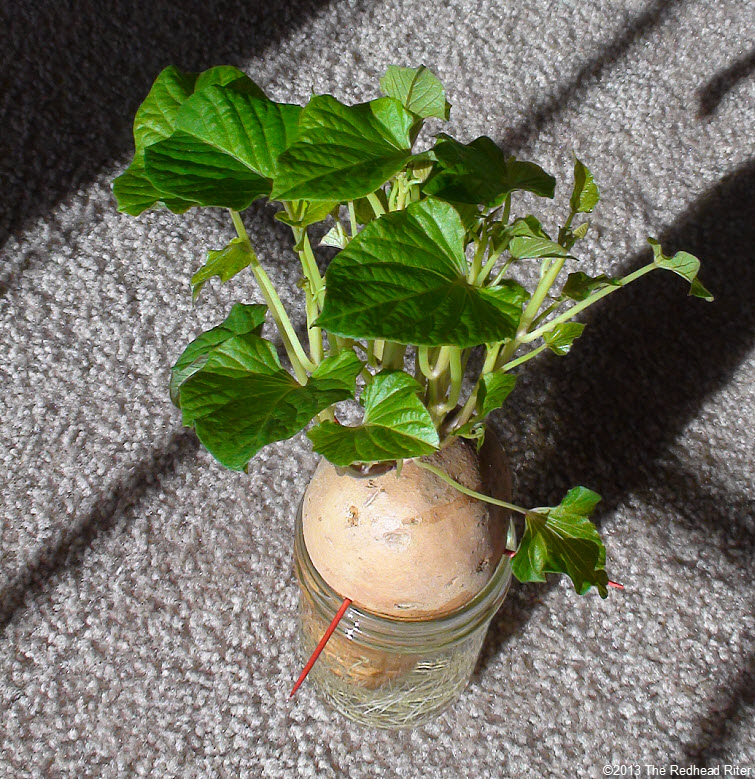
Tomatoes, green beans, sweet peppers, and sweet potatoes are still on the horizon. We’ll eat as many of these fresh as well. There’s nothing like fresh ready to eat vegetables from your own backyard garden.

Are you putting in a vegetable garden this year? I have written several books that can help you get started. All are available on Amazon.

Gourmet Weeds

Gourmet Weeds by Cygnet Brown and Kerry Kelley

https://shop.ingramspark.com/b/084?Bdm3q5kcr0zYvywdeuStOBmX4q0IYJBlMCeUAPi5FNL

Simply Vegetable Gardening

The Survival Garden

The Four Seasons Vegetable Garden

Help From Kelp

Using Diatomaceous Earth Around the House and Yard

https://www.amazon.com/Using-Diatomaceous-Earth-Around-House/dp/1329798775/?_encoding=UTF8&pd_rd_w=Nrcr1&content-id=amzn1.sym.cf86ec3a-68a6-43e9-8115-04171136930a&pf_rd_p=cf86ec3a-68a6-43e9-8115-04171136930a&pf_rd_r=146-8914817-1931602&pd_rd_wg=lPPWg&pd_rd_r=623a17aa-c969-4f8c-ab04-84c3050f6817&ref_=aufs_ap_sc_dsk

Featured

30 Uses for Baking Soda

A couple of weeks ago I bought a ten-pound bag of baking soda even though I have some at home that I am already using. Baking soda never goes bad, and I know I’ll use it so buying it in bulk is never a bad investment.

  1. Of course, use it in baking that calls for baking soda
  2. Use baking soda to make baking powder. Mix 2 parts cream of tartar with one part baking soda and one part cornstarch.
  3. Add baking soda to dried beans when cooking to remove excess gassiness.

Baking soda is a versatile ingredient whose uses extend far beyond cooking. It can be used in personal care, medicinally, for cleaning, and more

What’s more, baking soda is inexpensive and widely available. Never let yourself run short.

Personal Care

  • Use as toothpaste
  • Use as a deodorant
  • Use to replace soap
  • Use as an exfoliant
  • Use to deodorize feet in a foot bath
  • Use in place of shampoo to clean scalp and hair
  • make baking soda mouthwash, add 1/2 teaspoon (2 grams) of baking soda to half a glass (120 mL) of warm water, then swish as usual.
  • Treat itchy or sunburned skin by putting 1 cup of baking soda into a warm bath.

Medicinally

  1. Make a paste of baking soda and a small amount of water to treat insect bites especially good for relieving wasp stings
  2. A teaspoon in 8 ounces of water for indigestion or heartburn
  3. Bathe in a tub filled with water and ½ cup of water to treat different types of rashes
  4. Soaking fruit in a solution of baking soda and water for 12–15 minutes will remove nearly all pesticide residue
  5. Use to treat canker sores in your mouth. Dampen your finger, dab a little baking soda onto that finger, and touch it to the canker sore.

For Cleaning

  1. Use as a deodorizer in the refrigerator
  2. Use it to whiten and disinfect most bathroom surfaces, though it’s less effective than commercial cleaners.
  3. Baking soda is a safe alternative to commercial air fresheners, as it’s free of industrial chemicals and neutralizes odor particles
  4. Clean kitchen surfaces like ovens, stained coffee cups, stained marble, grease stains, kitchen tiles, tarnished silver, microwaves, and countertops.
  5. Add 1/2 cup (110 grams) of baking soda to your regular amount of laundry detergent. It also helps soften the water, so you may need less detergent than usual.
  6. Use to scour sinks, toilets, tubs, showers, and ovens. etc. Just dampen with a little water then rinse.
  7.  Mix a tablespoon in a gallon of water to clean the refrigerator
  8. Use baking soda with vinegar to unclog slow running drain. Pour soda into the drain, chase with some vinegar, and use the drain plug to create pressure to push any clogs beyond the drain trap. Remove the plug and pour hot boiling water down the drain to finish the job.
  9. To get rid of garbage odor, baking soda sprinkled into your garbage can will help eliminate garbage smells by neutralizing acidic odor molecules.
  10. A combination of baking soda and vinegar can remove the most stubborn carpet stains.
  11. Clean silverware with baking soda, vinegar and warm water in an aluminum baking pan. Should remove tarnish almost immediately.
  12. Sprinkle a generous amount of baking soda on the bottom of a scorched pot, and add enough water to cover the burnt areas. Bring the mixture to a boil and empty the pan as usual.

Other Uses

  • Pouring baking soda on a grease fire will put it out so always keep your baking soda easily accessible in case of a fire.
  • Sprinkle a few handfuls of baking soda over weeds in areas like patios and sidewalks where you want to kill off noxious weeds. However, don’t put on flower or garden beds because the baking soda may kill those plants too.

There you have it, my thirty uses for baking soda. Do you know other uses for baking soda? If so, please share them in the comments.

Featured

The Year of the Massive Cicada Invasion

On Saturday, this past weekend, when I was at the farmers market, we were inundated with cicadas. Near where we always set up our canopies on the ground around the tree, the dead cicada insect frass piled up. In addition, to the frass, the cicadas with their transparent wings and red eyes seemed to be everywhere. They hung around us and didn’t seem to be afraid of us. It almost seemed to enjoy human company.

The insects are loud, sounding a lot like the phasers used on Star Trek. Fortunately for us, they are harmless.

Conversation At the Farmers Market

One man who came to my booth had a cicada perched on his finger as if it were a trained bird.

After the man left, the woman next to me and I talked about these insects. She said that one morning, a couple of weeks ago, she woke up and heard a loud sound that she thought were frogs.

She told her husband. “Boy, the frogs sure are energetic today.’

“They aren’t frogs. They are cicadas.”

She then told me about how she had always associated the sound of cicadas with the fall when the annual cicada hatching occurs here in this region.

These were a special hatching of not just one type of cicada but two kinds. One type came out every thirteen years and the other every seventeen years. They only come out during the same year once every 221 years and this year is that year. The last time these hatchings occurred simultaneously was in 1803 when the Lewis and Clark expedition began. This particular event is particularly important to me because my next book Two Rivers is a fictionalized account of this expedition.

Deep-fried Cicadas anyone?

Another friend told me that she noticed more moths, butterflies, and bees where she lived since the cicadas started coming out. She wondered if the cicadas had anything to do with it.

If I were to guess why that might be, I believe that the trillions of cicadas invading our landscape might have something to do with this, because all kinds of birds and animals love eating cicadas which are high in protein. Even my chickens will eat cicadas before they will eat the chicken feed I give them.

The moths, butterflies, and bees are probably usually on the menu for the animals eating the cicadas, but this rare dish is preferred so they are leaving these other flying insects alone.

I have heard that there are people who also enjoy eating cicadas. For instance, some people like them deep-fried or in stir fry.  

As for me? As one of my friends says, “It’s a hard, no. I’ll pass.”

Gourmet Weeds

Gourmet Weeds by Cygnet Brown and Kerry Kelley

https://shop.ingramspark.com/b/084?Bdm3q5kcr0zYvywdeuStOBmX4q0IYJBlMCeUAPi5FNL

Simply Vegetable Gardening

The Survival Garden

The Four Seasons Vegetable Garden

Help From Kelp

Using Diatomaceous Earth Around the House and Yard

Featured

Beans, Planting, Canning, and Harvest

Sometimes the best defense is a fence

Tis the season to be gardening and I have been doing exactly that. On Tuesday this past week,  I finished planting my summer garden.

this week, I canned kidney and pinto beans. I also planted pole beans and harvested lettuce.

Planting Pole Beans

I planted the pole beans next to one of the fences where we had planted the tomatoes last year. I believe that rotating vegetables into different garden areas is important to prevent diseases from building up in the soil.

I dug the soil around the fences, but just immediately around the fences. I plan to mow the grass between the beds to keep it short.

As I was planting the pole beans, I noticed the bush beans I had planted last week were germinating.

Three Reasons That I Can (Bottle) Dried Beans

Some years ago, I started canning dried beans. So why do I can dry beans when they will store just indefinitely in the dried form or purchase beans that are already canned? I have two reasons.

  1. The first reason for canning beans is that by buying beans in their dried form, I can purchase them cheaper than the same kind of beans already canned.
  2. Although I could cook the dried beans as I need them, it’s still cheaper to can several meals worth of beans all at one time. The process uses less energy to do several meals using the same energy as it does to prepare beans for one meal.
  3. In addition, in the summer, having beans that are already canned heats up the house less than cooking the beans in dried form. This will help keep your home cooler during those warm months. Plus, simply heating a can of beans rather than cooking those same beans requires less time to cook at meal times. No extra time required for a good home cooked meal.

How I Can Dried Beans

The canning beans process began Monday night when I soaked the beans for the next day.

The Night Before

First, I needed to decide how many jars I wanted to can. Once I knew how much I wanted to can, I could determine how many beans I needed to help fill those same jars. To determine how many beans it will take to fill the jars, I use ½ cup of dried beans for every pint of canned ones. It was just a matter of math to multiply how many pints I would can the next day. I measure out one-half cup per pint for each jar that I plan to can the following day. (For instance, if I have seven pints to can, I’d measure out 3 ½ cups of dried beans.  I washed the beans and covered them with water to soak them overnight.

Canning Day

 In the morning, I washed the beans again. I covered the beans with water again and boiled them at a full rolling boil for about ten minutes. I rinse the beans one more time before putting them in jars. Next,  I add ½ teaspoon of salt for each pint.

 I pressure canned for 75 minutes for pints or 90 minutes quarts at 10 pounds of pressure where I live. For individuals living at altitudes greater than 1000 feet above sea level, increase to 15 pounds of pressure. Once done, I allow the pressure to release naturally and remove jars from canner.

Once the pressure is down to zero, I remove the pressure weight. I lift the lid carefully avoiding the steam when removing the lid. I use a jar lifter to remove the jars. I set the jars on a clean dry towel where I left the jars until the following morning.  I now have an additional 15 jars to add to my pantry to add to future homemade dishes.  

The Gardening Cycle Completes

Now that the garden is totally in, I am already harvesting lettuce from the garden. As the lettuce comes out, I’ll prepare the soil to put something else into the space vacated by lettuce. I probably won’t do anything right away because I plan to do the entire garden bed soon.

If you’re interested in putting in a vegetable garden this year, I have written several books that can help you get started. All available on Amazon.

Gourmet Weeds

Gourmet Weeds by Cygnet Brown and Kerry Kelley

purchase online

Simply Vegetable Gardening

The Survival Garden

The Four Seasons Vegetable Garden

Help From Kelp

Using Diatomaceous Earth Around the House and Yard

Featured

We Couldn’t Pass These Up!

Blackberry plants in ground and mulched with chicken litter and grassclippings

Even though blackberry plants were not on our radar this year, we found such a great deal on them that we couldn’t resist picking up five healthy plants to plant.

At the farmers market last week, one of the Amish families was selling blackberry plants that they had dug up that morning. The blackberry plants were healthy and ready to be put in the ground. I got five plants for just $10. The same five plants would have cost me over ten times as much for the same Triple Crown thornless blackberries. We bought them on Saturday and then planted them on Sunday.

For the planting location of our blackberries, we decided to plant the blackberry plants close to the garden area because we wanted to make watering them as handy as watering the garden. We planted them in a location in the full sun. We planted them in rows going east to west which allowed them to have access to the full sun all day long. We planted them in a straight line along the ridge for another reason too. We planted them in a way we could offer them support which I will explain later in this post.

My husband dug the holes and the two of us amended the soil in the holes with some organic amendments including mycorrhizal fungi so that the plants would more quickly adapt to the surrounding environment.

The blackberries were planted to the same depth to which they had been previously growing. Once they were planted, I mulched them with cardboard and then used small chunks of wood to hold the cardboard in place. We didn’t water them because it had rained the night before and it was going to rain the following night as well.

Cleaning Out the Chicken House

I always like combining projects to complete so I decided to clean out the chicken house and use the nitrogen and carbon-rich material on the blackberries.

Once the blackberries were planted and mulched with cardboard, we knew that we needed to cover the cardboard with another type of mulch. We could have used grass clippings, but since we had to clean out the chicken house anyway, we had used pine shavings in the chicken house. Pine shavings are acidic so I knew that this chicken house litter was perfect to use for mulching the blackberries.

Because it was raining and I couldn’t do much else, I went to the feed store on Monday to pick up new shavings to replace the shavings in the chicken house. By using this chicken manure enabled me to kill two birds with one stone. I cleaned out the chicken house and mulched the blackberries. On Tuesday evening, I replaced the old shavings in the chicken house with the new ones and used the used shavings and the chicken manure to finish mulching the blackberries. Once the manure was in place, we topped the bed off with grass clippings from our yard.

Providing Supports

Once the blackberries were mulched, it was time to support them. Supporting the blackberries will not only make it easier for us to harvest the berries when they ripen, but it also allows for good airflow which prevents various plant diseases.

We put up a fence on the south side of the blackberry plants. We placed the posts south of the plants and the wire on the north side of the posts between the posts and the plants. This way, the blackberry plants leaned against the wire and the wire leaned against the posts because the plants would lean toward the sun in the south.

Purchase Our Gardening Related Books

Gourmet Weeds

Simply Vegetable Gardening

The Survival Garden

The Four Seasons Vegetable Garden

Help From Kelp

Using Diatomaceous Earth Around the House and Yard

Featured

Planting the Main Garden

Small apples are on the trees, irises are in full bloom, trees have for the most part leafed out, and most importantly, we have just had blackberry winter. What is blackberry winter? Well, here in the Ozarks, when the blackberries are in bloom, we get our last patch of cold weather and after that, it’s time to plant the main garden plants like tomatoes, peppers, eggplants, and pole beans.

Here was last year’s garden. This year’s will be even better!

Preparing Tomatoes and other transplants for Planting in the Garden

To prepare the transplants I planted over the winter, I first have to “harden the plants off”. Hardening off the plants is the preparing the plants to go outside.

How to Harden Off Plants

You see, plants can’t handle direct sunlight. They have to ease into the sun just like we have to tan to prevent sunburn. To prepare the plants, we have to put the plants outdoors for short periods and gradually increase that time until the plants are no longer negatively affected by all-day sunlight. During this time we have to ensure that the plants have plenty of water, much more than we might otherwise have done before introducing the plants to sunlight. On hot, sunny days, the plants are especially vulnerable.

I give the plants ample time to harden off and start the process long before I plant the transplants in the garden. When cold weather or even nights occur, I brought the transplants into the warmth of the house. If the days were especially cold, often I would keep the plants indoors for a couple of days and then take them back out when the temperatures were above 50 degrees F (10 degrees C) during the day. As time went on, I started leaving the plants outside when the temperatures were above 50 degrees F (10 degrees C), but I decided not to plant them until after Blackberry winter occurred. Then I’d know we weren’t likely to have any more overnight frosts.

Planting Outdoors

During this past week, we had our last frost early in the week and then the blackberries were in bloom. When temperatures went above 70 degrees during the day and in the evening before a night of rain was expected, I planted our tomatoes, peppers, eggplants, onions, and a few annual herbs in the garden beds.

We have eight 4×8 foot raised beds that we surrounded with the fence this year and another larger bed outside the area where we planted potatoes and are using grass clippings to mulch the bed. Our grass-catching lawnmower makes it easy to collect the grass and dump it onto the bed.

In two beds, I put determinant paste tomatoes along with onions, lettuce, swiss chard, and basil. In most of the other beds, I put in the slicing tomatoes, peppers, eggplant, and more onions. I had one bed that I had not yet completely planted, except for tomatoes and some onions.

More to Do, But the Weather Isn’t Cooperating Right Now

I still need to finish that last bed, but right now the rain has kept us out of the garden for the past several days. We’ll be doing more when the rain lets up for a day or so. I’m not complaining though. It is April and we need the rain.

If you’re interested in putting in a vegetable garden this year, I have written several books to help you get started. All are available on Amazon.

Simply Vegetable Gardening

The Survival Garden

The Four Seasons Vegetable Garden

Help From Kelp

Using Diatomaceous Earth Around the House and Yard

Featured

The Fruitful Corner Behind the Barn

Mullein (strawberry plants are in the background

Behind one of my sheds is a patch that I don’t have to plant, weed, or fertilize anymore. It can’t even be called a bed because it’s just a collection of plants that are growing as companions to one another. Every one of these perennial plants has a use. Some are for food, some for flavoring, and some for eating either fresh or cooked. In this small space, there is a plant that I can use for the next several months.

First, there’s what I planted there. Originally, I had planted garlic in that area along with these vegetables. The garlic is long gone and the offspring of the original plants have moved to other parts of the garden.

What I Planted

Aspargus and Burdock

Asparagus

I planted asparagus from seed in the autumn of 2019 because I planned to move to our place in the summer of 2020. Instead, because of the pandemic, I moved here in the spring and planted them behind the barn so that they wouldn’t be in the way when they brought our mobile home onto the property. The asparagus could have been picked earlier this spring, but I didn’t realize it was ready as early as it was, I will be paying more attention to it next year. The asparagus is in its permanent location.

Strawberries

That same season, I planted strawberries alongside the asparagus and I have been getting a few berries from the plants for several years. I haven’t had as many as I would like, but I plan to transplant some of them this fall into a better gardening area.

Not only are these delicious berries, but the leaves are also edible. They contain several vitamins and other health benefits. Vitamin C (an antioxidant), calcium (can help with bone health), and iron (can improve red blood cells) are found in the leaves.

Strawberry leaves contain low levels of tannins that serve to help with an upset stomach, cramps, or bloating. 

Oregano with thyme growing beneath its leaves

Oregano and Thyme

I planted oregano and thyme in a small bed in 2020 soon after I moved here. Both can be used fresh and then I dry some for the winter months to use as seasonings. The oregano tends to overtake the bed in the early spring. Although you can’t see it, under the oregano, the thyme grows protected from the heat of summer. When the oregano dies back later in the season, the thyme will take its place in the cooler autumn months.

Oregano is not just a tasty herb. It also is rich in antioxidants, has antibacterial and anti-microbial, and potential anti-cancer properties, and is an anti-inflammatory.

Thyme helps reduce blood pressure, and foodborne bacterial and yeast infections, increases the stability of cooking oils, and improves common skin conditions including acne. Some people claim that it helps against several types of cancer. It can be used to kill the tiger mosquito.

The Weeds

Even though I planted the above plants, there are other plants in this “garden” which I did not plant, but are highly useful for food and medicine.

Lambsquarters

Lambsquarters

Lambsquarters is one of my favorite edible herbs. This herb I have eaten raw in salads and have eaten it cooked and eaten in place of spinach many times. This plant is rich in antioxidants. Lamb’s quarters promote circulation, are good for eye health. Some people believe that it could hasten the healing process and help the body detoxify. It may be good for skin health because it is rich in vitamins and minerals. It may also be good for respiratory health.

Plantain

Plantain can also be eaten raw or cooked. I have also infused it into coconut oil and then combined it with beeswax to make a salve as an effective treatment for insect bites.

Burdock

Burdock roots and leaves can be cooked and eaten. Burdock root has several health benefits. It is a rich source of antioxidants, which help protect your cells from damage and thereby help reduce your risk of chronic diseases, like diabetes, high blood pressure, arthritis, and even some cancers.

It aids in digestion and improves gut health as a source of inulin, a prebiotic fiber. It also contains flavonoids (plant nutrients), phytochemicals, and antioxidants that are known to have health benefits.

Mullein

Mullein is a plant that has many health benefits, especially for respiratory problems, ear infections, and skin conditions. The leaves of the mullein can be made into a tea that helps reduce inflammation, fight infections, loosen mucus, and soothe irritation in the lungs and airways.

The flowers can be made the flowers into an extract, tincture, or steam, (I have made an oil with mullein) to use for ear infections to reduce pain, swelling, and infection in the ear canal. Do not use if you have a ruptured eardrum or fever.

Always consult a doctor before using any of the above remedies suggested above.

If you’re interested in putting in a vegetable garden this year, I have written several books that can help you get started. All are available on Amazon.

Simply Vegetable Gardening

The Survival Garden

The Four Seasons Vegetable Garden

Help From Kelp

Using Diatomaceous Earth Around the House and Yard

Featured

A New Kind of Revolution

KONICA MINOLTA DIGITAL CAMERA

This week we celebrate the 249th anniversary of “The Shot Heard Around the World.”

Did you know that the American Revolution didn’t begin when the first shot was fired at Lexington Green in 1775? They started the revolution shortly after the Seven Years’ War (French and Indian War) because the British wanted them to pay taxes to pay what the crown felt was their fair share of the war debt that Britain had acquired.

The British tried to use taxes to collect the revenues from the Americans to pay those debts. However, Americans didn’t like that idea, so they did what they could to prevent the crown from getting any of that money.

Before and during the American Revolution Americans refused to purchase items that were taxed from Great Britain. The British tried to require that Americans buy their goods only through British companies. There was the Stamp Act which required that all goods have a royal stamp if they were to be sold. This didn’t sit well with the American public so the idea of the Stamp Act ended. They tried other ways to deal with the tax deficit. They also refused to provide military for the frontier as a way to keep expenses down. The next thing they tried was the tea tax which led to what became the Boston Tea Party. After that, the Monarchy put its foot down. It was time to put the colonists in their place. Troops were sent to put the rabble-rousers primarily in Boston in their place.

In the meantime, Americans learned to make their own or do without. They learned to grow what they could. They created their herbal remedies and grew flax and sheep so that they could spin yarn and thread to produce their clothes. They harvested animals, nuts, fruits, and vegetables from the surrounding woodlands and fields.

On April 19, 1775, these Americans faced down British regulars and let them know that they weren’t going to take it anymore. This shot heard around the world changed things because a few people decided that enough was enough and they were going to take back control of their lives.

Today, we face a similar situation. We don’t have the say we used to have 60 years ago. Today, four companies control all of the US meat industry. Twenty-five companies control most of the American egg market. Most of our fruit and vegetable companies are being bought out by huge conglomerates like Amazon (recently bought Whole Foods), Walmart, and Target. The adoption of technologies like AI-powered irrigation systems, vertical farming, and robotics is gradually impacting production and distribution processes, offering avenues for future innovation, but is that what we want?

We can feel that there is something wrong with the system. We realize that we have gotten away from our roots.

Lately, I have seen a lot of people complain about the price of everything. This is why I have been trying to produce more of our eggs and vegetables. The price of food, fuel, housing, debt, and all of it. Who’s responsible for the plight we are in?

We can fight back and fighting back begins with producing your own. Like the Minute Men of 1775, we can purchase a small homestead (1-3 acres can produce a lot!) in a rural area. We can pay off our debt as quickly as humanly possible. We no longer need to worry about the daily commute because we now have the internet in many rural areas, and it is becoming easier to find ways to work from home.

We can fight back with shovels and hoes, a computer, and a chicken house. Perhaps even a goat dairy. Is it work? Yes. Is it doable? Yes. We just have to allow ourselves to believe that it is possible.

This Week In My Garden

This week, the leaves on the trees have begun to unfurl green at the end of their branches. Fruit trees and dogwood trees are now in full bloom. It’s time to plant more in the garden. Oak tree leaves are past the size of baby squirrel ears.  If we were growing corn, now would be the time to plant that. However, this year, we will not be growing corn, but I planted celery and herb plants in the garden this past week.

I planted the celery and the herbs in one of the beds where I had planted garlic last year. In the other garlic bed, the cabbage and lettuce plants that I planted last month have been established and are growing well. It won’t be long before I will be able to harvest them and use the greens in meals.

My husband and I live in a small mobile home in the country and it’s big enough to raise a large garden, chickens, and other animals. We have no debt and our annual property taxes are low. So why doesn’t everyone live our lifestyle?

If you’re interested in putting in a vegetable garden this year, I have written several books that can help you get started. All are available on Amazon.

Simply Vegetable Gardening

The Survival Garden

The Four Seasons Vegetable Garden

Help From Kelp

Using Diatomaceous Earth Around the House and Yard

Soldiers Don’t Cry, the Locket Saga Continues in the Locket Saga is about the beginning of the American Revolution that I’m sure you’ll enjoy.

Featured

What to Do If Your Plants Are Too Big for Their Containers

healthy young tomato plants
Healthy young tomato plants in peat pots

I still have a few weeks before I can safely plant the tomatoes in the garden. However, the tomatoes have outgrown their pots so I need to transplant them into bigger containers.

How to transplant tomatoes

At this point in a tomato plant’s growth, it is important to plant them in a large enough container to allow them to grow deep roots, but not so big that it makes transplanting more difficult later. Ideally, when I am ready to put the plants in the ground, the roots need to fill the container so that the plant easily slides out of the pot. If the plants haven’t grown enough to fill the pot, the soil around the tomato plant will spill out everywhere. So judging the size of the transplant container is important. Also, be sure that each pot has proper drainage because you don’t want the plants to become water-logged.

Once you have the containers that you need to transplant your tomatoes, you will need to get good soil to plant your tomatoes in. You don’t want to transplant into the same kind of soil in which you started your seedlings, nor do you want to use just garden soil. When I transplant into larger containers, I like to use a combination of the seedling medium and the garden soil so that the tomatoes can begin adjusting to the denser garden soil. Be sure that you have properly moistened the soil with enough water to moisten the soil, but not so much that it is saturated. Ensure that the soil is moistened to the dampness of a rung-out sponge.

Next, you’ll want to add organic amendments to your soil. At this stage, you can add amendments that promote growth.

Once you have your pots and amended soil, it’s time to transplant the tomatoes. Put enough soil in the bottom of each pot so that only the plant’s leaves are above the soil. Do this because the tomato stem below the soil will sprout roots instead of leaves and you’ll develop a better root system.

Fill the pot around the tomato plant with soil and then saturate the planted tomato with water allowing the excess water to drain out the bottom of the pot. Now put your tomato plants back under lights or in a sunny spot and monitor them twice per day for the first few days to ensure that they stay hydrated. Water the plants as needed.

If you’re interested in putting in a vegetable garden this year, I have written several books that can help you get started. All are available on Amazon.

Simply Vegetable Gardening

The Survival Garden

The Four Seasons Vegetable Garden

Help From Kelp

Using Diatomaceous Earth Around the House and Yard

Featured

Does Gardening Really Help Your Emotional Health?

A few days ago, someone asked me why I thought everyone was so angry and unhinged all the time and I said that I thought it was because they weren’t spending enough time getting their hands dirty.

There’s science behind the idea of the emotional benefits of gardening. Scientists have long wondered whether humans boast this kind of magnetoreception like animals do. By exposing people to an Earth-strength magnetic field pointed in different directions in the lab, researchers from the United States and Japan have discovered distinct brain wave patterns that occur in response to rotating the field in a certain way.

These findings, reported in a study published online March 18 in eNeuro, offer evidence that people do subconsciously respond to Earth’s magnetic field — although it’s not yet clear exactly why or how our brains use this information. Digging in the garden, we ground ourselves into that magnetic field.

Gardening offers numerous psychological benefits that can improve mental and emotional health1234. These benefits include anxiety and stress reduction, attention deficit recovery, decreased depression, enhanced memory retention, and improved attention.

Gardening also promotes self-esteem and promotes creativity.

Therefore, if you want to improve your mood so that you’re not so irritable if at all possible, dig up some ground and plant seeds or transplants there. Not only will you have something that you can eat or benefits your view, but you also have something that might work better than a trip to the psychologist’s couch to improve your emotional and mental health.

Need More Gardening Information?

If you’re putting in a vegetable garden this year, I have written several books to help you get started. All are available on Amazon.

Simply Vegetable Gardening

The Survival Garden

The Four Seasons Vegetable Garden

Help From Kelp

Using Diatomaceous Earth Around the House and Yard

Featured

Rambling in the Garden

Last Year’s Garden

During the past couple of weeks, we have been planting potatoes, onions, lettuce, and brassicas in the garden.

One of the ways that we grow potatoes is in fabric bags. We used the same bags that we used last year and put different soil in the bags. Another way that we planted potatoes was directly in the ground. Right now we don’t have a lot of mulching material with which is why we put the potatoes directly in the ground.

I planted the greens in the garden bed with the garlic that I planted last fall. I don’t have as much garlic this year as I had hoped because chickens loved digging in the dirt around the garlic and now much of it isn’t growing. The chickens in the garden was one of the prime reasons that we erected a fence around the garden.

We planted some of the potatoes in the ground outside of the fence and the chickens have decided now that they would dig in that bed instead. Because of that, we now close up the chickens most of the day and just let them out of their pen in the evening while I clean out their pen, gather eggs, and give them clean water and food. When the potato plants are well established, I’ll let them roam the property again, but until then, they will stay in the chicken house most of the day.

 We’ve been putting other plants out on a table on the south side of the house to give them more sunlight during the daytime and then we take them in at night because the outdoor temperatures are too low for plants like tomatoes, peppers, eggplants, and some herbs.

A Spiritual Aspect to Gardening

When I work in the garden, I connect my gardening activities with my spiritual thoughts. This is especially true during religious holidays like the one we’re celebrating this week.

This week is called the Holy Week or Passion Week following the pattern of the Roman Catholic Church. This year the Orthodox Catholic Easter occurs on May fifth. The Christian Holiday is based on Passover even though Passover isn’t until the end of April.

With this in mind, here’s how I relate gardening to a spiritual experience.

  1. Just as the beginning of spring is for these religious organizations. For the Jewish people, the same time of year commemorates their escape from the bondage under the Pharaoh who had enslaved them. For Christians, spring is the time when Christ who was crucified at Passover rose again three days later. This time of year is when winter lets go of its hold on the world around us and allows nature to burst into new life.
  2. I can see God’s gift of eternity through the change in the seasons. He’s telling us that even though something seems dead, life continues. Jesus had said that “unless a grain of wheat to the ground and dies”, the plant could not grow. He was speaking of his own death.
  3. Like the cotyledons (the leaves before the first set of true leaves) that rid the plant of the seed hull, the Passover started Israel’s journey from slave to free people. Lambs died so that their blood could be spread over the lintels of the doors so that the firstborn children could live. Because of this, the Pharaoh had to let the people of Israel go.

If you have enjoyed my gardening rambles, please like and comment below. If you don’t like my ramblings, let me know that too!

Also, if you enjoy gardening as much as I enjoy it, check out my gardening books below.

Simply Vegetable Gardening

The Survival Garden

The Four Seasons Vegetable Garden

Help From Kelp

Using Diatomaceous Earth Around the House and Yard

Featured

Is Prepping Biblical?

I know this blog post is different than most of my posts here on The Perpetual Homesteader, but I wanted to get a few things off my chest that I hope will benefit you.

As a gardener and having been a Christian most of my life, I have found certain people unnerving. There are a couple of things that I noticed about people since I have been writing and selling my books and produce at the farmers’ market.

What Some People Say

The first thing was that there are times that people look at the fact that I am selling books and say that there is only one book that they read and that is the Bible. At first, I felt they were trying to make me feel guilty, but then I realized that their attitude has more to do with them than it does with me. I probably have read the Bible more times than they have, and perhaps the only Bible they read is what the pastor reads out in church. It could also be that they are afraid to read anything that might make them question their faith. Perhaps they just have difficulty reading and don’t want to admit it.

In addition, I am on several prepping groups on Facebook and occasionally, there is someone who presents the idea that they don’t have to prep for bad times because they “are trusting God to take care of them” or that they will be “raptured out” so why would they need to prep for the apocalypse.

What Does the Bible Say?

I won’t say anything against the idea of being “raptured out”, because I could write a convincing article myself about the possibility of Christians not having to face the wrath of God, however, is that a good reason for not prepping for a major disaster in the future?

I don’t think so. First of all, if the past is any reflection of the future, there are thousands of examples in history where if a person wasn’t prepared for a famine or whatever, they died. No matter their religious affiliation, if they didn’t have food, God didn’t save them. They died of starvation.

If we’re Christian or Jewish, we should all know the story of Joseph, the son of Israel (Jacob) whose brothers sold him into slavery. Genesis chapters 37-50  and who ended up saving their lives when there was a famine in the known world for 7 years.

If you notice, there’s a part of the story here that few people notice. After the Israelites were rescued by Pharaoh from certain death, they became slaves to the system that Pharaoh had set up.

At first, it wasn’t too bad, but over time, the system became unbearable.

We too may be finding that we are in a system of debt that is enslaving us and that we need to free ourselves from. By returning to our calling of tending the garden, we are better able to be freed from this system.

God’s Past Interventions

I can hear right now where someone is going to point out the fact that God sent manna from Heaven to the Israelites for forty years while they wandered in the desert. They might even point out how Hanukkah began because the Menorah stayed lit for eight days during a particularly bad time in Jewish history as well.

Also, if they know American history, they might point out that the Separatist Pilgrims almost starved during their second winter but were saved when a ship from Jamestown brought a shipload of food to them.

Yes, the Lord provided for them and helped them survive, but there’s more to this PIlgrim story. They realized that they needed to change the way that they produced food. They realized that instead of having a single farm, they each needed to have their own garden areas. After they did that, they learned that they had more than enough to provide for themselves and enough to pay back what they owed for their passage across the ocean.

I can hear you now. Nice history lesson, Donna, but that still doesn’t tell us whether prepping is Biblical or not.

So, let’s look at what the Bible said to others in the Bible.

First, there’s Adam. God told Adam to till the ground even before the fall. By planting a seed and tending the garden, Adam was putting up food for the future.

Here’s another verse from Proverbs

“Go to the ant, O sluggard,” he says. “Consider her ways, and be wise!” (Proverbs 6:6 ESV).

To be a sluggard is to be “a habitually lazy person.” Sluggardly character is like a slothful character, which is also often referenced in Scripture and means a “disinclination to action or labor; spiritual apathy and inactivity.”

Those who do not work hard are not viewed neutrally: “Whoever is slack in his work is a brother to him who destroys” (Proverbs 18:9 ESV). We are warned: “Love not sleep, lest you come to poverty; open your eyes, and you will have plenty of bread.”

The Bible is clear that those who seek to honor God will be committed to meaningful action. “Be doers of the word, and not hearers only,” says James. And Paul agrees, exhorting believers: “Whatever you do, work heartily, as for the Lord and not for men” (Colossians 3:23 ESV) and “If anyone is not willing to work, let him not eat” (2 Thessalonians 3:10 ESV).

It has only been since the 1850s that people have been purchasing more of their food from a grocery store. Before that, most of the food was purchased or traded with those who lived nearby who had something that another person wanted. Here in the US, often the purchasing power came in the form of furs that traders took in exchange for their goods. It has only been since the 1970s that rural Americans began depending more on grocery stores and less on their ability to grow fruits and vegetables themselves.

Whether we purchase what we need or learn the skills to grow our own, the Bible never does tell us not to provide for the future.

Well, you say, yes it does. What about this passage in Luke 12:16-21?

And he (Jesus) told them this parable: “The ground of a certain rich man yielded an abundant harvest. He thought to himself, ‘What shall I do? I have no place to store my crops.’ “Then he said, ‘This is what I’ll do. I will tear down my barns and build bigger ones, and there I will store my surplus grain. And I’ll say to myself, “You have plenty of grain laid up for many years. Take life easy; eat, drink and be merry.”‘ “But God said to him, ‘You fool! This very night your life will be demanded from you. Then who will get what you have prepared for yourself?’ “This is how it will be with whoever stores up things for themselves but is not rich toward God.”

Before the verses stated above, Jesus had been in the middle of teaching when a man shouted, “Teacher! Tell my brother to divide our father’s inheritance with me” (v.13).

The first response from Jesus was to explain that wasn’t His job. “Who made me judge in this case?” He then proceeded to give a warning: “Beware. Guard against every kind of greed. Life isn’t measured by how much you own.”

What is Jesus really saying here? Is saying that you shouldn’t store your extra grain for the future or is he saying something else?

No, what he’s saying is don’t be greedy and be willing to share what you have with those in need.

Be a Giver

Our best bet is to do as Jesus says in Matthew 6:19-21.

19 Lay not up for yourselves treasures upon earth, where moth and rust doth corrupt, and where thieves break through and steal:

20 But lay up for yourselves treasures in heaven, where neither moth nor rust doth corrupt, and where thieves do not break through nor steal:

21 For where your treasure is, there will your heart be also.

We’re not told to avoid saving up for the future, but we are told that when we do save up for the future, we need to do it in a way that helps us and others.

Here are a couple of examples from my own life. My chickens sometimes give me extra eggs. I don’t sell them anymore. I give them away. In addition, I do what I can to teach people what I know. If something bad happens, I’ll share even more, but I will expect others to do what they can as well. It is part of our God-imparted nature to work as long as possible, so I teach others gardening, foraging, animal husbandry, and food storage.

It really all comes down to motive. Are we storing up food and supplies because we are greedy? Are we doing it out of fear? Or are we putting back food and supplies because God told us to do so?

I hope this has helped someone. If so, or if you have any questions, please comment in the comment section below.

If you’re interested in putting in a vegetable garden this year, I have written several books that can help you get started. All are available on Amazon.

Simply Vegetable Gardening

The Survival Garden

The Four Seasons Vegetable Garden

Help From Kelp

Using Diatomaceous Earth Around the House and Yard

Gourmet Weeds by Cygnet Brown and Kerry Kelley

Purchase Gourmet Weeds Today

Featured

Crafting a Stable Bucket Pantry

bucket and lid
I fill buckets like this one with dry staple foods.

I have a room filled with canned goods that I home-canned. Most of these were foods that I obtained locally, or we grew ourselves. In another location, I have buckets of staple foods, most of which will last me many months. Here is what I store in my stable dry food bucket pantry.

Oatmeal- There’s nothing like a bowl of hot oatmeal in the morning. Oatmeal is versatile. It can be used to make oatmeal cookies. You can also use it for toppings for fruit pies and crisps. It is one of the main ingredients in granola. Here’s a link to my granola recipe. Make Homemade Granola from Scratch

Cornmeal also makes a great breakfast food. It can also be used in making cornbread and hushpuppies. It can also be used when making crunchy toppings for various deep-fried vegetables.

Rice is a staple that is used as the main ingredient in numerous cultural meals. Purchase brown rice if you plan to use it within the next year. If you want to purchase rice for long-term storage, use white rice. Brown rice will likely turn rancid if not used within a year.

Dried Beans and Peas If you find yourself short on other sources of protein, then beans and peas are your go-to when you’re a vegetarian or meat is in short supply. Dried beans are used in various cuisines around the world. Whether it’s pinto, black, red, or cranberry, various colored lentils, or peas, etc., beans are a basis for many meals.

Flour-whole grain flour usually lasts only about six months, before it starts to go rancid. Unbleached flour will last longer, and bleached flour will last even longer than that. For grain that lasts indefinitely, however, whole grain that hasn’t been processed at all will last even longer than the bleached flour does and provides more nutrients as well. Another of my recipes that you will enjoy is How to Make and Store Bread in the Refrigerator

Cooking Oils-lard, tallow, butter, shortening, vegetable oil, olive oil, even bacon grease. These don’t last forever. One to two years tops so these are very important to rotate. Remember “first in, first out”. Buy just enough so that you can use up any that you purchase before the oil goes bad.

Sugar and other sweeteners-white sugar, brown sugar, maple syrup, honey, and the like are used in numerous ways like baking, cooking, candy making, and even in coffee or tea. Most types of sugar will last indefinitely if kept dry.

Salt-sea salt, pink Himalayan salt, and iodized salt are used to flavor food and used in cooking. Canning salt is used in canning, but I often use plain salt in canning instead without any problems. Salt will keep indefinitely if you keep it in a sealed plastic bucket.

Leavenings The obvious leavening that most people first think of is yeast, but many other forms of leavening exist. These include baking soda, cream of tartar, baking powder, and even vinegar. Make pancakes from scratch with this recipe Healthy Whole Wheat Buttermilk Pancakes from Scratch

Spices Whether baking or cooking, many different herbs and spices will spice up your meals and provide a variety of flavors with the other simple ingredients in the pantry.

The Last Word

Of course, some people have allergies and cannot use some of these household staples. If this is you, you’ll need to find a substitute for the items that you cannot eat.

Gourmet Weeds

Of course, you would get tired of eating just staple dry foods day in and day out, so here’s another way to get more variety into your diet. You can use the food you foraged from your backyard! We share some delicious recipes that your whole family will enjoy in our book Gourmet Weeds.

https://shop.ingramspark.com/b/084?Bdm3q5kcr0zYvywdeuStOBmX4q0IYJBlMCeUAPi5FNL

Featured

February’s Gardening Schedule

Our chickens are hard at work turning the compost pile

Can you believe that February is over half over? Many people in the Northern Hemisphere are looking out at the winter weather hoping for an early spring. Others, like me, have already started the 2024 gardening season.

What We’ve Done So Far

Here at our place, the onions and the herbs that I planted are now up and growing in our grow tent that is set up in our pantry. Since I planted the onions and those herbs, I planted more herbs and brassicas which are also now coming up. This past week, I planted hot and sweet peppers along with eggplants.

In the meantime, we’ve been feeding the wood stove. I am so happy we put in the indoor woodstove and purchased the dump truckload of wood from a local sawmill. Perhaps it has something to do with the fact we’ve had a mild winter, but our heating bill and our electricity bills both are down. We still have so much wood left that we’re wondering where we’ll put what’s left over.

We have a pile of wood ashes and charcoal that we will soon be sifting through so that we can inoculate the charcoal into biochar. Our compost is in process with our chickens doing the turning for us.

Plans for the Near Future

On the first of March, we will be planting tomatoes. This year we’re not planting any type of cherry tomatoes. We plan to just plant tomatoes for slicing and paste tomatoes. The tomatoes for slicing will be Cherokee Purples and Beef Steak. The paste tomatoes will be Amish paste.

We’ll be planting more Amish paste tomatoes because these tomatoes are determinant whereas the slicing tomatoes are indeterminant. The paste tomatoes will be ready all at once so I will have all of them available all at once so that I can prepare the tomatoes for sauce all at once.

You might wonder why we waited so long to plant the tomatoes. I am waiting until March 1 to plant the tomatoes because we don’t want them to be too big before we plant them in the garden. The past couple of years we had to plant the tomatoes too early because the tomatoes outgrew their pots, and we didn’t have space for them in our grow tent. This year by planting them later, we will have smaller plants in smaller containers which will require less room under our indoor lights.

These are all the plants we intend to plant before we start planting the early spring vegetables out in the beds in the garden. Soon too, we’ll be preparing the garden beds for this year. We have the seeds, we have some of the plants and soon the garden will be ready to plant.

Putting in a vegetable garden this year?

I have written several books that can help you get started. All are available on Amazon.

Simply Vegetable Gardening

The Survival Garden

The Four Seasons Vegetable Garden

Help From Kelp

Using Diatomaceous Earth Around the House and Yard

Featured

We Were All Preppers

When I saw the above photograph and the quote that came with it, I knew that I had to write about this.

I have followed the prepping ideology for many years and I often see how commercialized the movement has become. podcasts, videos, blogs, and books all seem to try to scare us into believing that SHTF could happen at any moment and that we need to hurry and purchase what they have to sell before it is too late.

People who really can’t afford what is being sold purchase buckets of freeze-dried foods that were prepared at a high price. They are told to purchase nonperishable foods and store them in mylar bags even though these same people don’t have a month’s worth of food in their pantry. They buy all kinds of survival equipment and medical equipment that they don’t know how to use.

A hundred years ago, we were all preppers. We didn’t purchase a bunch of food buckets and we didn’t go to the grocery store. Instead, most people raised their own food. They knew that they could grow most of their food in less than two acres. If they had a farm, the rest of the farm paid for everything else they needed to survive.

A hundred years ago, they didn’t just grow their own food, they produced a lot of other things as well. they cut down trees to build and then heat their homes. They took some of that wood and built furniture to use themselves or to sell or trade for other things. Blacksmiths built the parts to repair the simple cars of their day as well as shoe the horses that the cars would soon replace.

A hundred years ago, neighbors worked together. When they worked together, they made it a party. They had husking and quilting bees. They had house and barn raisings. If a neighbor was sick or someone died, everyone was there to help the family deal with it.

What We’re Doing

Rather than just looking wistfully back at the past, we are taking what we liked about the past and emulating that. Here is a sample of what we are doing.

Gardening-We’re growing a garden where we can grow most of our own calories and nutrients. We’re not just growing vegetables, but we are growing herbs as well for culinary and medicinal purposes.

Growing an Orchard-About three years ago, I planted five fruit trees. Last year I was able to harvest one apple off one tree, but I know that I will soon have many more apples as well as pears and peaches.

Foraging have been foraging a lot of foods that I don’t grow. I either forage from the wild or forage in the form of gleaning (picking what the owner allowed us to pick after they had what they wanted).

Hunting and Fishing-Where we live we have lots of opportunities for getting meat from the wild.

Raising Chickens We raise chickens for eggs. We have plans to get other animals soon, but right now we just have the chickens. We have raised our chickens from eggs in an incubator. We’ve also raised chicks that we bought from the store.

Butchering We’ve butchered chickens. We don’t usually butcher our chickens though. We’d rather get them from the grocery store since it’s still available from that source.

Freezing We have a small freezer and store some food there. This allows us to purchase food less often.

Canning I can a lot of our food. I probably have enough home-canned goods to last us for a year.

Heating with Wood We heat with wood. We used to have an outdoor woodstove but we decided that the outdoor woodstove used too much wood and required electricity to run. We have an indoor woodstove now, and we have not only reduced the amount of wood we’re using (by 66%!) we also reduced our electric bill by 25% as well!

Utilizing Skills I Have Learned I learned numerous skills that can be used if life becomes more difficult to live.

I know how to handle a weapon.

I spent numerous years working in healthcare including being trained as an 8404 Navy Corpsman, an EMT, and an LPN. In addition, I have learned some information about medical herbs and I have delivered one of my own children at home.

I can cook, bake, and sew.

There are probably a lot of other skills that I haven’t mentioned.

Learning New Skills I am always learning new skills. I read to learn about new skills. I also watch videos to learn other new skills. I sometimes go to events where skills are demonstrated.

Books By Cygnet Brown

I’ve written books to help others learn some of those skills that I have learned. Feel free to check them out!

If you’re interested in putting in a vegetable garden this year, I have written several books that can help you get started. All are available on Amazon.

Simply Vegetable Gardening

The Survival Garden

The Four Seasons Vegetable Garden

Help From Kelp

Using Diatomaceous Earth Around the House and Yard

Featured

Free Fertilizer Right in Your Own Backyard

In recent years, many commercial fertilizers have been in short supply and what we can purchase is so expensive. What if I told you that you don’t need to purchase fertilizer to get rich soil that offers so many different types of fertilizers? What if I told you that the fertilizer that your soil needs doesn’t have to cost you a single dime?

A pile of leaves provides a lot of brown material to a compost pile

Building Compost-The Garden’s Backbone

One of the most known forms of fertilizer you can get is from using compost. Building compost is a simple process.

You need a form (or several forms) of brown material. Brown material includes dried leaves, hay, straw, wood chips, paper, or sawdust.

Next, you’ll need a form of green material. Green materials include household kitchen garbage, green matter from the garden, and fresh grass clippings. Don’t add unprocessed meat, bones, or milk products to your compost. Animal manure is another green compost material that will help break down the pile more quickly if they are added.

The first step in building a compost pile is to shred the plant material into smaller pieces. The smaller the pieces, the more quickly they will break down.

The next step is to place a layer of brown material on the ground and a layer of green material on top of that. Make your layers about three inches deep. Keep layering until you have a pile that is the size of a four-foot cube. You can layer inoculants every few layers, but they aren’t necessary, especially if you use manure. You can also layer in finished compost to do the same thing.

Next, you’ll need to add water to get the pile to heat up. You’ll want to add enough water for the pile to be like a rung-out sponge. Not too much and not too little. The rule of thumb is to add the water at the end of the piling process. When the water starts running out of the bottom of the pile, you have watered enough. Once the pile is done, you will want to cover the pile with a tarp to keep the moisture level in the pile and prevent rain from washing the nutrients out of the pile.

Another component of creating compost is air. Remember when I said that shredding the plant material makes it break down faster? Well, it also causes it to become anaerobic faster. Anaerobic compost stinks. Two steps to take to get rid of that stink are to turn the pile and to add brown material to the pile. Some people recommend adding lime to the compost, but it can make the pile too alkaline so I don’t add it. A compost with balanced ingredients will balance its own pH.

A hot compost pile breaks down more quickly than a cold pile. The difference between a hot compost pile and a cold one depends on how much air you add to the pile, proper moisture, and how small your material has been chopped. Regular turning of the pile makes all the difference in how fast your compost pile will finish out. Your compost is finished when it looks and smells more like fresh soil than the original ingredients.

Here’s my vermiculture bin. I topped it off with dried grasses to protect the worms from cold weather.

Vermiculture

Another way that I produce fertilizer for my garden is by producing vermiculture to produce worm castings.  Last year I bought some earthworms, put them in some bedding, and fed them with household peelings and coffee grounds throughout the growing season. We take the worm castings and make worm casting tea and use it in the garden where we need it for a plant quick pick me up.

Wood ashes

We heat with wood in the wintertime, so we have a lot of wood ashes. These wood ashes we spread over our garden and yard.

Animal bones and Eggshells.

We burn animal bones in a fire which makes them brittle. We then break them up into powder and spread them around the garden and yard as well.

Eggshells are pulverized and added to the worm bin to help neutralize the soil.

Here’s our cat Ziggie checking out the quality of the compost we started last summer! Do you think it’s ready for the garden yet, Ziggie?

Wood chips and Grass Clippings

Wood chips and Grass Clippings are the primary forms of mulch that we use around the garden and in the orchard. We have found that if we put down a layer of grass clippings and top it with wood chips, the wood chips will not negatively affect the growing plants because of the added nitrogen of the grass clippings that are closer to the soil surface.

Chicken Manure

In late winter, before planting the garden, we spread composted chicken manure onto the garden, orchard, and added some to the compost pile as well. To keep our chicken house from smelling like one, we remove the previous year’s chicken manure layer and add a thick layer of wood chips into the chicken house. This layer of brown material keeps the chicken house from stinking during the heat of the summer.

Green Manure

Keeping a layer of living green plants growing in the garden during the off-season not only keeps the soil from erosion, but it also adds organic matter, nutrients, and microorganisms to the soil. There’s a lot to this process that I plan to explore during the next year.

If you’re interested in putting in a vegetable garden this year, I have written several books that can help you get started. All available on Amazon.

Simply Vegetable Gardening

The Survival Garden

The Four Seasons Vegetable Garden

Help From Kelp

Using Diatomaceous Earth Around the House and Yard

Featured

Perennial Vegetables that Come Back Every Year

Sweet Potato plants growing indoors

Every year, millions and probably billions of people around the world go out and build a vegetable garden. They dig. They prepare the soil. They plant seeds and work diligently throughout the summer to get a vegetable crop.

In recent years, there has been a movement called permaculture where people take an ideology started by Bill Morrison and they produce a gardening system in which they don’t have to dig and plant regularly. In this system, fruit, nut, and nutritionally support trees, climbing plants, brambles, bushes, tall plants, herbs, and root crops. Among these plants are perennial vegetables that come back year after year.

asparagus plant
It takes at least three years to produce a decent asparagus plant, but you’ll have perennial growth for about 20 years

Asparagus

Asparagus is probably the best-known perennial vegetable. It is one of the first vegetables ready to harvest in the spring. Since it will be in the same place for years, it’s important to find an area with all the growing conditions they need. Asparagus plants are slow to mature, taking three to five years to fill in, but they are worth the wait. Once they start producing well, you will be harvesting asparagus spears for more than a month every spring before the rest of the garden starts producing

Though I grew the ones I have from seed, most people find it easier to grow asparagus from crowns, which are widely available in the spring. Asparagus plants grow best in full sun. Without enough daily sunlight, you will wind up with thin spears and weak plants that are prone to problems. We had this problem with the asparagus that I am growing. It grew under an old maple tree. Last fall we cut it down so the decreased shade should help my asparagus develop better spears.

Rhubarb

Another common vegetable that can be grown easily is rhubarb. Yes, rhubarb is a vegetable. However, it’s usually prepared and eaten like a fruit, turned into pies, jams, and jellies. This cool-season vegetable is grown for its leaf stalks that can make a wonderful tart treat. It also is a beautiful ornamental plant with its large, textured leaves and chunky stems. Rhubarb plants are hardy and live as long as 20 years or longer.

Rhubarb is also grown partial to full sun so if grown in a permaculture setting, these plants should be grown in an area where they have more than six hours of direct sunlight.

Sunchokes

Sunchokes are harvested at the other end of the growing season. Sunchokes (Jerusalem artichokes) (Helianthus tuberosus) are root vegetables that can be prepared much like potatoes but have a lower starch content.

They produce a sunflower-like flower that adds a bright cheery aspect to the perennial garden. However, if you want a better root harvest, you’ll want to remove the flowers to allow the plant’s energy to focus on producing larger tubers.  Best planted in the spring a few weeks before your last frost date, Jerusalem artichokes will grow at a moderate pace and reach maturity in about 20 weeks.

Perennial Greens

Many types of perennial greens exist that can be added to the garden space. Among them are dandelions, burdock, dock, and lambsquarters. Some do best in cool shady areas while others do better in sunny locations.

Peppers

In warmer parts of the world where frost isn’t an issue, peppers are a tropical perennial that will produce fruit as long as they are kept picked.

Sweet potatoes

Sweet potatoes are another tropical perennial. These plants are so easy to grow especially when hot summers are the norm in your area. Roots or the tubers from the sweet potatoes can be brought in before the first frost and then planted indoors. I have done this many times with good results.

If you’re interested in putting in a vegetable garden this year, I have written several books that can help you get started. All are available on Amazon.

Simply Vegetable Gardening

The Survival Garden

The Four Seasons Vegetable Garden

Help From Kelp

Using Diatomaceous Earth Around the House and Yard

Featured

Get a Victory by Growing a Garden

Back during World War II, both the United States and Great Britain began what they called Victory Gardens. Great Britain had started the idea when the Axis powers began their quest to take over Europe during the late 1930s and early 1940s. As the Nazis rolled over their neighboring countries and swallowed up agricultural land in its wake. To feed the people on the British Isles, people there had to grow their own food not only to feed their people but also to feed their military men on the ground and in the air.

When the United States joined in the fight after declaring war on the Axis powers and joined the allies in the battle, they too joined the fight to feed their population and the populations of those who fought with them. Victory Gardens were not only a means to help feed people but also served as a means that they could feel as though they were helping the war effort.

Every State in the United States had a recommendation for what to have in vegetable gardens based on that State’s climate, nutritional, and caloric needs.

Victory Over Increase Military Tensions

Today, we have seen the escalation of “wars and rumors of wars” with the potential increased tension in the conflict between Ukraine and Russia and the powder keg that is igniting in the Middle East. The potential for the conflicts to spread to other lands, more otherwise fertile farmland may be bombed and rendered useless like the wheat fields of Ukraine. Therefore, it would be wise for anyone who has any space to grow a garden at all, to consider growing as much of our own food as possible.

However, even if these conflicts don’t spread, there are still victories to be won with our backyard gardens.

Victory Over Supply Chain Disruptions

As we saw beginning in 2020, supply chain issues can leave grocery shelves bare, and having a garden can help combat this issue. If we grow it at home, we don’t have to worry about not having food in stock. Instead of going to the grocery store, we can head to our backyard and find something for the next meal.

Over the past few years, we have seen breaks in our supply chain and many times there have been empty shelves in our grocery stores because trucks have not been able to get food to the areas where food is needed. If we grow our own gardens, we will help alleviate some of that burden.

Victory Over Poor Quality Vegetables

In addition, the quality of food that we get shipped into our grocery stores is not as fresh nor is it of high nutritional value. Taste is also compromised in vegetables from the grocery store. Anyone who has grown their own tomatoes can tell you that there is no comparison between store-bought hot house tomatoes and a tomato freshly picked from a home garden.

Victory Over the Cost of Groceries

The cost of food has risen 50% or more in some areas on many items during the past year or so. Gardening offers a more ready source of vegetables at a lower cost. Part of the reason has to do with the cost of transportation, which is understandable.

However, other reasons are more nefarious.  Often supplies know that they can raise the prices because of the fear that many people have about there not being enough to go around, so they raise the prices because they know that people will pay whatever they have to for food which is a necessity.

Victory Over Tainted Vegetables

Getting food from our gardens isn’t only about quantity, but about quality as well. Food safety has also come under fire in recent years. Have you seen the number of vegetables that were recalled in 2023? There were more than I care to count.

Victory Over Poor Health

Not only does having a garden provide nutritious food, but tending the garden is good exercise. The stretching, walking, and lifting we do when gardening helps us maintain a firmer, toned body.

Time in the garden also offers us the ability to get fresh air as well as time in the sun helps us create our own vitamin D.

Victory Over Damaging Our Planet

Not only is gardening better for the gardener, but gardening is also beneficial to the planet. Vegetables grown in a home garden are a source of vegetables that have a lower carbon footprint than food that travels thousands of miles before it reaches our dinner plates.

Victory Over Dependence on Agribusiness

A huge percentage of our food is grown by huge conglomerate agricultural enterprises that take advantage of government handouts through government subsidies that are not available to smaller farm businesses.

Where I live, small farms that utilize the farmers’ market for direct sales are relatively few and far between because few members of the younger generation are getting into farming because of the cost of doing business. Even our local farmers’ market is struggling to find enterprises that are willing to participate in farmers’ market enterprises. State governments who seem to be trying to control the quality of food coming into farmer’s markets are making it more difficult for small farming businesses to grow.

The government doesn’t have control of what we grow for our own families, at least not yet. We can grow our gardens using compost and manures that were produced on our own land rather than depend on commercial fertilizers that mine the soil rather than feed it. We can utilize our yard wastes and household garbage to grow vegetables that have a higher nutritional value than any grown in huge commercial agricultural enterprises.

Your Mission Should You Choose to Accept It

Therefore, your mission, if you choose to accept it is to create a victory garden in whatever garden space you can find. Whether it’s in your backyard, front yard, a friend’s yard, your window sill, under grow lights in a closet, or wherever you imagine. The benefits are there for the taking.

Books by Cygnet Brown

If you’re interested in putting in a vegetable garden this year, I have written several books that can help you get started. All are available on Amazon.

Simply Vegetable Gardening

The Survival Garden

The Four Seasons Vegetable Garden

Help From Kelp

Using Diatomaceous Earth Around the House and Yard

Featured

My First Attempt at Tomato Pie

Until this summer, I had never heard of a tomato pie, but then I heard about it from three different sources. It is apparently a popular summer southern dish.

Since we have a big crop of tomatoes this year, I decided to give tomato pie a try. It is a savory dish and not a dessert so I figured it would make a good main dish or even a side dish. We decided we would eat ours with meatball subs.

How to Make a Tomato Pie

Start with a single crust. The crust may be a regular pie crust, but a good crust can be biscuit dough rolled out very thin.

Slice ripe tomatoes thin and put them on paper towels or something for them to drain on for a minimum of two hours. Once the tomatoes are properly drained, heat the oven to 350 degrees F. Bake crust until about 50% baked remove from oven. In a pie crust layer drained tomato slices on the bottom of the crust (one layer deep). Next, put a layer of thinly sliced onion seasoning, salt, black pepper, and other seasonings you might like. like basil or so forth. I used a dried Italian seasoning mix. Make 3 layers after 3 layers take 3/4 cup of mayonnaise and stir in a cup of grated cheese of your choice. Spread this over the top of the entire pie. Cover the top with thin slices of ripe tomatoes. Bake in a 350-degree oven, bake until the top is slightly browned. This usually takes about 40 minutes.

How was it?

My husband and I enjoyed the pie. It had a rich flavor and reminded me of pizza. There was plenty left over so we stored the leftovers in the refrigerator. Like pizza, it was good the next day as well. We just nuked it in the microwave for about a minute to take the chill off a slice and ate it at lunch the next day.

I definitely recommend trying tomato pie. A great way to use fresh summer tomatoes!

More Information about Tomatoes

Growing your own tomatoes can be fun. Here are other articles I have written about tomatoes that I have grown.

Canning Filled Month

Our Tomatoes and Peppers in Raised Beds

Healthy Tomato Plants from Seeds

Featured

Making Garlic Powder

Garlic powder is used in many different cuisines. I use it in many dishes like spaghetti, pizza, goulash, soups, and stews as well as garlic toast to name a few. Because I had the garlic and often use garlic powder, I decided to make my own.

Every year since 2019, I have been growing garlic. I started with two bulbs and now have more than enough to last us an entire year, sell at the local farmers’ market, and have some left to replant. This year, rather than depending on fresh garlic for the entire year, I have decided to make my own garlic powder.

There’s no way that I believe that making garlic powder from scratch is going to save me a lot of money. The time it takes to turn garlic into powder wouldn’t pay even a minimum wage. I do it as a hobby, but I am also doing it so that I know that I know how to do it and so that I can share the process with others.

I feel that learning skills that people used to do are important for the future because it would be a shame if our descendants had no idea how to do valuable skills like this. You never know what the future has in store for us.

Pulling the Garlic from the Garlic Bed

To begin the process, I pulled up the garlic and laid the plants out to dry until the leaves were brown. I made sure that the garlic didn’t get rained on and I turned the drying plants regularly so that no mold grew in areas that still contained moisture. After the leaves were completely dry, I cut the garlic bulbs from the plant at the neck of the garlic plant about two inches above the top of the bulb. I laid the bulbs out in a clean dry location to dry for a couple days longer.

Where the garlic had been growing in the garden, I reconditioned the soil with compost and planted sweet potato slips in their place. I then covered the soil there with mulch and kept the soil moist.  

Cleaning the Garlic to Make Powder

Once the outside of the garlic bulb and the cloves were relatively dried, I separated the individual garlic cloves within the bulb. I then removed any part of the garlic clove that isn’t edible. This process was quite tedious and took me two afternoons to complete. This took longer than the drying process would.

Mincing the Garlic

The morning after I cleaned all the cloves, I minced all the garlic in my food processor. I minced the garlic before I dried it for two reasons. First was because the garlic would dry more quickly if it were in smaller pieces. The second reason was that the garlic would be easier to powder once it was dried.

Drying the Garlic

Once the garlic was minced, I  poured the garlic into my dehydrator to dry. I put the minced garlic in thin layers on the dryer sheets so that the garlic would dry quickly.

Powdering the Garlic

Once the minced garlic was completely dry, I placed the dried clumps of garlic into a smaller food processor. I pulverized the dried minced garlic into powder.

Storing Garlic Powder

To store the garlic powder, I poured some of the garlic powder into a shaker to use right away, but I placed most of the garlic powder into a sealable plastic waterproof container.

Now I have enough powdered garlic to last for at least the next two years.

Is it Worth the Effort?

Some people would ask if all the work involved in drying my own garlic powder was worth my time? The answer to that would depend upon several factors.

If I were doing it to make money from the enterprise, my answer would be a resounding “no”. As cheap as it still is to buy dried garlic from the store, there’s no way that making my own would create a viable income.

If time were at a premium, making the garlic powder would probably be a distraction from other more pressing projects. If

If I had to purchase the garlic that I dried, unless I got a great deal on that garlic, making my own powder wouldn’t be worth the cost either.

However, I dried the garlic as a learning experience to see if I could do it. I enjoyed the experience. I had the garlic and didn’t want to waste it. The garlic cloves I used were the garlic cloves that wouldn’t last long unless I processed it right away. The garlic powder that I produced was far superior to the garlic powder that I can purchase at the store.

I would recommend others might want to do the same. A homeschooling parent or simply a parent who wanted to teach their children where their food comes from could use this project as one of their life lessons.

Someone with garlic that they didn’t want to waste would find that making their own garlic powder is a good way to utilize the garlic in a product that they are already purchasing and can store it in a relatively small space.

If you’re interested in producing a superior product like garlic powder from homegrown garlic and have the time to invest in producing the powder for your own use, I invite you to try your hand at it yourself. It is a satisfying feeling knowing that is just one more thing that you don’t have to go to the grocery store to purchase.

Featured

Our Gardening Update

It has been so long since I have written on this site that I thought I would catch you up on what we are doing now in the garden.

This year we have grown most of the vegetables that I feature in my book The Survival Garden.

We planted much more of our garden in raised beds and doing has its advantages over growing in garden rows.

Using Raised Beds and Mulching Them

The advantages of planting in raised beds include the fact that we can plant intensively in the bed. We can also focus our resources. These resources include water, fertilizer, insect damage control tools, and disease prevention, and we can mow between the beds. In addition, because the beds aren’t walked on, the raised beds keep the soil aerated for the benefit of plant roots and soil microbes.

We mulch all our beds with our grass clippings. These grass clippings not only conserve water and protect the soil from getting too hot or too cold, but the grass clippings feed the soil by adding nitrogen and becoming food for the microbes too.

The Harvest Has Begun!

We’ve been eating greens from our “salad bar” for several weeks now. I pick and wash the greens and then use them in sandwiches and salads.

We just harvested our garlic and are now planting our sweet potatoes in the same area where we had the garlic. One day we pulled the garlic and cleared out the weeds and the next day we conditioned the soil and that evening we planted our sweet potato slips.

Our beans are growing fast. These are our beans last week.

Our bush beans are now blossoming, and our pole beans are diligently climbing the fences that we provided for them. By the end of this week, we will be picking the first bush beans. We should have enough to eat fresh and have some to either sell at farmers’ market or can. I will probably be doing a load of green bean canning next week.

Soon we will also harvest our potatoes too. These we’ll use to eat fresh, can in green beans and new potatoes, dry in the dehydrator, and prepare and freeze some for French fries and hash browns.

Our tomatoes, peppers, and onions are growing like crazy. We have blossoms and fruit on the tomatoes and peppers and the onions are developing bigger bulbs than we’ve had in this garden.

Our carrots are growing as are the beets. We hope these will be ready within the next few weeks as well.

I hope you take the time to read the book The Survival Garden and apply at least some of the methods so that you don’t have to can, freeze, or dehydrate all of your foods.

Featured

A Bumper Crop of Peppers

Last year and the year before last, I didn’t have that much luck with peppers. The year before last I had quite a few hot peppers, enough to add to the cucumbers for hot pickles and a few to dry, but not much else. Last year I had a few sweet peppers, but barely enough for the canning, I had to do. This year is a different story. I have plenty of peppers both hot and sweet peppers to do everything I want to do with them and then some. I sold a few peppers at the farmers market, but I am not the only one to have peppers there, so, I have had to figure out what to do with what I have.

Canning Hot Peppers

Last year I had to buy some hot peppers at the farmers’ market to make Rotel, so I have plenty of that. It’s just diced tomatoes and hot peppers that I canned together in vinegar and water. This year I am canning some sliced jalapeno peppers in vinegar water in half-cup jars so that I have a few to add to roasts when I cook them in the crockpot. I am also roasting a few larger hot peppers to add to bigger roasts. I don’t need many of those, but they come in handy.

I also have been making small amounts of red enchilada sauce. I first made the sauce and canned them in the half-cup jars but found that there really isn’t enough in a jar for a good batch of enchiladas so I am now making them in cup- and pint-sized jars. You want a good amount of red sauce when making enchiladas or burritos.

I have also used them in making salsa, but for now, I have some left over from last year and made enough for this year as well.

Drying Hot Peppers

When I don’t need to use them in canning, I dry most of the hot peppers. It’s as easy as cutting off the tops, cutting them in half, and laying them out on the food dryer to dry until they are crunchy crisp dry. If there’s any pliability left in them, I leave them longer. Right now, I am just putting the dried peppers into a sealed container. Later, I will put a lot of them through the food processor to grind them for chili powder.

I have a lot of cayenne peppers coming in, so I am drying them separately from the rest of the hot peppers. I’ll be making cayenne pepper powder with those later in the season as well. The process is the same as with the other peppers, but there’s nothing like good fresh cayenne when cooking.

Hot Pepper Sauce

One thing that I am not making that I would like to try perhaps next year is to make pepper sauces. I need to study more on the subject and then grow the right peppers for the project. I’ll let you know next year if I will be doing this.

Sweet Peppers

I use sweet peppers in many of my tomato products. I use them in my salsa along with the hot peppers and my tomatoes. I also use them in tomato sauce. I like making pasta sauce and pizza sauce. The pasta sauce I make in pint jars and the pizza sauce I make in half pint jars. This way I have just enough for a meal and not much more than that.

I have also used them in making relishes, but right now, I have more than enough relish from two years ago. We don’t use a lot of it so I’ll wait until next year before I make more. Also, this year I didn’t get a lot of cucumbers or zucchini squash so relish and pickles where the sweet peppers usually go aren’t a good option this year.

Most of the sweet peppers this year are going into the freezer. It’s a really simple process. I do the peppers two different ways. One way is that I cut them into strips to fry for sandwiches and the other is that I chop them up and spread them out on a cookie sheet and put them in the freezer. When they are frozen, I scrap them off the cookie sheet and put them into a bag, and then back into the freezer. This way, I can get as many or as few as I want at a time. To use them, don’t thaw them, but use them frozen in cooking. I like to use them in anything that I use peppers and onions in including omelets and fried potatoes O’Brien. They can also be added to soups and stews and other cooked dishes that require sweet peppers.

Do you have a bumper crop of peppers this year? If so, please share in the comments below, I would love to hear about it!

Featured

12 Vegetables that Don’t Require Canning, Freezing, or Dehydrating

The harvest is coming in and many of these vegetables can be kept fresh all winter.

Though astrological fall doesn’t happen for another few days, metrological autumn is upon us here in the Ozarks and the harvest is coming in. Though we can get vegetables throughout the year, during the autumn, prices are the lowest that they are ever throughout the year. Autumn will get you better prices on vegetables of any form whether fresh, frozen, canned, or dehydrated. This has been true throughout history, and even though we have been able to get various types of food in recent years from all over the world thanks to transportation innovation, it’s still true today. Recently, the world has been in flux based on climate change, a worldwide pandemic, and war and this has affected not only our worldwide food supply but also how we are able to transport and prepare it. It is even more imperative than ever to have an adequate food supply on hand.

There is an expected worldwide food shortage and the more food we can get from local sources, the better. However, there is only so long that much of what we get locally can be used fresh. Tomatoes, peppers, lettuce, and the like can only last so long before they spoil. We can prepare many of these fresh foods for the freezer, can or dehydrate them for future use because they won’t keep as fresh vegetables. However, there are some vegetables that don’t need to be stored in any of these ways. They can be stored for several months beyond the time they are picked.

For any of these vegetables that you want to keep for several months, be sure to only store perfect specimens. Bug damage or cuts in the vegetables decrease their longevity.

Onions

Whether you get your onions from your garden, the grocery store, or buy them from a local grower, you can store onion bulbs for several months.

Although you can’t store green onions for longer than a few days, you can store onion bulbs for up to several months.

Before storing your onions, let the skins of the onions dry and their necks begin to shrivel. Spread the onions in a single layer. Keep the temperature around 40 degrees to 50 degrees Fahrenheit (4–10 degrees Celsius) to keep the onions longer. Store onions individually and don’t store them with the other fruits and vegetables since they can reduce the smell and taste of the onions. You can use a pantyhose to store the onions. Simply cut off the legs of the clean pantyhose, place an onion in the foot of the pantyhose, then tie a knot for each onion. Keep adding the onions until the foot is full. and hang the braided bags in a dry cool place with the recommended temperature.

Uncut onions will last several months this way. Use cut onions within two to three days.

Garlic

The storage temperature for the garlic is most important. The ideal temperature for storing garlic is 60–65 degrees Fahrenheit (15–18 degrees Celsius). Although keeping at this temperature is not easy, the closer you can keep your garlic at these temperatures, the longer the garlic will keep. Keep your garlic away from your stove or heat source.

Don’t store them in the refrigerator because it is too cold. and its moisture causes the garlic to rot sooner. Nor should you store it in plastic because it prevents air circulation, increases moisture, and speeds up disintegration. Better to store garlic in a cupboard in a paper bag (or no bag at all) than in it is to store them in the refrigerator or a drawer.

Potatoes

Potatoes thrive in humid conditions. This durable crop is comprised of 80 percent water. The best places to store them long-term should be dark, well-ventilated, and cool areas — but not cold and where they won’t freeze. Keeping temperatures below 55 to 67 degrees Fahrenheit (12 to 19 Celsius) will prevent the growth of sprouts on potatoes longer and reduce both shrinkage and a loss of nutrients. Ideally, keeping potatoes between 43 to 55 degrees Fahrenheit (6–12 Celsius) will allow them to keep for multiple months without rotting or sprouting eyes especially if they are varieties that are meant to keep longer (indeterminant late potatoes).

Sweet Potatoes

Newly harvested sweet potatoes with the roots still attached are the best option to use. Plump vegetables have more usable flesh to eat than skinny ones. It is even more important to be sure that sweet potatoes are not bruised. Shake off the dirt, but don’t wash.

Sweet potatoes should be cured for one to two weeks. This curing process forms a second skin over scratches and bruises. Place in a location where you can keep temperatures between 75–80 degrees Fahrenheit (24–27 degrees Celsius) with a relative humidity of 90 to 95 percent. Use a small electric fan in the area to keep the air circulating to prevent rotting and molding. Do not allow sweet potatoes to touch one another. Cure in this manner for between 7–14 days for longer storage.

Once the sweet potatoes are cured, wrap each one in newspaper. This will allow just enough air circulation to prevent the sweet potatoes from rotting too quickly. Store these individually-wrapped sweet potatoes in a cardboard or wooden box, or wooden basket. Do not use an airtight storage container. Place an apple in the box to prevent the sweet potatoes from sprouting. Store the box in a cool dark place, maintaining a consistent temperature of 55–60 degrees Fahrenheit (13–16 degrees Celsius), a basement or root cellar is ideal. Do not refrigerate. Stored this way, sweet potatoes last up to six months.

Carrots

Don’t wash the carrots before storing them. Simply remove the green tops. Store in a temperature around 41 degrees Fahrenheit (5 degrees Celsius). Store in a wooden box with slightly dampened sand. Spread sand out on the bottom of the box and the first layer and then put carrots inside without the carrots touching.

Continue adding alternate layers of sand and carrots until you have stored the whole harvest. The carrots will keep fresh for several months.

Beets

Beets are easy to store in the refrigerator. Properly stored beets can last for weeks or even months. Remove beet greens, don’t wash them, and store them in a plastic bag in the refrigerator. Simple.

Turnips

Store undamaged roots. Gently rub soil from the roots before storing them. Store the turnips in a cold moist location at or near freezing (32–40 degrees Fahrenheit or 0–4 degrees Celsius) and at 95 percent humidity. Store them in a wrapped moist cloth or paper towel in a perforated plastic bag in the vegetable drawer in the refrigerator. Turnip roots can also be packed in a bucket or plastic storage container or cooler in moist sand, peat moss or sawdust.

Corn (Maize)

Corn dried on the stalk and further air dried so that it can be stored indefinitely when removed from the cob and stored in sealed mylar bags. The corn can be used to make corn flour or meal or made into hominy and ground into grits.

Dried beans

Beans seeds can be dried on the vine, further air dried, and shelled. Heat beans in the oven at 200 degrees Fahrenheit (100 degrees Celsius) and place them in a container or seal them in a mylar bag for extended preservation.

Peas

Treat peas in the same way that you prepared the dried beans.

Squash and Pumpkins

To store winter squash, you’ll need ripe fruits. To determine ripeness, push a fingernail into the rind. If it is hard and nearly impossible to pierce, it’s ready. Cut the squash off with pruners and leave a 3-inch (8 cm.) stem for pumpkins and 1 inch (2.5 cm.) for winter squash. The stem helps prevent rot when you are keeping winter squash in storage.

After you harvest the squash, rinse off the dirt and lay the squash into a single layer to prevent damage to the rind. Next, you’ll want to cure the rinds against moisture, insects, mold, and bacteria. Cure the squash for ten days at temperatures of at least 80 degrees F. (27 C.) and 80 percent humidity. Acorn squash doesn’t need to be hardened off, as they lose their quality. Turn the squash occasionally to expose all sides to air.

Store the squash by lowering the temperature. Every 18-degree reduction in temperature increases the time for storing winter squash. Keeping winter squash in a temperature of 50 to 55 degrees Fahrenheit (10–13 Celsius) is the optimum range for most squash. Good ventilation is a necessity for keeping squash.

You Will Save Money

Storing these fresh vegetables whether purchased from the grocery store, a local source or grown in your own garden will save you a lot of money in your grocery bills without having to do anything more than store them until you can eat them.

For More Information

book cover of the survival garden book
You will discover more about these vegetables in The Survival Garden.

You can grow as many of these vegetables in your own garden as you have room to plant, and you can start now to get a head start on the upcoming gardening season by planting garlic and purchasing my book about this topic. The book is The Survival Garden and it is available on Amazon in paperback and on Kindle. Check it out today.

Featured

Seven Ways We are Saving Money and Time in the Garden

This year our raised beds did better than other beds so this next year we will be building more raised beds.

The cost of food is rising faster than any other purchases we make regularly. One of the ways that many of us are helping to make ends meet is through gardening. Things are not expected to get any better (or even worse) next year, so my husband and I are streamlining our gardening process with garden beds and saving money where we can.

Get Good Quality Tools

The first thing that we did was to purchase good quality tools to work with. Not purchasing cheap tools may not sound like a way to save money in the garden, but it will in the long run. Last year we purchased inexpensive hoses and this year we are having to replace them with better hoses because the hoses we purchased didn’t last. By spending a little more now, if we maintain them properly, the hoses should last us several years rather than one season.

Going No-till

After having more success with our raised beds this past spring and summer in our two raised beds where we grew our best tomatoes and hot and sweet peppers (along with annual flowers and herbs), we decided to build even more raised beds using as many free materials as possible.

We are building the raised beds using lumber seconds that we get from our local lumber yard. E Because they aren’t perfect boards, we are getting a discount on them. We don’t use treated lumber because treated lumber emits poisons into the soil which we don’t want.

We find that 2×8 foot lumber is right for the job and the least expensive length to purchase is 8-foot boards. We use three of the boards. We cut one in half for both ends so that we have a bed that is 4×8 feet long. We screw the boards together and brace them in the corners. We prepare the soil under where the bed is going. We mow the grass at the lowest setting and then apply chicken manure in the area and cover it with local sawdust. We then cover that with cardboard and place enough down so that it extends beyond the raised bed frame.

Once the frame is in place, it is time to fill it. We add a couple inches of sawdust and scatter chicken manure over that and then add as much topsoil as we can get on top of that. Next, we use a simple sheet composting system to fertilize the ground during the off-season.

Simple Compost of Household Waste

One of the easiest ways to utilize compostable materials from the house is to put them directly in the garden area where you want to grow your plants next season. Personally, I like to just drop the garbage onto the growing surface during the non-growing season and allow the chickens free range in the area, to eat what they want and leave their own droppings behind. Then when I plant the area, I put a fence around it to keep the birds out as well as other wildlife.

Shred yard wastes for mulch

This fall when we mow the lawn, we capture all of the grass clippings in our grass catcher and incorporate them with the household wastes that we are bringing into the raised beds. This way, when the chickens scratch the surface, they are incorporating the clippings into the first few inches of the soil for the soil microbes.

We also incorporate fall leaves into the garden beds. Again, we use the lawnmower to chop up the leaves and gather them and then dump them into the beds. The chickens turn the materials in the bed for us to add to the ingredients of food for soil microbes.

Use Saved Seeds

I have looked at the price of seeds recently and I understand why people say that the price of gardening is so expensive. I started collecting my own seeds in the fall to use for the next year. Seed saving, however, is a skill, and not every seed is handled the same way for it to be viable. However, the skills are not difficult to learn.

We Grow Our Own plants

This past year we grew more of our own plants for transplants from seeds than we had in the past. The process of growing seeds for transplants involves some expenses at the beginning like you need good lighting or your seedlings will get too leggy to plant and you should use the proper germinating medium in which to grow it. We discovered that growing our own plants from seed too takes skill, but it also saved us a lot of money.

Recycle Items in the Garden

Above, I mentioned using household garbage, yard waste, and cardboard in making our garden beds, but there are so many other things that we recycle in the garden. We use plastic milk jugs to pick berries and to make cloches to cover plants on cool early spring days and nights.

We also could also poke holes in the bottom of them and bury them around newly planted tomatoes and peppers and fill them every few days with water to soak in around the plant roots over an extended period. Watering this way is better than surface watering because we’d be watering at the roots of the plants and not allowing the water to evaporate before it benefits the plants.

Now It’s Your Turn

There you have it, the seven ways that we are saving time and money for next gardening season. I would love to hear what other ways you use to save time and money in the garden. What do you do?

Featured

Elderberries-The Last Hurrah of the Berry Harvest

I remember when I was a kid, my mother had an elderberry bush at one corner of the house and every year she would pick the berries and we would have elderberry and blackberry or elderberry and apple upside-down cakes and pies throughout the winter season. She also made elderberry jelly which we ate regularly on toast and on peanut butter and jelly sandwiches.

As an adult now, I don’t have my own elderberry bush, but recently my husband and I have been harvesting some down by the river. Two years ago, we made an elderberry tonic, which not only tasted good but supposedly kept us from getting respiratory illnesses. (Neither of us caught C-19 but that might have also been because we also got our C-19 shots.)

This year my husband wants me to make more tonic, but I really want to make some jelly. He’s planning to go back to the river to get more so perhaps we can do both.

Elderberries are highly nutritious, can be used medically, in personal care, and is also delicious.

Elderberry Nutritional Value

Elderberries are high in vitamin C (52.2 milligrams per cup) and dietary fiber (10.2 grams per cup). One cup of elderberries also has 26.7 grams of carbs, 0.7 grams of fat, and one gram of protein.

Elderberry Uses

Elderberry is an antioxidant, and researchers think the compound that makes it blue lowers inflammation. This same color can be used for food coloring.

If you don’t need elderberries to produce the color you can use them for something else because elderberries have many uses. They can be used medically and made into syrups, tonics, tinctures, gummies, lozenges, pills, and teas.

They can also be used in body lotions, jams, baked goods (with another fruit is best), and wine.

Elderberry Warnings

  • Always cook your elderberry berries before consuming and never eat any of the rest of the plant or unripe berries because they contain poison. Other parts of the elder tree, including the branches, twigs, leaves, roots, and seeds contain a type of cyanide called glycoside.
  •  Poisoning can cause nausea, vomiting, and diarrhea. Larger amounts can cause more serious poisoning symptoms.
  • Never consume elderberry if you are pregnant or breastfeeding.
  • Individuals with an immune deficiency may have reactions to elderberry.
  • If you get a rash or have trouble breathing after you have some, you might be allergic to it.
  • Because it’s a diuretic, be careful when you take it if you’re also using medicines that make you pee more.
  • Always consult your doctor if you’re thinking about taking elderberry.

Planting My Own Elderberries

I want to grow elderberries where I live so that I don’t have to go down to the river to harvest some. One of the things that I just did which might produce elderberry bushes is I threw the elderberries that I am not using for the tonic and jelly into the perennial garden at the edge of the yard and perhaps they will grow. If not, I have other alternatives in mind.

Elderberries are supposed to be easy to grow from cuttings so this fall, we are going to get some of the cuttings from some of our favorite plants down by the river and plant those cuttings along with willow cuttings with the intention of having both root into the soil. Willow cuttings have a natural growth hormone that stimulates growth in other plants including elderberries.

If that doesn’t work, I can still purchase elderberry plants either at a nursery or online and can even purchase elderberry seeds online as well. As you can tell, I want to add elderberries to my own yard.

How about you? Do you grow elderberries? What’s your favorite way of using them? Please share in the comments below.

Featured

My Bread Making Secrets

Homemade bread (public domain photo)

Baking bread from scratch is one of the most basic skills for anyone who wants to develop self-sufficiency and create a perpetual homestead can learn.

I remember when I was a kid going to Dad’s cousin,s house. She worked out of her home before it was cool and baked bread and rolls for a locally owned store. I always liked to go to her house because it always had the wonderful smells of fresh, baked bread and any time I had a meal at her house, we always had some of that wonderful homemade bread. Sometimes I was there when she was making it and I learned a few of her breadmaking.

As an adult, I have learned that I am able to duplicate her breadmaking process and I am sharing some of what I know now.

Basic White Bread

Into a large preferable glass bowl (glass holds heat better than plastic or metal) put 2 ½ cups lukewarm water and sprinkle in two tablespoons of powdered yeast. Dissolve the yeast in the water.

Once dissolved, add a quarter cup of sugar. Let bowl of mixture set until yeast begins to bubble in the water mixture. Once the bubbling begins to occur, add ¼ cup of vegetable oil, one egg, and 1 ½ teaspoons of salt to the mixture. If the bubbling doesn’t occur, you’ll want to throw out the contents of the bowl and the yeast and get a new batch of it.

Next mix in 8 cups of white all-purpose or unbleached flour. The last of the flour you will probably have to mix in on the counter or a board. Add more or less flour depending on the consistency of the ball of dough.

Once you have the ball of dough at the right consistency and sitting on the counter or board, wash out the bowl and add a couple of tablespoons of vegetable oil to the bowl and place the dough in the bowl. Coat the dough with the oil and cover with a towel. Put the bowl of dough into a warm location to rise.

Once the dough is doubled, punch down and form the dough into two loaves. Place loaves of dough into two greased 9×4 ½ inch bread pans, brush vegetable oil on the top of the loaves and allow to rise until doubled. Preheat oven to 400 degrees Fahrenheit.  Without punching down, place loaves into oven. Bake at temperature of fifteen minutes then lower temperature to 350 degrees and bake until bread sounds hollow when tapped on the top. Remove from pan and tap on bottom. If the bread still sounds hollow, the bread is done.

Remove the bread from the pans and brush bread with melted butter to make soft bread crusts. Allow to cool before serving the bread.

Other Types of Bread

You can adapt this bread recipe for other types of bread easily.

For a crispier crust, don’t brush on the butter after baking.

For French bread, make an elongated loaf and sprinkle with seeds or herbs if desired.

For rolls, shape into rolls and place on a cookie sheet.

Whole Wheat Bread

Substitute 4 cups of whole wheat with 4 of the cups of all-purpose or unbleached flour

Rye Bread

Substitute 4 cups of rye flour with 4 cups of the all-purpose or unbleached flour

Potato Bread

Substitute 2 cups of mashed potatoes or dried mashed potatoes for two of the cups of all-purpose or unbleached flour can use in other types of bread as well to reduce over-all all-purpose flour needed.

Sweet rolls or Loaves of Cinnamon Bread

Roll out the dough and spread softened butter onto the dough.

Sprinkle cinnamon over the butter then sprinkle a generous amount of brown sugar over that and then another layer of cinnamon over the brown sugar. Add another generous amount of softened butter on top of that.  Roll the dough as tightly as possible. Cut the dough into rolls or just into loaves. Allow the bread to rise and bake.

Tips for Successful Bread Making

  1. Store yeast in the freezer to keep it fresh.
  2. Make sure that the liquid (water) that you use is lukewarm, not hot, and not cold as this can prevent the bread from rising.
  3. In cold temperatures, prewarm the bowl that you’re using for rising the bread.
  4. If your yeast doesn’t bubble after sugar is added, don’t add the rest of the ingredients. If your water was warm enough, discard the water mixture and get different yeast.
  5. Work your dough until it is elastic and not too dry and not too wet to work. If it still sticky and sticking to the working surface, add a little more flour.
  6. If you want a softer crust, brush with butter. If you want a crispier crust, don’t brush with butter.

If you enjoyed this post, be sure to follow this blog: The Perpetual Homestead where you learn skills to become more prepared in an insecure world.

Featured

Extending Your Fall Harvest Beyond the First Frost

(public domain photo)

Maybe it is because we have just exited an intense drought and it has been raising, but I have started working on my fall garden and have been thinking about what I can do to extend the crops that survived the 100-plus degree heat.

Last week my post was about the vegetables that I am going to be planting during the next couple of weeks. Here’s a link to that post. My focus on this blog this week, however, is to demonstrate ways that we can extend the harvest past the first frost in the fall.

Extending your garden beyond the normal autumn season is much like extending beyond the normal spring season except that you’re protecting bigger plants.

That’s right, ways do exist to extend vegetables like tomatoes, squash, cucumbers, and peppers beyond the first autumn frost with the use of a season extender.  

Many of the early season frosts can be made harmless to a plant simply by using a simple season extender. Often an early season frost would come and then warm weather would come and if the crop is not protected it will freeze and vines and fruits can be damaged. By using one of these season extenders even just one night, frost damage can be put off up to an entire month in which the plants can continue to grow and fruits can continue to mature.

A season extender can be used to trap heat from the sun to keep your plants and soil warmer as the temperatures outside dip down. It also protects your crops from the wind and snow, creating to a micro-climate in your garden.

Recycled Sheets

The first way that I learned to extend the harvest beyond the first frosts of the autumn season was to throw old bed sheets over plants like squash and cucumbers to keep the plants from an overnight frost. This was very effective for this type of plant with early frosts. These do need to be removed every morning, however.

Cold Frame

Another way to extend a harvest is to erect cold frames around plants that are growing. A simple cold frame can be erected by setting square hay bales around a group of plants and then putting old windows in frames over the bales or even covering them with sheets of plastic. Remove the plastic or window frames if the weather becomes warm and sunny or you’ll cook your plants.

Floating Row Covers

Purchased floating row covers do well for protecting long rows of vegetables from frost and these don’t have to be removed every day. These hold in the heat, create ventilation and allow rain to percolate down to the plants. To keep floating row covers from blowing away, be sure to anchor the edges of the row cover with rocks, sandbags, or bricks.

Greenhouse

The ultimate season extender is a greenhouse. Although this doesn’t do much for extending the season of plants that are already in the ground, you can plant a late crop of those same crops in the greenhouse to last you well into the winter months. If you heat the greenhouse, it can last even longer! However, greenhouses are expensive.

High Tunnel

A high tunnel is a greenhouse-like structure that you could put over an existing bed to extend your harvest longer into the winter months and are much less expensive. An easy high tunnel to build is made of cattle panels, supports, and sheets of plastic. They are fairly easy to build, and directions are available in many sources.

Low Tunnel

Another alternative is a low tunnel it is a cross between floating row covers and the high tunnel and can be used in conjunction with a high tunnel for additional season extension.

Cloche

If you only have one or two plants that you want to protect and that plant isn’t too tall like a pepper plant, you can build a simple cloche using a large tomato cage and plastic. Put the large tomato cage around the pepper plant and cover the cage with plastic. Remove plastic if the weather turns sunny and warm.

So what do you use or plan to use to extend your garden into the fall months? Please share in the comments below

To read more of Ten Powerful Ways to Save Money this Fall on my other blog How My Spirit Sings https://wordpress.com/post/authorcygnetbrown.com/3862

Featured

Planning the Fall Garden

(public domain photo)

Gardening recently has become a popular way for many people to make ends meet and creating a fall garden is a great way to extend your harvest longer into the season.

We’ve been in a drought with temperatures over 100 degrees Fahrenheit for the past two months and rain and the temperatures have fallen so I am feeling that it is time to plan to plant my fall vegetable garden.

What I Have Done So Far

Last week I planted broccoli and cabbage indoors and now I intend to plant them outdoors within the next couple of weeks. If I had any seed for it, I would also have planted Brussel sprouts, but I don’t have any available now. I do have seeds for other vegetables. Here are some vegetables that I will be planting during the next couple of weeks.

Green Beans

One of the first vegetables that I am going to be planting is more bush beans. I already pulled out the bush bean I had grown earlier this season.  I would like more fresh beans than the pole beans that I have so another planting of bush beans would be good not only for eating fresh but also to add to what I have canned already.

Greens and herbs

Another group of crops I intend to plant soon is greens. Greens come in many forms. Lettuce, arugula, beet greens, spinach, collards, and kale all can extend the vegetable harvest well into the autumn months. These are easy to plant, but you’ll want to plant them deeper than you would in the spring. Once planted, water every day until the plants become well established. Pick the outer leaves rather than taking the whole plant to help extend the harvest.

Some herbs like parsley, cilantro, and chives love the cooler weather. The cilantro can be allowed to go to seed. The parsley will produce until well into the winter months and the chives are a perennial that will come back season after season.

Root Crops

Root crops are another group of vegetables that grow well in the winter. Carrots, turnips, and beets all do well and will produce edible roots before snow flies. In many cases, you can make several plantings in succession every couple of weeks to guarantee a large harvest that you can keep over the winter months.

Radishes that take a month or less to produce can also be grown in succession and I will probably start growing some myself probably starting in September once temperatures cool down at night. I can also plant these in succession every week and may be able to continue to eat these along with the greens well into December and beyond if the weather stays mild.

Read more of Ten Powerful Ways to Save Money this Fall in this article I wrote on my other blog How My Spirit Sings https://wordpress.com/post/authorcygnetbrown.com/3862

Featured

What Is Growing That I Didn’t Have to Plant this Year

One of the nice things about being a perpetual homesteader is that there are foods that I am now growing that I didn’t have to plant this year. I have taken some permaculture practices and added them to my homestead so that I don’t have to reinvent the proverbial wheel every year by planting a strictly annual garden.

Today I want to share some of the fruits and vegetables that I planted last year that I don’t have to replant this year.


Strawberry Plants

When I lived back in Springfield, I was growing these strawberries and brought them with me when I moved here. I have a nice little patch of strawberry plants growing. Though I plan to move them to a better larger location next year, this year, I’ll have a nice little supply for us to eat.

Asparagus

Planted next to the strawberries is the asparagus. They take three years to get up to eating size. I started these from seed back in Springfield so they are a year shy of us being able to eat them, and they are almost to the size we want. We didn’t get any of the asparagus this year, but the chickens enjoyed a few choice spears. Next year we should be getting a decent crop for our own use. I am sure they will be worth the wait!

Baby Peach

Here on my peach tree, I have the first of two peaches growing. I am really excited because these are the first peaches I have ever grown. The variety is resistant to several peach diseases and insects. I am still learning about the various natural means of protecting these peaches from those problems.

I planted the peas this year, but is dill that I planted the year before last is coming in strong for the third year! This plant is not a perennial like the previous plants that I have shown. It is a self-seeding annual among several self-seeding plants that I have not had to plant this year. The rest of the vegetables that I am showing on this blog are also self-seeding annual vegetables.

Self-seeded potatoes

Though I planted a lot of potatoes this year, I found that a whole row of self-seeded potatoes also came up in the area where I planted last year. Potatoes, of course, are not usually grown from seed, but from tubers from the year before. It looks as though I didn’t get all the potatoes last year but that’s okay because it just means we’ll have more to eat this year!

I also have some lettuce and radish seeds that seeded themselves and in a day or two, I’ll be able to make a salad from these early vegetables.

For More Information, Check out My Books

If you’re interested in learning more about how you can create your own perpetual homestead, I am working on a book series called The Perpetual Homesteader series that shows tips on how you too can produce a perpetual homestead of your own. In the meantime, check out my other gardening books. Simply Vegetable Gardening The Survival Garden And my latest book The Four Seasons Garden Get your copies today!

Featured

My Garden is Flooded!

What do you do when your garden is too wet to plant?

For the past month, we have had warm dry weather intermittent with cold wet weather and mornings where frost has nipped certain plants that we were able to get into the garden. That changed this past week. Now the temperatures are perfect, but rain has become the issue. This past week, we have had a lot of rain that inundated many of what we had planted. The water-logged ground prevent us from being able to plant the rest of the garden as well.

Many gardens in the western United States are suffering from excessive dryness and much has been spoken about what they do about excessive dryness. However, not as much is written about flooded gardens and what to do about it. Therefore, if flooding is an issue for your garden, this post is for you. Many people would have just raised their hands in defeat, but here are some ways that I am dealing with the flooding problem in my garden.

Raised Some Garden Beds

Every year, this time of year, we get more rain than what we can use in the spring. Therefore, because we knew this is a yearly occurrence, one of the things that we did earlier this year was build a couple of raised beds for some of our plants. The tomato plants in those raised beds are doing well and are growing, but the ones along the fence in the main garden were swimming in pools of water.  We’ll no doubt be growing more of our tomatoes in raised beds next year.

Dig a Trench

Another thing that we have done is dig trenches the length of the garden bed perpendicular to the slope so that the water runs into the trenches and doesn’t wash the soil off the side of the slope. If soil runs anywhere, it will run into the trenches which is why we took an additional step so that the soil wouldn’t just run into those trenches.

Filled the Trenches with Organic Material

Because the soil is still so cool and saturated, we decided that we didn’t want to put mulch around the plants just yet. Instead, we are adding organic material to the trenches. We use these trenches for pathways between the garden beds. We’ve been using sawdust and a small amount of chicken manure as a sort of water collection system. This way, much of the water that sheds off the land into the trenches is absorbed by the organic material. Any soil that washes off the beds washes into the trenches and mingles with the organic material. The water is thereby stored in the garden for the months when the rain stops which around here is just after Independence Day. The organic material and the soil that came off the beds become food and home for soil microbes and earthworms and incorporate into the soil for future gardens.

No Tiller When Planting in Wet Ground

Often around here, the soil this time of year is so saturated that we are unable to plant using conventional methods once the rain does start to fall in the spring. Therefore, we must get a little unconventional in our techniques.

We do a lot of our garden prepping in the winter when it doesn’t rain as much, and we use a broad fork rather than a tiller. We don’t use a tiller partly because we have clay soil that if worked when wet becomes like adobe. Another reason we don’t use a tiller is that tilling destroys the garden tilth. And if that isn’t enough, tilling brings up weed seeds that have long been buried in the soil. A broad fork doesn’t create any of these problems except when the soil is saturated like it is now, so we have to get even more creative if we want to plant our spring garden in the spring which is our rainy season.

Planting in Saturated Ground

Because our soil is primarily clay, we have started to add small amounts of organic sandy loam to our garden in exactly the places where we need it most and that is on top of newly planted seeds. In some cases, for large seeds like corn and beans, I dig a row in the ground, put in a little organic kelp and the seeds, and cover with the sandy loam soil. Sometimes, especially with smaller seeds like carrots and lettuce, I broadcast the seed over the soil and sprinkle the sandy loam soil over the planted area. The plants come up in a few days.

How about you? What challenge is this garden season bringing to you? Please share your questions and comments below.

Featured

Container Gardening

sweet potato vines in a container of water
Sweet potato vines and roots from the garden. Will plant vines in tires in the garden in the spring.

Having a highly productive garden doesn’t require a lot of space, but I find gardening very satisfying no matter what the size.

Great If You Don’t Have Much Space

Container gardening might be the answer if you don’t have much space. A few years ago, I lived in a house where the only outside space I had was a concrete patio that faced east. For two years I grew a small container garden on that patio. I grew potatoes, cherry tomatoes, green beans, peppers, lettuce, and strawberries in five-gallon buckets and plastic pots.  Of course, I didn’t grow enough to grow everything that my family ate, but it was something.

Use Containers to Get a Jump on the Season

In the later winter and into the early spring of 2020 I started planting seeds indoors that I knew I would plant in my garden at our new place. Even though I had not moved yet I had lots of different seedlings growing from herbs to onions to tomatoes, peppers, eggplants, and even sweet potatoes had been started in dirt ready to be planted outdoors.

That year, I didn’t plant anything to stay in containers but instead grew to plant directly in the ground. The garden was fantastic. I was even able to can some of what we produced there on the property.

Why I Now Grow Both in Ground and In Containers

In 2021, however, I decided to try a little experiment and planted some potatoes in plastic buckets, but most of them I planted in the ground. I knew enough about how to plant each variety. The red potatoes that I planted in the buckets did well, better than the red ones that I put in the ground. When the buckets were ready to harvest, all that I had to do was dump it out on a tarp and collect the potatoes. I then took one of the small potatoes from the pile of potatoes and planted it in fresh dirt to see if I could get another crop from those potatoes. At first, the potato didn’t grow (I guess because the temperatures were too hot, but when the temperatures were optimal, they started growing and I had a crop before frost. I am guessing that the crop might have been bigger if I would have brought them inside when frost threatened.

Planting Sweet Potatoes in Tires

This year, I decided to plant some potatoes in the buckets as well. I intend to plant a bucket every week for ten weeks. (I have done six weeks already). The plan is that this would make it possible for us to have fresh potatoes available to us all summer long. Because I don’t have a lot of buckets this year, I plan to recycle bags that I got potting soil in. I just poked a few holes in the bottom of the bags for drainage and planted like I usually do. In addition, I planted potatoes in tires to contain them so that they are easier to dig as well. I am doing the same with sweet potatoes.

Sweet potatoes are an interesting project for me because I have been saving roots left from one year’s harvest, planting them indoors in containers, and then replanting them outdoors when all danger of frost has passed. I have planted them in two tires one on top of the other and filled with dirt. I plant them in tires so that they stay warm. They are easy to care for. I just make sure they get enough water and they love water. They are easy to harvest. When the plant dies back or frost threatens in the fall, I just kick off the top tire and pick up the sweet potatoes. I gather up a few of the roots and plant them indoors for the next year. They are that easy for me to grow.

Other Containers I am Planting

In addition, I have some sweet peppers planted in containers so that I can get some peppers as early as possible as well. I could do the same with tomatoes, especially our cherry tomatoes, but we already have them in the ground. I am thinking about planting some flowers in pots and putting them around the garden where I want pollinators to come and do their thing. I haven’t done that yet, but I think it’s a good idea.

Looking for more gardening information? Check out my books The Survival Garden–Plant a garden for food that you don’t have to can, freeze or dehydrate in print and on Kindle and The Four Seasons Vegetable Garden available only on Kindle.

Featured

Switching From a Conventional Garden to Raised Beds

We are starting to grow our tomatoes and peppers in raised beds this year and plan to do more during the next few years.

Our garden isn’t all that big. We don’t have a quarter acre in vegetable gardens, but we hope that our garden will provide more than enough vegetables for my husband and I this year. We have a 40×40 foot garden that has been in a conventional row system for the past two years, but this year, we plan to put in some smaller raised beds and will eventually replace the conventional garden with raised beds in the same area.

Our conventional garden had a lot of success. However, the garden required a lot of work just to get into shape for the following year. That’s why I am working to advance my entire garden to raised beds.

Why Raised Beds?

If you’re a beginner gardener, raised beds are for you because they remove many of the barriers that you face. Though raised beds require a little more upfront investment, it guarantees better success that first year. Build a box, add some soil, throw in some compost, sow some seeds, sprinkle on some water, and something will grow. This is much better than tilling, fertilizing, tilling again, seeding, weeding, weeding and weeding some more and then bending over or fighting hard rocky soil to get vegetables out of the ground.

A raised bed will up my soil for the easiest possible gardening. The less work, the better. Rather than tilling the soil every year to add fertilizer and amendments, I will be maintaining my raised beds by simply adding materials on top.

It will save me lots of work. Compost, mulches, manures, and other soil conditioners can all go directly onto the top few inches of the soil without the need for backbreaking work. The soil can do its own tilling as worms and roots push their way through. While regular mechanical tilling depletes the soil structure, adding organic material builds up the organic component of your soil over time. Instead of compacting the soil where the plants are growing, I walk on the paths between the beds, and never on the beds themselves.

I am getting older and I can use all the help I can get to continue gardening. A raised bed reduces back and knee strain.  A raised bed, especially one that is at least twelve inches tall, can resolve debilitating back and joint pain. Building raised beds is an investment in my health.

Raised beds help keep pests out of the garden too. The tall sides of a raised garden box will slow down the migration of slugs and potentially rabbits into your garden. In addition, some gardeners attach copper flashing to their boxes to keep the slugs out. If you install chicken wire to the bottom of the box, you’ll prevent digging animals, like moles and voles from eating your root crops. Dogs are also less likely to urinate on your box. If deer are a problem, consider placing inexpensive six-foot bamboo fencing around your garden area. Though the fencing is lightweight and easy to move, deer won’t jump the fence because they can’t see through it.  Uniformly designed raised beds are easy to add prebuilt plastic hoops to them for bird barriers, cold frames, or row covers.

A raised bed offers better drainage. Early in the gardening season, my garden is prone to flooding. The most popular depth for a raised bed is eleven inches, which is one inch below the sides of a twelve-inch high garden box. For most crops, this is enough drainage and gives plants almost a foot of extra breathing room above wet conditions. Raised beds also tend to drain better in general, even in heavy rains.

My garden will have fewer weeds and crabgrass. This was the biggest reason I am not using conventional rows. My garden became inundated with Bermuda grass, a perennial shallow-rooted grass that doesn’t quit during drought or deluge. This is wonderful grass for my lawn but chokes out everything in my garden if I don’t stay on top of it.

I don’t have to till. Tilling germinates more weeds by burying weed seeds and giving them the perfect opportunity to propagate. It also uncovers weeds that have been buried too deep to germinate. To make gardening even easier, I cover my beds with mulch, and cardboard, after a quick clean-up and dig with a broad fork in the fall to kill any of the plants that might grow during the winter. When it’s time to start planting again, I simply rake off the dead weeds before they have a chance to go to seed. I’m learning that one of the most effective ways to battle crabgrass is with a raised bed. I put cardboard on the bottom of my beds before I fill them to stop the grass from infiltrating.

Raised beds can be planted earlier in the season than conventional rows. Early planting in raised beds is possible because the soil dries out faster in the spring and warms more quickly for planting than soil at ground level. Many gardeners also find a surprising number of plants have overwintered in a raised bed that usually wouldn’t otherwise. This partly relates to the type of soil in the bed. If untilled and fortified with compost, your soil will regulate temperatures better than disturbed, nutrient-poor soil. In addition, raised beds can be retrofitted with a cold frame that helps warm the soil.

Planting in beds save me space because I’m able to plant closer within the bed than I would if I had to weed between each row. The closely planted garden vegetation will require less space than it would if the plants were planted in rows. If a plant gets a disease, I can easily pull it out and replace it with another. I can also plant smaller quicker growing plants between larger slower growing plants and get more than one harvest in that bed.

Other Situations Where Raised Beds Would Benefit

Raised beds look good, especially if the only decent place you find to grow your garden is in your front yard. In the city, a raised bed may be needed to keep neighbors from complaining. I have my garden beds in the front yard because the ground in the backyard slopes to the south and the neighbor’s trees block the sun. Because I planned the bed spacing to specifically accommodate my lawnmower, I’ll be able to mow the pathways between my raised beds and create a distinct separation between the bed and those pathways. This will decrease the need for weeding because I won’t have to weed those pathways. A pass with my lawnmower and my garden path looks manicured. Throw in a few strategically placed flowers in the front garden beds and my garden will become a showplace.

If you’re not in your forever home like I am, raised beds may be the best answer for you. Raised beds don’t have to be permanent. If you don’t own your garden area and you’re not sure if your landlord would allow you to have a garden, talk to them about your plans and show how aesthetically pleasing your raised beds can be.  A neat and properly built garden box can enhance property values and be a feature rather than an eyesore. If the landlord still says no, a temporary garden can be built by using a removable garden box. The box is simply set on the ground, cardboard is placed over the grass inside, and the box is filled with soil. When you move, take the box with you, spread out the soil, and throw down grass seeds.

With raised beds, you can avoid soil contaminated with heavy metals. Urban gardeners are at a higher risk of ingesting heavy metals, especially lead. Many different vegetables, especially roots, tomatoes, and greens, can easily absorb unacceptable amounts of heavy metals from contaminated soils. Keep your beds away from the road and research how your land was used in the past. If possible, plant thick between the road and your garden beds. Then bring in new soil for your raised bed that hasn’t been subjected to whatever toxicity may be on site. Toxicity is further reduced by adding compost. As time goes on, you’ll be diluting the concentration of contaminates every year by binding heavy metals to soil particles.

Want More?

Would you like more of this kind of content? Be sure to like this page. Also I have two new books you’ll enjoy. The Survival Garden available in paperback and on Kindle

and The Four Seasons Vegetable Garden, available only on Kindle.

Get your copies today to grow an incredible garden!

Any questions or comments? Please reply in the comments section below.

Featured

Our Tomatoes and Peppers in Raised Beds

Planting these tomatoes was the first step in developing this raised bed.

One of the widely practiced strategies used in gardening involves interplanting. Intercropping is a gardening strategy that involves planting or growing more than one crop at the same time and on the same piece of land. It means having more than one type of crop growing in the same space at the same time. It also means more vegetables coming from that space! One of the most efficient ways to interplant is by using a raised bed.

Planting in Raised Beds

This can be done with numerous types of vegetables and herbs and will help you make the most of your garden space. We’re using growing our tomatoes and peppers in the same beds this year.  We plan to get lots of tomatoes and peppers from a small space.

Planting the Tomatoes Outdoors

We’ve already planted the tomatoes in the middle of the bed and put cages around them so that they grow more vertically. We put water containers with holes cut out of the bottom to keep them warm enough not to freeze during frosts that are sure to come. At night we remove the caps from the jugs and during the day we take them off so that the tomato plants can breathe.  We want to get the tomato plants well established before we put in the pepper plants. For more information about planting tomatoes see my post on this blog: Healthy Tomato Plants from Seed

Planting Peppers Outdoors

Around these tomatoes, we’ll be planting peppers in staggered rows two rows on each side of the tomato plants. Although we were able to plant the tomatoes in the beds before the last frost, we will put the pepper plants into the garden after all danger of frost has passed because we have found that they are much more sensitive to cold than tomato plants are. We have two of these raised beds devoted to peppers and tomatoes. One will have sweet peppers in it and the other will have hot peppers in it. We keep the hot peppers separate from the sweet peppers because often the two types of peppers will cross making the sweet peppers taste hot like the hot pepper. There’s nothing more shocking than eating what you think is a sweet pepper when in fact, it has crossed with a habanero!

To learn more about how we grew our peppers from seeds, see my post on this blog: Pepper Plants from Seeds

There’s More Room for Even More!

 Once we plant the peppers in the bed with the tomatoes, we’ll sprinkle basil and cilantro between the pepper plants and put marigolds at the corners of the beds. These aromatic herbs and flowers will help keep pests from damaging the pepper and tomato plants. Even weeds will have a hard time competing with these plants!

If you like what you’re reading here and want more, be sure to check out my latest books: The Survival Garden and The Four Seasons Vegetable Garden.

If you have any questions or any comments, please be sure to ask in the comments section below!

Featured

Recycling in the Garden

photo of making garden pots using newpaper and a soup can and held together with tape.
You can make newspaper pots using newspaper and a recycled soup can for plants sensitive to transplant shock. You can use tape or hot glue to keep them together.

The average American creates up to 2,072 pounds of garbage every day. I would bet that my husband and I produce far less than that because we recycle a lot of what garbage we produce with garden projects. Here are a few of them that I have been using lately.

Making Seed Planting Containers

I have reused planting containers that I got from nurseries to use as my seed planting containers. I have cut the bottom out of milk jugs and water and soda bottles to use as planting containers and having seed some planting containers, I started using yogurt containers.

In addition, if I need biodegradable containers that I can use that will transplant shock in plants like cucumbers and other members of that family of vegetables, I make newspaper pots. I make them by cutting the bottom out of a tomato soup can and then cut newspaper pieces twice the length of the can and able to go around the can at least twice. Wrap the newspaper so that one end is even with the top of the can and the other half hangs over the end of the other end of the can. Wrap the can and hold the end with some hot glue. This creates the sides of your pot. To create the bottom of your pot, take the overlapping end and push it into the bottom of the can to create a bottom for your pot. To hold the shape of that bottom, use a dollop of hot glue. Carefully remove the newspaper pot from the can and begin making the next one.

Recycled Potting Soil

Once you have the pots, you’ll need something to fill them. If you have any, you’ll want to recycle your old potting soil too. This will save you money. To recycle it, you’ll want to add some homemade compost (made with recycled household and yard wastes, of course!). Add any other favorite organic fertilizer and you have soil ready to use again!

Recycled Seeds?

I save seed. I save a lot of money by saving the seed from one season’s growth to the next. This isn’t technically recycling, but it does create a sustainable source that you don’t want to ignore.

Preparing the Soil with Recyclables

After you have plants made from recycled items, you’ll want to continue using recycled materials in the garden. I never use store-bought fertilizers. Instead, during the winter I put yard wastes and kitchen wastes onto the garden and allow my chickens to eat and scratch in it. I also put my wood ashes on my garden areas. If I had more time in the fall, I would lay cardboard on the soil and the compost on top of that. So far, I haven’t done that, but what I have started doing this year is using the cardboard in my mulching system. Before the gardening season begins, I put cardboard down in the pathways and then cover them with sawdust (also a recycled item that I can get for the price of someone hauling it for me. If I had my own truck, it would be free.) More uses for cardboard to come!

Recycled Outdoor Planting Containers

A lot of times we just plant in the ground as a no-cost container. Other times, we have reasons for building containers. Most of my garden is currently planted in the ground, but I also have some raised beds made of old lumber that we had lying around our place that we nailed together. In addition, I have potatoes planted in used tires placed on cardboard and filled with garden soil. After the potatoes start growing, I fill around the potatoes with mulch. I also plant potatoes in recycled buckets. I put holes in the bottom of the bucket, fill it halfway up with soil and plant the potatoes in it. I then fill up the rest of the bucket with mulch. Once filled, I allow the potatoes to finish growing.

I don’t do this but I have heard a lot lately about people using cardboard boxes for growing potatoes. Do you or do you know of anyone who does this? Please tell me about your experience in the comments below.

Homemade Cloches from Recycled Milk Jugs

I am using recycled milk jugs for cloches. A cloche is a small translucent cover for protecting or forcing outdoor plants. I am using them to protect my tomato plants and pepper plants from late frosts.

Recycled Vertical Supports and Fencing

You must be careful when using supports that have been recycled. Rotten or insufficient plant supports can do more harm than good. Some of my favorite recycled vertical supports are supports made of durable materials like metal that will last decades. Fencing is the same. Purchase good materials in the first place and you’ll have materials to recycle indefinitely. For more ideas about vertical supports, see my post in this blog: Support for Your Garden Plant.

Recycled Mulch

Recycled yard wastes make some of the best mulch. Grass clippings and tree leaves as well as wood chips and sawdust all contribute to a well-mulched garden. I make mulch gathering around the yard easy by using a grass-catching lawnmower to chop and gather leaves and grass that goes onto the garden throughout the season. This mulch breaks down and becomes nutrients for the soil. I have found that the mulch breaks down too fast and that perennial grasses and weeds readily break through the mulch. This year I plan to put cardboard or paper feed sacks down before I put down the mulch to smother the weeds longer so that the plants have a chance to take over the bed.

These are, of course, not the only ways that I recycle otherwise disposable items and with imagination, I am sure that you can think of other ways to recycle them in the garden. What ways do you recycle in the garden?

Featured

Support for Your Garden Plants

Corn can be support for pole beans and squash

Some plants need support and others do not. Some plants require support to prevent being deformed and prevent disease and pest damage from the ground. In addition, vines allowed to grow indiscriminately can choke out their own vines limiting proper fruiting of that plant.

Supporting your plants helps in saving garden space because you’ll allowing them to grow vertically. By training them to grow upward, you may even be able to utilize the space vacated by planting other plants under them. 

Plants that need support

Plants that are best supported include cucumbers, peas, beans, winter squash, and tomatoes (especially indeterminate varieties).

Use Vertical Structures for Growing Up Rather than Out

These vertical structures can be placed in a way in which the plants around it are placed on the sunny side of a structure (in the northern hemisphere it is on the south side) or on the north side of a structure so that it shades the plants you’re trying to grow. Alternately, you could also place the structure in the center of the bed so that you can plant vegetables of both.

Some plants need structures to support a plant to go upwards. Fences, trellises, stakes, trees, corn, sorghum, and even hanging baskets are examples of verticals structures. Just be sure that the structure will be strong enough to hold the plant as it grows and develops. Lightweight and flimsy structures can easily collapse under the weight of a heavy plant.

Examples of structural Garden Supports

Fences-A fence around your yard that gives you enough sunshine can serve as a support for your plants. An open metal wire fence works better than closed wooden fences because the lack of sunlight can block the sunshine. A challenge can be weeds along the fence. This can be remedied by keeping weeds pulled or prevented with a heavy mulch.

In addition to existing fences, you can also consider putting up fencing specifically to grow within the garden. To save even more space, consider growing on both sides of a metal wire fence. I often plant peas on one side of the fence and later plant tomatoes on the other side.

Tomato cages-just because it is called a tomato cage, doesn’t mean it can only be used for growing tomatoes. Other vegetables can be grown on them as well such as beans or peas.

Bean towers-You can buy bean towers, or you can construct your own. Bean towers aren’t necessarily just for growing beans either. They can be used to grow peas. Sturdier ones may even be used to grow squash or melons.

Trellises- Like tomato cages and bean towers, trellises can be used to support any of the vegetables mentioned previously. As stated previously, be sure that these trellises are strong enough for the intended plants.

Stakes-Individual stakes can also be used to hold up individual tomato plants or used to support beans or peas. They can also be used as supports in windy areas for things like corn or potatoes.

Trees-we don’t often think of trees as supports for garden vegetables, but in some cases, plants will grow up trees especially if there’s adequate exposure to sunlight. Trees on the north side of a garden work well for this. In addition, you can grow peas in the spring on trees before the trees’ leaves are out.

Corn-Another living vertical support is corn. Corn is one of the well-known sisters in the three sisters’ garden and provides vertical support for beans and squash (or pumpkins).  

Sorghum-Yet another living vertical support is sorghum. Sorghum is a lesser-known plant that can be used for its grain and for making sorghum molasses. I like to grow it with cowpeas and okra. It provides support for the cowpeas and grows well with okra.

Hanging baskets-many people don’t think of hanging baskets as vertical growing, but they are. Hanging baskets can be hung on the south side of a porch and offers a growing area for plants such as peas, pole beans, squash, and sweet potatoes. You can also grow strawberries in these hanging baskets.

Planting towers-Plant small plants in numerous built-in pots in a planting tower. Greens and many herbs grow well this way and if you plant the individual cells over time, you’ll have a continuous harvest of greens and herbs from an amazingly small space. You can build one of these yourself using pallets. Nail four of them together into a square. Half fill the center with soil. Plant indeterminant potatoes in that center part. On the outside, create little planting boxes around the outside and up the sides by securing landscape fabric to the bottom of each of the boards, and fill the little boxes with soil. Plant vegetables like lettuce and other greens, plant herbs like parsley, chives, and cilantro, and even fruit like strawberries in each planting box that you create. As the potatoes grow, fill in the bed with more soil, straw, hay or even dried grass clippings (dried because too many green grass clippings and the grass will heat up and burn the potato plants.

South (or in the southern hemisphere, north) facing wall of a building-You produce a lot in a space that is not often utilized in your yard simply by growing hanging plants and growing plants that grow vertically up trellises and utilizing planting towers that can either be homemade or purchased. It’s almost like having another complete garden area to work from!

The Survival Garden, available on kindle and in

For information about growing vegetables that you don’t need to can, freeze or dehydrate check out my latest books The Four Seasons Vegetable Garden (only available on Kindle) and The Survival Garden available on Kindle and in Paperback.

Featured

Pepper Plants from Seeds

This pepper plant has been transplanted by placing a small peat pot into a larger peat pot enabling it to have more room without transplant shock.

Although it is easier to purchase ready to plant transplants, many reasons exist for growing your own pepper plants.

Why Grow Peppers from Seed?

The pepper transplants that I grow at home are healthier, sturdier seedlings than any I could purchase at a nursery. That means they’ll suffer less transplant shock, which often means better production.

I have found that healthy plants are less likely to develop diseases and are less prone to being attacked by insects.

Annual plants that I used to buy from nurseries were available only during a few months out of the year. Therefore, if I want to eat from my garden longer in the season, I had to learn how to grow some of my own. When I grow my own transplants, I usually end up with more plants than I need, so I share or trade with friends or neighbors.

In addition, you’ll be able to time transplants for when you need them, not just when they are available at the nursery. You can time them, so they’ll be just the right age when you’re ready to transplant Seedlings you buy are often root bound which slows down their growth. By growing your own transplants, your plants will have a better start on life and be healthier overall.

I discovered that peppers sown from seed let me choose from a larger number of varieties. A lot of gardening diversity is only available to gardeners who grow from seed!

In addition, things happen. If one of my plants dies, I have a plant available to fill in. I’m able to grow plants indoors that wouldn’t be able to grow outside at that time of the year. Not only can you grow transplants for getting an early start in the season, but you can also grow indoors in air conditioning, cool weather plants that don’t germinate well during the heat of the summer.

Peppers are especially sensitive to the cold and won’t germinate unless temperatures are warm because they are tropical plants.  Because I don’t have a greenhouse (yet!) I start my pepper plants indoors. This year I discovered that my heat mat really speeded things up because the plants were kept warm enough to germinate.  

Potting Medium

The purchased potting soil specifically indicated as seed-starter is good for planting seeds. The seed-starter potting mix has been sterilized so there are no fungal or bacteria that can overcome the young plants. If soil is not sterilized, young plants are especially sensitive to a disease called dampening off. This fungal disease is evident when the young seedlings sprout but suddenly turn to mush and the roots sport white webbing. By sterilizing the soil, the soil no longer can harbor this disease.

 This potting soil has a light texture which allows the roots to grow deep. Garden soil is too heavy and may cause plants to rot if it has too much clay or sand, and the soil will not be able to hold the water that the young plants require. A peat and perlite blend gives the average plant its best shot at good root growth. Before putting soil in your pots, dampen the soil so that it has the moisture content of a well-rung-out sponge. You don’t want it too wet. Dampening the soil is best done in a large tub.

How to Plant Peppers

When I fill the pot with soil, I use biodegradable pots that I can bury the pot and all into the soil. You could use commercial pots of various kinds, or you can make your own. If you’re recycling pots from previous seasons, it helps to wash your pots and then soak those pots in a bleach solution for about fifteen minutes.

I put an indentation in the middle of the soil in my pot and drop in my pepper seed. I then cover the seed with soil to the point that soil covers the plant to a depth of two times the length of the seed. When in doubt, I use the depth recommended on the seed package.

Once the seed is covered, I spritz a little water over the top of the soil in the pot then cover the entire pot with some breathable plastic. This will keep the top of the soil from drying out. I have used plastic bags from the grocery store and have had good results. I keep the plastic on the pots until I see the seed leaves or cotyledons appear. These are the first leaves to emerge from the soil when a plant germinates. They are part of the seed’s embryo and provide nutrients to the plant until its true leaves unfurl and begin photosynthesis. Most plants don’t need to be in the light to germinate but make sure to get them under a light as soon as these first leaves appear. Good grow lights are critical to growing healthy pepper plants.

Once the peppers germinate, plants should be either put under grow lights or outside in a greenhouse. Keep them watered and fertilized until ready for transplanting.

When to Transplant Seedlings

I know when my plants are ready for transplanting when I loosen the plants from their containers and the plants hold their shape. If a large amount of soil is not held together by the plant’s roots, my plant doesn’t need to be transplanted yet. However, if the plant holds its shape and the roots are starting to wrap around the outside of the container, I’ll either need to repot the plant into a larger container or plant it directly in the garden.

When replanting into another pot, I fill the new pot up with soil and then take the pot where the seedling is growing plastic pot and all and create a hole in which the pot can fit. Once the hole is created, I sprinkle a little organic fertilizer into the hole (I use dried kelp) and then remove the plant from the pot and place it in the hole. I make sure that it fits so that I don’t need to add any more soil. I then pack the soil around the plant from the top and water from the bottom of the plant. I don’t plant the pepper plant any deeper than it was growing in the original pot.

Before I plant the peppers outdoors, I harden them off like I recommended for the tomato plants in the previous post Healthy Tomato Plants from Seed.

If you want to learn more about growing a home garden, check out my two latest books:

The Survival Garden

and

The Four-Seasons Garden

Featured

Healthy Tomato Plants from Seed

healthy young tomato plants
Healthy young tomato plants in peat pots

Tomatoes are the mainstay of almost every backyard vegetable garden and our garden is no exception. Our plans this year include eating all we can while they are fresh, canning them in various forms as well as selling some at farmers’ market. We have planted several varieties of tomatoes that we plan to put in our garden this year.  

Planting Tomato Seeds

I plant tomatoes differently than I plant other annual vegetables from seed. I have a special way that I start them that helps me grow strong healthy tomato plants with deep root systems. This year I discovered that I like growing them in peat pots which will be easier to transplant and cause less stress to the tomato plants than growing them in plastic pots would. Instead of planting them in a small planting cell, I like to plant them in quart-size pots and fill only half of the pot with soil. I then plant tomato seeds in the pot and cover the pot with a plastic bag. I then put the planted pot on a heating mat. Within a few days, the tomatoes begin the germinate.

After the seed germinates, I put the small plant under grow lights and let the plant grow. Once the plant has its first true leaves, I start adding more soil to the pot around the young seedling. As the plant grows, I add more soil around the stem of the plant until I have filled up the entire container. New roots will start growing around the stem of the plant. Once you have a nice plant above the rim of the pot and the danger of frost has passed, it’s time to prepare your plants to plant outdoors.

Hardening Off

Don’t confuse ‘hardening off’ with ‘dampening off’. Dampening off is a fungal disease. Hardening off is a process in preparing your plants for planting outdoors. Plants grown indoors have been treated delicately as they grew, but when we put them outdoors, they are exposed to things they don’t get exposed to indoors like heavy rains, strong sunlight, and drying winds. Hardening them off toughens them over a week or so. By doing this they can better handle what nature throws at them. If you take plants straight out of your home or greenhouse to plant them into the garden, they don’t have a good chance of surviving the transplant. They will start by wilting badly and going into shock. Their leaves can turn white from being sunburned. You’ll slow down their growth or worse, kill them.

You’ll need to have a way to take your plants in and outside because in the next several days you will be doing just that. A strong tray or box works well for this purpose. I use cookie sheets that I picked up at a local secondhand store. Also, you will need a place to put your plants where it will offer shade at least part of the day and where they will be protected from the wind.

The hardening off process will take you between a week and ten days to accomplish. Start by placing your plants in the shaded area. Keep them outdoors for between 30 minutes and up to four hours. On the second day, increase the time your plants are outdoors by an hour. On the following day, put them in a location where they have some filtered sun and increase your time by another hour. Continue increasing the hours outdoors and exposure to sunlight by an hour every day. If a cold snap prevents you from taking your plants outdoors, you may need to start the process all over again or add a few days to the process. This depends, of course, on how cold and how long the cold snap lasted. On the last day or so before transplanting, put the containers in the garden where you plan to transplant the plants and leave them there all day. If they don’t show any signs of distress, they are ready to transplant into the garden.

While hardening off, put extra water in the plant reservoir and increase exposure to breezes as well.

How to Transplant Tomatoes

When I plant tomatoes in the garden, I plant them differently than I do other plants to produce strong root systems and increase production.  

I have learned that it is important to put the support structures into the area where I am putting in the tomato plants before planting the tomatoes. This prevents damage to the plant roots. The only exception to this would be tomato cages which you would put in immediately after planting and do your best to avoid severing the roots with the cage.  

Once you’ve hardened off your plants, you’re ready to transplant them into the garden. You shouldn’t plant your tomato plants to the same depth as the pot in which they were growing. Instead, remove all but the top cluster of leaves and plant the tomato plant up to that top cluster. Before planting, however, you’ll want to remove any flowers or small fruit that may already be forming. This may seem counterproductive, but at this stage of the plant’s growth, energy must be concentrated on the plant’s roots for the best production from the tomato plants. The stronger the root system, the more resilient the plant. If you live in an area that lacks rainfall and is hot, plant tomato plants deep. If you live in an area where rain falls regularly and the temperatures don’t cause soil to overheat, plant them so that the roots spread out sideways along or in front of the bed.

Dig the hole for the tomato plant in the way that you intend to plant it. Now, In the bottom of that planting hole, put a dusting of powdered kelp. Sprinkle in some worm castings, as well, if you have them. The kelp will ensure that the tomato plant gets the nutrients needed to prevent blossom end rot and the worm castings will provide nitrogen in the root zone will give them a boost for growth right after transplanting.

Water the bottom of the planting hole and then put the tomato plant into the hole. Because my tomatoes are planted in the peat pots, I can bury them pot and all. Cover the plant’s stem with soil up to the leaf cluster at the top of the plant. Again, water over the entire area where the plant is buried. Keep the soil around the plant moist until you see new growth on the plant then water deeply once per week, or let the rain do it for you, at the rate of one inch per week. It is important to maintain even watering of your tomato plants especially during dry weather to prevent your tomatoes from splitting when it does rain.

When you see new growth in the leaves on the tomato plant, mulch around the plant as well to help keep the tomato plant’s moisture from evaporating. Mulch also prevents rain or irrigation water from splashing onto the plants which can cause blight to spread from the soil onto your plants.

Through the Season Maintenance

Once you have your tomato plants established with a great root system, you’ll be in maintenance mode. Much of what you have already done will ensure that you have healthy plants that shouldn’t have as many problems during the growing season. Some of the other things that you’ll be doing, while you’re maintaining the plants, will be tying up the plants so that they are not laying on the ground, watching for pests, weeding, mulching, and watering until your tomato crop comes in. I’ll be sharing more on this in the coming weeks. Until then, happy gardening!

My Latest Gardening Book Available on Kindle!

The Survival Garden book-with photo of pumpkins and squash on a cart.

For more gardening tips, check out my latest book on growing vegetables that you don’t have to can, freeze, or dehydrate The Survival Garden. The Survival Garden will get you through the winter.

Featured

What Do I Grow in the Vegetable Garden This Year?

What should you plant in your vegetable garden this year?

It’s that time of year again! It’s time to purchase seeds for starting the annual vegetable garden. But what should you be growing?  With the uncertainties of the food supply chain, it is imperative that you know how to discover what to grow in your vegetable garden.

If you’re new to gardening, this article is here to show you where to go to discover what you should grow successfully.

Grow What Your Family Will Eat!

Probably the most important advice that you’ll get from anyone is that you should grow the vegetables that your family will eat. For instance, if your family doesn’t like carrots, you shouldn’t grow them. If your family only eats corn, green beans, potatoes, and tomatoes, then you should grow them. You should grow them if those vegetables will grow in your area. So, determine what your family will eat and put them on a list. Now that you know that, it’s time to find out what you CAN grow where you live.

How Do You Know if What You Eat is What You Can Grow Where You Live?

I would love to be able to give you step-by-step instructions on how you can grow your best garden every year, but even if you did exactly what I do, you won’t get the same results that I get. In fact, if I do the same plantings in different locations or in different years, I will get different results.

 I can’t tell you when to plant specific varieties of plants, nor can I tell you specifically what vegetables you should plant when or whether or not you should plant a specific type of vegetable! I would take with a grain of salt anything that anyone who tried to say that they can do this for you. I can, however, suggest places you can go to get better educated on your planting region and zones so that you can make better choices on what grows in your area and what doesn’t. This information can also help you know when to plant your garden and the general types of vegetables to plant.

Your County Extension Office

One of your local resources is the county extension office of your county if you live here in the United States. These people are paid with your tax dollars so why not hear what they have to say. They can tell you what zone you’re living in, what others have grown in your area, and what you should consider not growing.

Glean Information from Your State Conservation Department

Speaking of those who are paid with your tax dollars, you can also contact your local conservation department to learn what animals might be a problem for your crops and what you can do about them as well as what endangered plants and animals you should avoid killing. They may also be able to tell you when various insects are likely to be causing problems in your area.

Plus, they will tell you things that you should know like how many deer, raccoons, possums, crows, and other animals are near where you live. This is good information to have if you want to know what critters are in your area. Deer may be a great resource if you’re a hunter but are not so good for you as a gardener. If you want to grow a lot of corn, you may want to have a plan in place to combat raccoons.  

Fellow Gardeners as a Resource

Find out about other gardeners in your area. Perhaps there’s a nearby gardening club. If another gardener lives nearby and you like how their garden looks, consider introducing yourself whenever you see them working in their garden. Be sure to have a list of questions that you would like to ask. Most gardeners are happy to share what they know, especially if you offer to help do a little weeding with them while you talk. They can also tell you about what you can and can’t grow.  

Seed Catalogs

Seed catalogs also offer a lot of information about specific varieties. Pay particular attention to what zones the variety grows best and compare that to where you live. If your planting zone falls into the recommended zones, that seed might be a good option for you. In addition, the seed catalog description will tell you how much sun the plants will require, how far apart to plant the seeds, how far apart to put the rows, and how many days from seed, or transplant to harvest.

Seed Package Information

Don’t overlook the seed package itself as a resource. It’s pretty much the same information that comes from your seed catalogs but is more readily in hand.

Your Own Experience

That’s not to say that I believe that you should take the word of anyone else as gospel. Your own experience will teach you better than what others can tell you about what vegetables will grow where you live. As I said before, your land is going to be unique and will have its own set of idiosyncrasies also, what works one year might not work the following year.

For instance, my garden in 2020 was amazing. I purchased one of those “survival gardens” that had numerous types of vegetables and I planted some of all of them in my garden (at the right time of year, of course).  I was able to keep getting food from the garden all spring, summer, and fall from what I planted. My experience in 2021, had different results. My bush beans didn’t do well, but later my pole beans did, but the pole beans had not done well during 2020, but the bush beans did). I had a difficult time getting squash of any kind to produce. The insect pressure was too great. (It was the same for most people in my area, even those who used pesticides which I don’t use.)

I can’t tell you that you will have a perfect garden every year, but what I can tell you is that if you grow a diverse variety of vegetables, plant over several months, and maintain healthy soil, you’ll develop a garden that you can pick from every day of the year from early spring to late autumn and beyond!

What I can tell you is that by experimenting with different growing styles and vegetable varieties, you will soon know what works in your location and what doesn’t.

Are there questions you have about what vegetables you should grow where you live? Is there anything that you would like to comment on regarding what you like to grow in your vegetable garden?

If you like what you’re reading here, consider following this blog! And check out my latest book The Survival Garden and look for its upcoming sequel The Seasonal Garden!

Featured

Where Should You Put Your Garden?

Where you locate your garden is as important as what you put in it.

With the price of food skyrocketing, many people are gardening this year for the first time. This article is to help you determine where the best place is on your property for your vegetable garden. If you’re thinking about putting in a vegetable garden this year, you’ll need to consider several factors for where to put your garden. You’ll need to have good accessibility, you’ll need to know your climate and weather, you’ll need to know how many hours you have access to direct sunlight, and you’ll need to know where water is most readily available to your garden, and you’ll need to have a location with good soil.

Personal Accessibility and the Accessibility for Tools

How easily can you get into the garden? Do you need special accommodations to be able to work in your garden? For example, if getting down on your knees is too difficult, perhaps you should consider using raised beds that eliminate much of the bending and stooping.

Also, can you get whatever equipment you’ll be using into the area?  What about supplies? Can you easily get supplies like manure, compost, and mulches to your garden area?

Climate and Weather

How well do you know your climate? What is your average monthly rainfall for each month of the year? Does your area usually have regular rainfall during the summer months? Are there months when you’re likely to need to irrigate? How many sunny days do you have every summer? What is your average high temperature each month? What are your summer highs? What are your summer lows? When is your average last frost date in the spring? When is your first average frost date in the fall? Don’t know the answers? Ask a neighbor or friend who has been gardening for a long time or contact a local government agency. 

Sun Access

Will your garden have at least six hours of direct sunlight per day in the spring? How about in the summer and fall? Is it possible that you’ll have too much sun for your vegetable plants?

A seedling’s sun exposure requirement is indicated on the seed packet or nursery label. Full sun is 6-8 hours of direct sunlight each day. Next, plant your garden to follow the sun. The sun rises in the east and sets in the west. The Eastern morning sun is mild and the western afternoon sun is considerably hotter, especially in the summer.

Row orientation. Experts advise the best way to give plants the most sun exposure during the northern hemisphere’s growing season is to plant rows of vegetables running north to south. Personally, I plant my rows going east and west and plant taller plants on the north side of the garden and shorter plants to the south.

Access to Water

Almost every annual vegetable that I have ever seen requires at least one inch of water per week. In most areas, at certain times during the gardening season, the rain will not be sufficient to provide that one inch of water per week, so you’ll need to supplement the water needed for optimum productivity.

 Watering for too long creates an open invitation for fungus. Water too little, and roots become shallow. If you’re watering too high off the ground, half the moisture will be lost to evaporation.

Water is a precious resource for any gardener. Consider collecting water for your garden with rain barrels that have garden hose connections. You can build your own rain barrel or shop top-rated rain barrels.

The best time to plant is either in the early morning between 5 and 10 a. m. and in the evening just before dark. (Though some experts say to never water in the evening because warm wet soil and foliage attracts insects, fungus, and disease.

Avoid watering lightly or more often because it promotes shallow root growth. Be sure to water deeply and about 1-2 times per week only so that the water reaches the root. Soaking the soil to 5 to 6 inches encourages deeper root growth and creates more resilient plants.

Don’t water overhead. Water the base of the plant rather than the foliage because wet foliage invites fungus. Also, less water will evaporate because you’ll be watering the root zone making it more available to the plant roots. For best irrigation methods that conserve the most water, use a drip irrigation system rather than a sprinkler system.

To conserve even more water, mulch beds and containers with several inches of organic mulching material cool the soil and retain moisture. Watering soil that hasn’t been much can splatter mud on plants and cause runoff. An added benefit is that mulching also cuts down on the need for weeding!

Flatten a Garden Slope

Sloped garden areas are unique challenges including difficulty maneuvering on the sloped ground, establishing plants on it, and controlling erosion. You may want to use the land for perennial ornamentals or perennial vegetables, berries, or even orchard trees, rather than cultivating annual plants on it, but in many cases, the recommended steps below may make annual gardening possible.

Next select plants. Grow perennials or suitable groundcovers whenever possible between annual beds to act as soil anchors, slow the speed of the water running down the slope and reduce the force of impact of raindrops on the soil surface.

When you plant, orient rows or plants on contours perpendicular to the slope and alternate plants in rows so that individual plants are staggered and prevent water from running in a line straight down the slope. When cultivating, leave small channels between rows to collect water and allow it to drain slowly into the soil.

Many people would direct water off the slope with one or more French drains or perforated drainpipes located halfway down or at multiple levels on the slope. They create a trench at least 6 inches deep and wide that runs perpendicular to the slope and leads to a ditch, rain garden, or another suitable outlet. They place perforated pipe in the entire length of the trench and fill the trench with clean, coarse gravel. If the soil is particularly silty, they might line the trench or wrap the pipe and gravel in landscaping cloth or filter fabric to prevent clogging.

I think that a better choice is to use berms and swales Instead of using a French drain to redirect water.  Berms and swales help slow and direct heavy rains to soak into the soil rather than being directed down and off the slope. The longer it takes for water to meander down a hill, the more it will soak into the ground.

A swale is a shady spot, a sunken or marshy place, or in other words, a shallow channel with gently sloping sides. A swale may be either natural or human-made. Artificial swales are often infiltration basins, designed to manage water runoff, filter pollutants, and increase rainwater infiltration.

A berm is a level space, shelf, or raised barrier, usually made of compacted soil, separating areas in a vertical way, especially part-way up a long slope. It can serve as a terrace, road, track, path, a fortification line, a border/separation barrier for navigation, good drainage, industry, or other purposes. Berms also control erosion and sedimentation by reducing the rate of surface runoff. The berms either reduce the velocity of the water, or direct water to areas that are not susceptible to erosion, thereby reducing the adverse effects of running water on exposed topsoil.

If a slope is very steep, install terraces or a retaining wall. Terraces break the slope up into multiple nearly flat steps. A terrace can be made from earth, rocks, timber, or other materials. Each “bench” should have a slight slope perpendicular to the hill’s slope to direct water to one side or the other. Also, consider putting in steps to make maneuvering down the terraces easier. Just be sure that you’re not using treated lumber if you are growing vegetables because any leaching from the lumber is toxic to the plants and to you too.

In addition, spread mulch over the soil around plants. Mulches such as wood chips or shredded bark slow runoff while also conserving soil moisture, regulating soil temperature, and contributing nutrients as they break down. Don’t depend on just mulch to keep soil in place on a very steep slope, however.  The mulch may just wash off after severe rains.

Plant Where There’s Rich Organic Soil

Plant your garden where you have good soil that is rich in organic material. The organic material improves the ability of the soil to retain water and the rate at which water is absorbed.

Improving the soil condition is an easy fix. Add organic soil amendments including manure, compost, sphagnum peat moss, or grass clippings. The best time to add most of these is in the season before planting the garden rather than during that season. If your garden is small enough, consider topping the surface of the whole garden bed with compost and then plant into the soil. Once the plants start growing, cover the compost with mulching material. Use foliar sprays and side-dress plants with amendments during the growing season for an added boost. If you continue adding organic material of different types, every time you plant, you will be amazed at how much your soil will improve.

That said, some hard, rocky, or hardpan soils can’t be readily used, and building up an area by creating a raised bed may be necessary. This is also a choice that many gardeners choose because of the convenience of a raised bed.

Would you like to get to know me better? Here’s a link to my other blog: How My Spirit Sings

Featured

Gardening Through the Seasons

Photo by Jou00e3o Jesus on Pexels.com

Imagine not having to worry about whether there’s an adequate supply of fresh produce at your local grocery store or whether it has been put on a recall list.

Cygnet Brown

Imagine every night going to the garden and picking vegetables for your supper. Imagine not having to worry about whether there’s an adequate supply of fresh produce at your local grocery store or whether it has been put on a recall list. Wouldn’t it also be nice to know that you have the added satisfaction of knowing exactly how your vegetables were grown and that it’s fresh?

\That’s some of what you’ll get when you develop a seasonal garden. What is a seasonal garden you ask? A seasonal garden is a garden that isn’t just planted once in a season and then forgotten. It’s a garden that you start planting early in the spring before the last frost and continue planting over the rest of the summer so that you have a continuous harvest all the way until the last frost and beyond.

Increased Nutrition in Vegetables

You’ll love the fact that you’re picking your produce from your garden daily and eating it fresh because it increases the produce’s nutritional value. According to a University of California study, vegetables lose 30% of their nutritional value within a week of being picked and spinach can lose up to 90% of its vitamin C within 24 hours of harvest. By picking your vegetables straight from your own garden, you’ll be giving your family the most nutritious food possible.

 If you raise it organically, you’ll be getting an even higher nutritional content because the soil would have more micro-nutrients available for your vegetables.  Considerable evidence exists that decreases in nutrition may be related to changes in farming methods, including the extensive use of chemical fertilizers, as well as food processing and preparation. A 2004 study evaluated Department of Agriculture data for 43 garden crops from 1950 to 1999. The researchers found statistically reliable declines for six nutrients — protein, calcium, potassium, iron, and vitamins B2 and C.

An added benefit to growing your food organically is that it can cost you less than growing it using chemical fertilizers especially if you’re composting house and yard wastes and using it in the garden!

Protect the Environment

Growing your garden and eating it directly can help protect the environment and lower your carbon footprint. Recycle yard and garden waste to keep it out of landfills! Decrease transportation costs to the environment because your vegetables are not coming from other states or countries! Decreases the need for food processing for storage in things like canning supplies, freezers, and dehydrators because you’re using your vegetables straight from the garden!

Use Your Gardening Hoe as a Piece of Exercise Equipment!

Plus, if you choose to dig your garden by exclusively using hand tools like hoes, shovels, rakes, and broad forks, not only will you be lowering your carbon footprint, but you’ll benefit from increased physical activity as well. It provides healthy exercise. The bending, stooping, raking, hoeing, and digging of your garden will likely increase the amount of exercise you are getting. In addition, time in the sun provides vitamin D.

The Emotional Benefits of Gardening

 It benefits your emotional and mental health too. Along with being an excellent way to fill your free time, gardening also helps to promote mental health and emotional wellness. The American Institute of Stress states that gardening can have the following mental health benefits:

  • Reduces stress hormones like cortisol.
  • Improves the ability to focus.
  • Encourages creativity.
  • Improves self-confidence.
  • Reduces stress levels.

{resource}

Gardening and Eating Fresh Can Save You Money!

It will save you money in many ways as well. Growing food organically and making household and yard wastes into compost saves money on fertilizer. Using produce directly from the garden daily prevents the expense of canning or freezing. It even reduces the need for refrigerator space because you’re using the produce soon after you pick it up!

Also with the price of food going up and up these days, the carrots you plant now may be worth much more by the time they are ready to harvest!

Amazing Benefits to Eating Fresh from the Garden!

As you develop your garden, you’ll get better and better at being able to eat from your garden every day. If you compost your house and yard wastes, your garden soil will become better and better, and your health will continue to improve as well because your exercise and food consumption will be of better quality. You’ll save money. You’ll be helping the planet as well by removing carbon from the air and replenishing it in the soil. It will be a win, win, win!

Can you think of other benefits for this type of gardening? Please share them in the comments below.

If you want to know more about seasonal gardening, follow this blog to learn more and about when my latest book The Seasonal Garden will be available! In it you’ll learn the how-tos of growing a garden you can eat from frost to frost and beyond. If you’re in obtaining a review copy, let me know in the comments below! Interested in what else I write? Check out my other blog How My Spirit Sings

Featured

A More Complete Sweet Potato Harvest

One of the things that I discovered during the past two gardening years has been ways that I can get more from my harvests and how I can perpetuate a garden crop, which has been the focal point of this blog. Nothing can be easier than perpetuating sweet potatoes.

Here’s how many people start their own sweet potato slips. They wait until January or February and use this method. It’s how I started and it works, but I’m sharing a better way!

Rather than waiting until spring to create slips from sweet potatoes from a sweet potato root, I started collecting sweet potato roots with the stems and leaves attached in the fall and planting them in containers in the house to last all winter. But first, let’s find out how to take care of the sweet potatoes you are dig up.

Digging Sweet Potatoes

Where I live, it is now time to dig sweet potatoes. I use my broad fork to dig my sweet potatoes. To avoid damaging the tubers, I begin digging just outside where the potato vines are growing and dig in toward where I planted the original vine. That way as I come to a sweet potato, I finish digging it out with my hands and then place the sweet potatoes in a bucket. Once all of the sweet potatoes are picked, I take them inside and place them in a warm and dry, but dark area to cure. Some southerners recommend storing them in temperatures as high as ninety degrees so don’t worry that the temperature is too high where you are storing them. I spread them out on a table so that they can cure evenly and remove excess dampness that can expedite decomposition. Spreading them out and allowing them to dry out allows the skins to harden.

In addition to hardening the tuber’s flesh, curing in a warm and dry environment helps convert the starches of the sweet potatoes into sugars thereby increasing the sweetness of the sweet potatoes. Putting the sweet potatoes into cold storage stops the change from starches to sugars, so don’t move the into cold storage until they have cured in the warm dry environment for two weeks.

After the two weeks, I remove any damaged sweet potatoes to use regularly and store them in boxes in a cool dark place.

Periodically remove any sweet potatoes that show signs of decomposition. If you plan to can any of your sweet potatoes, for best results, can them before New Year’s Day.

Saving Sweet Potato Roots and Leaves Now for Spring Planting

Sweet potatoes are perennials so, the roots have the same genetics as the sweet potato. This enables me to eat the big sweet potatoes rather than keeping some back for producing slips.

Because I am growing the roots all winter, the plants produce more slips in the spring and uses parts of the sweet potato plant that I don’t usually use. I also get the added benefit of access to the sweet potato leaves that I can use during the winter months. These leaves are delicious and can be eaten raw or steamed and provide even more nutritional value than the sweet potato tubers.

When growing new sweet potato plants, most people purchase a sweet potato in the spring and plant the slips they produce from it or they purchase slips (often hard to find) from other growers. These slips can be put in the ground even without roots. Just keep them well watered and soon they will take root, and in a few months, will begin producing sweet potatoes.

 I have my own solution. I grow my sweet potatoes from the roots left over from the previous year.

Because I am growing sweet potato roots all winter, the plants produce more slips in the spring and uses parts of the sweet potato plant that I don’t usually use therefore I can eat every sweet potato myself.

I have grown sweet potatoes from roots of sweet potato plants that I grew this year. These roots will begin creating shoots and leaves. Once that happens I can plant it in a shallow tray for the rest of the winter

Since I’m digging sweet potatoes anyway, and sweet potatoes are perennials and the roots have the same genetics as the sweet potato, now is the perfect time to start the sweet potato slips for next year’s crop. As I dig the sweet potatoes from the ground, instead of throwing the roots onto the compost pile, I put them in a bucket and take them indoors.

If the weather is not too hot, I have just put the sweet potato vines and roots into a bucket, then in an hour or so taken the vines and roots into the house to process and still had success. However, a better solution is to have a bucket of water to put the vines and roots in so that they don’t die before I can take care of them.

Although not as pretty as plants grown from a tuber, many of these leaves and stems will root and can be used to grow sweet potatoes next year. Once they’ve rooted, I will plant them like I do the roots I saved.

Last year, I pulled up the roots and just planted them in a shallow tray. This year I am trying something a little different. I am cutting the stems from the roots and cutting leaf segments and then placing them in water until they start to sprout roots or leaves respectively. Once they sprout, I’ll transfer the segments into soil This will not only make transplanting into the shallow trays easier but will also make it easier to plant the young plants in the garden come spring.

Once the leaves start growing on the sweet potatoes, I can also harvest the leaves all winter and eat them fresh in salads or steamed as side dish of greens with my winter meals for added nutrition. These leaves are delicious and can be eaten raw or steamed and has a higher nutritional value than the sweet potato tubers.

Try this method when growing your own sweet potatoes. I am sure that you will find that done right, you’ll have more sweet potatoes than you know what to do with them!

For more information about growing vegetables that can be stored throughout the winter without canning, freezing, or dehydrating, purchase my new book The Survival Garden!

Available in Paperback and on Kindle

Featured

Ten Things You Can Do this Fall to Begin Preparing a Survival Garden

In my last post, I suggested the first two things that you can do to begin preparing a survival garden.

The first one is to purchase my book, The Survival Garden. Here’s the Amazon Link to the eBook. Here’s the link to a paperback copy.

The second is to purchase a supply of the vegetables suggested for your winter nutrition from your local market so that you can have them throughout the winter to begin your own survival vegetable experience.

In this post, I will show you eight other ways that you can begin your survival garden this fall.  

Allow Livestock to Help Clear and Fertilize the Garden

Chickens in winter
Chickens clear away weeds and overwintering bugs.

The first one is to allow livestock to help clear and fertilize the garden.

Most of the time we try to keep the animals OUT of the garden, but this time of year, having animals in the garden is helpful.

The idea is that once your crop is harvested from the land, you can send your animals in to clean things up a bit before winter. You can even send in more than one animal type to do even more of your garden work.

Send in cows to clean out what they want, send in sheep to eat what they want, then send in pigs to eat what they want and finally send in chickens to pick out what’s left and to get rid of any bugs that are thinking about over wintering in your garden.  

If all you have is chickens, it’s okay. Just run them through your garden and see how much “damage” a few birds can do!

Preparing the Soil

winter time garden
This is a photo from last winter. Much of this garden was cleared and mulched, ready for this season.

Don’t wait until spring to prepare your garden beds for planting. If you have the time before winter sets in, prepare your beds now. Once you have allowed animals to benefit from your garden wastes, it’s a good time to prepare the soil. This way you can tailor each bed to the needs of the plants that you’ll plant in that area in the spring.

Only dig up the areas that you are going to actually be planting in the fall. Any areas that the animals dug up that is on a slight slope, rake evenly and sprinkle cover crop seed in that location to prevent erosion.

Cover the Soil

Once your ground is exposed, it is a good idea to cover it to prevent erosion and nutrient depletion. There are two fantastic ways to do this. You can either mulch the area or use a cover crop. Both are good choices. Mulches and cover crops are both composed of biological mass, either once-living or still-living, used to optimize soil conditions.

Mulches consist of dead plant material like compost, leaves, spoiled hay, grass clippings and pine needles. During the summer they keep the soil moist and control weeds that could rob water from the crop. During the winter months, it helps protect the soil from harsh weather fluctuations and keep water from running off. Mulches are best used on level beds or terraces. One of the best mulches and most readily available mulches in the fall is autumn leaves.

Plant cover crops in areas of the garden that are on sloped areas and are also a good choice for pathways during the winter months. Cover crops help prevent soil erosion because the roots hold onto the soil to prevent erosion. In addition, the foliage above ground, even when not growing, protects the soil from extremes in weather and breaks up rain droplets before hitting the ground. The roots absorb the rain and hold it in place so it can be used by garden plants later.

Make Compost

Compost can be made in many different ways. A cold compost consists of layering compostable materials as they come and allowing nature to take its course.

A hot compost is a science experiment that can offer high quality nutrition for garden plants and is produced from yard and house wastes that would otherwise end up in a landfill. You can create hot compost quickly, so you really want to wait until early spring to actually start creating hot compost. However, now is a good time to start piling your brown composting materials in preparation for combining with the green materials in the spring.

Fall can be a fantastic time to start cold composting, however. Starting compost can be as easy as burying a pile of shredded brown and green yard and kitchen wastes in a garden bed and covering it with mulch. By spring, the wastes will be black gold compost that you can use immediately.

Save Garden Seed

If you have garden plants that are going to seed, now is the time to collect it, air dry it and get it ready for next season.

Plant Biennials to Save for Seed

In addition to seed saving, if you’re in an area where this is possible, consider planting biennials that you might be able to get seed from next summer. Begin planning in the early in the fall months and allow them to grow until well after the first frost. Later, you’ll be deeply mulching or digging up these vegetables for the winter. If you dig them up, you’ll be re-planting these same plants in the spring. If you leave them in the ground, you may instead wish to use these vegetables in the early spring before your garden begins producing in the new season. Use them before they begin growing again in the spring.

Plant Garlic

Fall is the best time for planting garlic.

Once you have some ground prepared for your spring garden, take some of that to plant garlic. Garlic produces better, more reliable bulbs if planted in the autumn months rather than in the spring. Plant garlic when you plant daffodil and other early spring bulbs.

Plant Sweet Potatoes Indoors

This is how most people grow sweet potatoes. I, however, bring in the roots and plant them in a grow box.

Rather than waiting until spring to create slips from sweet potatoes from a sweet potato root, I started collecting sweet potato roots with the stems and leaves attached in the fall and planting them in containers in the house to last all winter.

Sweet potatoes are perennials so, the roots have the same genetics as the sweet potato. This enables me to eat the big sweet potatoes rather than keeping some back for producing slips.

Because I am growing the roots all winter, the plants produce more slips in the spring and uses parts of the sweet potato plant that I don’t usually use. I also get the added benefit of access to the sweet potato leaves that I can use during the winter months. These leaves are delicious and can be eaten raw or steamed and provide even more nutritional value than the sweet potato tubers.

With the days shortening and the nights lengthening, you often don’t have enough time in the day to get everything done, but if you’re able to do these ten things this fall, you’ll have a head start toward producing your own survival garden.

Featured

The Survival Garden is now in print!

A few weeks ago, I made The Survival Garden available as an eBook on Amazon. Now, it is available as a paperback as well! Get your copy today!

Why I Wrote This Book

As I mentioned in my previous post about the fact that The Survival Garden was available as an eBook, (see that post here), I told how this book idea came about because my brother told me how people in Pennsylvania couldn’t find canning lids or jars last year.

What I didn’t mention was that gardening as a whole had been part of my preparedness goals for a number of years and that my big goal is to write a series of books called The Perpetual Homesteader which is what this blog is all about. I started with this book because I feel that it is imperative that as many of us as possible start producing our own supply of food by growing food that will help supply healthy calories throughout the winter without needing freezer space, canning equipment, or even a dehydrator (although I do use a freezer, a canner and a dehydrator as well!)

Should You Wait Until Spring?

Definitely don’t wait until spring to start thinking about growing these foods! You can start right now by purchasing The Survival Garden and read it!

Next, start purchasing those vegetables in the book from your nearest supplier whether its a grocery store or a local farmer! This time of year they are readily available and you can often purchase them in larger quantities.

Finally, start implementing those vegetables into your daily diet.

Is there more you can do now? You bet there is, but those are subjects for future blogs.

Over the next several weeks I’ll share what you can and should be doing now so be sure that you’re following this blog to keep updated on what you can do to maximize the produce of your own survival garden!

Featured

The Survival Garden

Last year, I called my brother in Pennsylvania and he told me that a lot of people in his state started growing gardens because they were afraid of what could happen during the pandemic. Their plans were to garden and freeze or can what they produced. The problem was that though they were able to find seeds in the stores, canning jars, lids, and freezers were in short supply. Their garden produce grew well, but because they had no way to preserve their food, what they couldn’t eat rotted and was wasted. Numerous people tried to capitalize on their bounty by selling it, but that too became a problem because everyone else was doing the same. The countryside was littered with little roadside stands that had produce that no one wanted.

That was what gave me the idea for The Survival Garden: Plant a Garden for Food to Last all Winter that You Won’t Need to Can, Freeze. or Dehydrate. This short little book shows you how you can grow and preserve a huge percentage of the calories that you and your family will need to survive the next winter or any winter of the future even though food is in short supply in the grocery stores for whatever reason. These are foods that you don’t need any canning equipment. You won’t need to hunt all over town or get gouged with internet prices on canning lids. You don’t have to worry about purchasing a freezer or concerning yourself with the fear that the electricity could go out and ruin your produce. All twelve of the vegetables in this book can be raised in your garden and stored without any of these worries.

In this book, you’ll learn everything you need to know about growing, harvesting, and preparing these vegetables to last well into the winter months and potentially until the next harvest!

Currently The Survival Garden: Plant a Garden for Food to Last all Winter that You Won’t Need to Can, Freeze. or Dehydrate is available on Kindle. (Paperback will be available soon) Get your copy now to see how you can actually get your survival garden started today!

Featured

How to Grow a Better Crop of Potatoes

potato in garden
One little early potato can lead to many a summer meal

Container Planted Potatoes for Early Crop

A few years ago, I grew potatoes in buckets on my patio at my townhouse when I lived in Springfield.  I had mixed results. One of the reasons that I had problems was because I tried to grow what I later learned were indeterminant potatoes whereas what needed to grow were determinant varieties. The basic difference between indeterminant and determinant potatoes is that if indeterminant potatoes have good conditions, they will continue growing all season whereas determinant potatoes grow a short time and then die off leaving behind a specific crop to harvest immediately.

As I understand, determinant potatoes have a short growing season (as little as seventy days) and can be planted in succession throughout the growing season.  That is what I want to try to happen this year.

Another problem I had was that I put too many seed potatoes in my buckets. The buckets soon became crowded, so the potatoes stayed small. This year I am planting just one potato per bucket.

I want to try to grow potatoes so that I have a continuous crop coming in all summer long. The variety of determinant potato that I will be growing is Red Norland which has a growing season of just 70 days! I want to see how many buckets of potatoes I can grow during the summer and how many I need to keep myself supplied in potatoes for the entire growing season.

If I have more than enough Red Norland potatoes to supply me with potatoes throughout the growing season, and I have more than enough to sell at Farmer’s Market, I’ll take what extras I have and can some of them. I don’t think that will happen this year, because I only bought five pounds of this type of seed potatoes.

Because I only had three buckets available this year for the early determinant potato, I planted most of them in the ground in the main garden.

How to Plant a Bucket of Early Potatoes

To plant early potatoes in buckets, begin by putting holes in the bottom 1/3 of the bucket. I only put holes in the top of that bottom third of the bucket so that water would drain out only if it reached that part of the bucket. The lower part of that bottom third of the bucket would be used as a wicking bed of sorts. This way I wouldn’t have to water the buckets of potato plants quite as often.

I fill half of this bottom third of the bucket with sawdust, add a half shovel full of aged chicken manure and then cover that with more sawdust and filling that remaining bottom third of the bucket. Over the sawdust I put a one-inch layer of soil. In the center of the bucket on top of the soil, I set the potato or potato piece so that the rose end with the majority of the eyes was facing upwards in the bucket.

half filled buckets
I put in a layer of sawdust, a layer of chicken manure, another layer of sawdust, a layer of soil and set the potato in the bucket.

Once the potato piece was in place, I filled the remainder of the bucket with soil so that only two inches of the brim showed.

Once the potato plant surfaces above the soil line, I will fill the remaining space with grass clippings. I use grass clippings at this point because the grass clippings contain nitrogen so that if gives the potato plant’s leaves a little bit of a boost early in the growing process, but not so much to prevent the potatoes from producing the root vegetable.

Companion Planting for Potatoes

I am planting a companion plant with the potatoes in the garden. Because the potatoes take up a lot of growing space, I like to plant them with bush green beans. One reason, I like to use green bush beans is because bush green beans are a legume and while legumes are growing, they store nitrogen from the air in their roots that potatoes have access.

Another reason is that potatoes and bush green beans are harvested about the same time. I am able to harvest the potatoes and harvest the bush beans together and remove them both and replace them with a later crop like cabbage or spinach.

A final reason is that potatoes and bush green beans have a symbiotic relationship where they protect one another from insect pests. Green beans repel the Colorado potato beetle and potatoes protect green beans by repelling the Mexican beetle, a nasty pest that can quickly destroy a lush crop of green beans.

A Late Potato for Winter Storage

In addition to growing determinant potatoes for use during the gardening season, I am growing an indeterminant variety as well. The indeterminant potato variety that I will be growing will be White Russets. I know that they are good storing potatoes because I stored them in a cool place in my kitchen over the winter. I am experimenting with them as well. This experiment is that I planted some in the autumn and hope that they will start growing this spring. I also have some that I planted this spring. These potatoes are considered late-growing potatoes and should keep me supplied during the winter.

I have some idea about how many potatoes I will need this next winter because this past winter I bought 100 pounds of potatoes to use this past winter and there was enough in that my husband and I were sufficiently supplied with them throughout the winter. Therefore, if I can grow at least that many for the winter, it should be a sufficient supply for the upcoming winter.

How about you? Do you grow potatoes and if so, what do you find helps you improve your potato harvest?

Featured

Planting Perennial Vegetables

asparagus plant
It takes at least three years to produce a decent asparagus plant, but you’ll have perennial growth for about 20 years

A garden is good insurance for making sure that nutritious, delectable vegetables are available throughout the year, wouldn’t it be nice if you could plant a vegetable that you plant once but it keeps offering you its produce year after year. Well, you can do this with perennial vegetables.

Perennial vegetables like asparagus, rhubarb, Jerusalem artichokes, and horseradish among other vegetables can be planted once and with little care offers a crop year after year.

Asparagus

Native to Western Europe, but a hardy perennial here in the US, asparagus, is probably the most popular perennial vegetable. With good reason, asparagus plants are viable for up to twenty years and nothing compares to the taste of homegrown fresh asparagus.

I grew my asparagus last year from seed. Growing from seed takes a lot of patience, but it’s worth the wait. However, if you don’t want to wait, you can also buy two to three old crowns.

I started my asparagus plants in January 2020.  I put the seed in the refrigerator for a couple of months so that the seed would chill. I soaked the seeds overnight and then when I was ready, I planted them indoors in flats. This way I was able to control their growing conditions. Also, the asparagus didn’t need to combat weeds just to get started. (It takes anywhere from 2-8 weeks for asparagus seed to germinate).

I planted the seedlings in the garden bed behind the shed in April last year and kept them reasonably weed-free so that they could grow. Their roots are well established now, but it will still be a year or more until I am able to get a harvest.

Rhubarb

rhubarb crown
The black blob in the middle of the photo is of a rhubarb crown. In a few days it will green up and begin to grow.

Pioneers called this perennial “pie plant” because rhubarb pie was a favorite among them. Though used like a fruit in pies, rhubarb is actually a vegetable. I planted my rhubarb in the part of the herb garden where I had grown kale, greens and late corn last year. I planted it here for a couple of reasons. One, the garden had been deeply dug and lots of organic material had been added and perennial grasses had been removed. It is a sunny enough location (more than 6 hours of sun per day).

I have two plants so I planted them on opposite sides of the four foot long bed. To plant them I dug a hole and positioned the bare root rhubarb plant so that the crown was 2-3 inches below the surface. I tamped the soil down lightly over the rhubarb and watered it thoroughly.  

Jerusalem Artichokes

<p value="<amp-fit-text layout="fixed-height" min-font-size="6" max-font-size="72" height="80">Also called sunchokes, Jerusalem artichokes grow wild where I live, but I decided to grow them in my yard, because I love to use them in stir fries in place of water chestnuts. They can also be used in place of potatoes. The tubers look like ginger root and provide a starch (inulin) that converts to fructose in the digestive tract and is better tolerated by diabetics than the potatoes would be. The flowers look like sunflowers and produce edible sunflower like seeds. (the seeds are smaller than sunflower seeds.)Also called sunchokes, Jerusalem artichokes grow wild where I live, but I decided to grow them in my yard, because I love to use them in stir fries in place of water chestnuts. They can also be used in place of potatoes. The tubers look like ginger root and provide a starch (inulin) that converts to fructose in the digestive tract and is better tolerated by diabetics than the potatoes would be. The flowers look like sunflowers and produce edible sunflower like seeds. (the seeds are smaller than sunflower seeds.)

This hardy perennial prefers cool weather and grows best in poor soil. I planted mine in the yard across the driveway from my perennial herb garden. They will flower during mid-summer. I planted it in the late winter just after the really cold weather. I added wood ashes and planted the tubers 12 inches apart and covered them with 3 inches of soil. I then added sawdust around the outside edge of the bed and placed rocks on top of the sawdust to ensure that I knew where the plants were when I mowed the lawn later in the season.

Horseradish

This vegetable is a hardy perennial and grows in all planting zones except the hottest desert regions. For perennial planting, I gave mine plenty of space and planted it at the edge of my herb garden next to the frost-free faucet. Because I have three plants, I planted them in a triangle and planted them 3 feet apart. It thrives best in sandy soil, but since I have clay soil, I amended it with plenty of organic material. Because it loves potassium, I dusted the area with wood ashes. It does not like too much nitrogen, so I did not add composted chicken manure.  I buried the horseradish so that the crown was placed in the hole at an angle, not straight up and down with the top two inches below the soil level and backfilled the remaining hole. I then covered the horseradish bed with sawdust for mulch and so that I knew where the horseradish was planted.

So, what is your favorite perennial vegetable? Is it similar to what I am growing or do you have something else that you like to grow year after year?

Featured

Planting Berries

early spring strawberry plant
The June-bearing strawberries are coming to life after a fall planting

So far, my perpetual homestead has the start of a perpetual garden. In addition, it has an orchard that will produce peaches, pears, and apples but those will not bear for a few more years. What I have that will all begin bearing in the next couple of years is the berry patch.

There are, of course, many other berries that could be planted, but I decided not to over-extend myself this first year. One berry, you might notice, isn’t included on my list is blackberries. The reason for this is that I am able to get out and pick wild ones that are growing nearby. I hope, next year, to get some elderberries. They not only are good in pie baking, but they have excellent medicinal properties as well. I would also like to add currants, gooseberries, and goji berries. For now, though, I am growing June-bearing and everbearing strawberries, blueberries, and yellow raspberries.  

June-Bearing and Everbearing Strawberries

The first berries that I started growing were the June-bearing strawberries. The reason that they are called June-bearing is that they put on one crop of berries in a short period. They generally produce one large harvest in late spring or early summer. I started growing these in a container garden while I still lived in Springfield. Last spring, I moved them out here with me, planted them in a temporary location in the garden. In September I finally transplanted them into a more permanent location where I am able to give them more room. I should be getting some berries from them this year because they had all winter to develop their root systems.

To plant the June-bearing strawberries, I planted them so that they were planted 12 inches apart in staggered rows twelve inches apart. After harvesting the berries, the strawberry plants will produce runners. Instead of allowing these runners to develop roots in the ground where they want, I am going to be putting pots under each of them and coaxing the roots to develop in the pots. That way I can move them and keep their roots more intact when I transplant them. My plan is to sell some of the plants and to plant the rest between the trees in the orchard to create a fruitful ground cover for the trees.

Just planted everbearing strawberry plant
Doesn’t look like much but this strawberry plant will be producing strawberries late this summer.

A second type of strawberry are everbearing strawberries. These produce two to three crops over the course of the summer and into the fall, with the larger crop coming in the summer. The berries on the everbearing strawberries are smaller and sweeter that the June-bearing plants and produce fewer runners. Like with the June-bearing, I planted the everbearing in two rows, with staggered plantings twelve inches apart. I planted them so that the strawberries roots are completely covered, but the crown remains above the soil line.

I planted the strawberries in late winter, so I spread a thin layer of partially decomposed chicken manure on top of the soil around the strawberry plants. This way, the manure will filter down to the roots during the spring rains and help nourish the plants’ roots. If I would have planted them in the spring after things started growing, I would have watered the plants with compost tea.

Next, I used sawdust to mulch the patch to reduce weed growth, hold in moisture and keep the manure from washing away or dissipating into the air. I have heard of people using plastic for mulch around the strawberries but because it can facilitate diseases such as leaf spot and anthracnose, I don’t recommend it.

Once things start growing in the spring, I will give the patch one inch of water per week if the soil is dry. It is important that strawberries get enough water until they are established. During production, Strawberries may have up to 2 inches of water a week.

If I would have planted the June-bearing strawberries in the spring, I would have removed blossoms and runners in the first year. However, because I planted them last fall, I don’t have to do that. For everbearers, I will remove blossoms and runners only until July 1. This will enhance strawberry plant growth and production.

.

Blueberries

newly planted blueberry plant
A freshly planted blueberry plant.

I planted my blueberries in the ground where I grew potatoes last year. This way the soil was loosened with the broad fork several times and rocks and weeds were removed as well. Because I had mulched the area heavily with leaves and grass clippings, the ground was light and highly organic. Because blue berries prefer much more acidic types of soil, measuring a little closer to 4.5 to 5.0., I am continually adding coffee grounds to quickly increase soil acidity.

I planted two kinds of blueberries. One was Patriot and the other was Jersey. Blueberries should be planted during the early springtime or just when the winter season is about to come to an end. Choose a part of your garden where your blueberry plants get access to sunlight for most of the day, but without it being harsh and full sunlight.  Companion plant with strawberries and thyme. I planted the blueberries to the depth that they grew when they were at the nursery.

Yellow Raspberries

Yellow Raspberry plants
Don’t let their appearance fool you. Those sticks poking out of the ground are raspberry plants.

I decided to grow Fall Gold raspberries. I may grow red and black raspberries in the future, but for now, I’ll stick to the yellow ones. One reason is that (I am told) that the birds are less likely to eat them than they would the red or black raspberries. 

These berries are a primocane type which means they bloom and fruit on first-year wood. Sometimes people refer to the primocane varieties as “everbearing” because they produce two crops on each biennial cane (unless pruned otherwise). The fall crop comes on current-season canes, at the top 1/3 of the canes. After overwintering, and if not pruned, a second crop will be produced in late spring to early summer at the bottom 2/3 of the canes. If I wanted a single heavier crop, I would prune all the canes to the ground every year before growth started in the spring. This way the new cans would produce fruit in late summer or fall that same year.

To plant yellow raspberries, I Choose a planting spot for my raspberries where they had plenty of room to grow and lots of sunlight. I only have three plants right now, but that number will grow every season, so I planted them on the south side of the garden. Plants tend to grow toward the sun so by putting them south of the garden, they will grow away from the garden and not toward it.

Because the raspberries are at the edge of the garden, I didn’t have to worry about breaking up hard ground. I worked some aged chicken manure into the top couple of inches the soil for a nitrogen boost. If I were limited on space, I would have put the raspberries on trellises, but since I am just growing a patch right now, I will let the raspberries grow naturally.

I dug a wide shallow hole for each bare root raspberry plant. If they would have been potted raspberries, I would have dug a hole big enough to accommodate the entire contents of the pot. Each raspberry plant was planted about 2 ½ feet apart.

I trimmed off damaged roots from the bare roots and spread them out. I would removed the plant from the pot and would have left the soil intact if I planted a potted plant. Prepare the raspberries for planting. Trim any damaged roots from bare root plants. Spread the roots out. Remove potted plants from the pots, leaving the soil intact around the roots.

I set each plant in a hole, bare roots spread out, into the soil. I didn’t plant the roots deep put left them less than two inches below the ground. I buried the roots and firmly pressed the soil to remove any air pockets. Potted plants should be planted so that the plant is buried no deeper than the surface of the soil in the pot.

I cut the canes to about six inches tall. I watered the raspberry plants just enough to settle the soil and mulched them to suppress weeds, hold in moisture and keep soil cool from the heat of the sun.

Now I have several berries that will soon offer me fruit from June until late summer and with a little maintenance work, they will do so year after year.

Now its your turn. Are you growing berries where you live? If so, what’s your favorite?

Featured

Starting the Orchard

the beginnings of an orchard
The orchard doesn’t look like much, but if I properly planted it and maintain it, it should do fine.

This past week I finally planted the trees in my permaculture orchard. I decided to plant semi-dwarf trees because they tend to be heartier and live longer than dwarf trees but produce in a smaller area and produce more quickly than standard trees.

I bought bare-rooted trees from GrowOrganic.com for my mini-orchard. Bare rooted fruit trees are those sold without a pot and the type purchased by tree nurseries, but they can be purchased by individuals too. Bare-rooted trees will save me money and are available in a much wider selection of varieties and sizes than those sold in pots. Also, they are less expensive to ship. Because bare-rooted trees don’t have an extensive root system, they do require proper planting and careful treatment during the first year to establish healthy root systems and provide a reliable harvest.

I bought three apple trees, a pear tree, and a peach tree and I purchased them so that I would have tree fruit from mid-July to November.  

First, we have the Red Baron Peach. This tree is the earliest of all the trees in the orchard. It is self-pollinating. It blooms early to mid-season and harvest from the middle of July to August first. It produces a rich juicy, large yellow freestone fruit. It is a vigorous tree that needs fertile, well-drained soil and regular pruning and thinning.

The pear is the Pontiac Pear. It is self-pollinating and has a superior resistance to fire blight with good-quality fruit. This fruit harvests in August-September.

The first apple that I chose was the Golden Delicious. The reason I chose it, is that it is not only self-pollinating, but it also pollinates other apple trees too. It resists woolly apple aphids and collar rot.  This is the earliest of the apples that I chose and produces ripe apples in early September and is a sweet eating apple.  

I chose the Braeburn apple because it can be kept in long term storage and I like the fact that it was grown from a “wild-seedling”. It doesn’t hurt that it originated in New Zealand too. This apple is harvested in mid-autumn.

Finally, I picked the Liberty apple because this apple is low maintenance. It has a natural disease resistance to apple scab, powdery mildew, cedar apple rust, and fire blight. Its fruit has a crisp white flesh, yellow with red overtones, a crisp white flesh, and a tart but sweet taste. It harvests in late autumn.

Properly planted peach tree
The Red Baron peach tree was properly planted, staked, and mulched.

Where I Planted My Trees

I put a lot of thought into where to plant these trees because once they are in the ground, they can’t be moved. Our land is on a south facing slope which is great for gardening, but not so good for orchards. South facing slopes heat more quickly than north facing ones which wouldn’t be a problem, but late spring frosts can destroy the tender buds on those south facing trees. Therefore, it is necessary to protect the trees from a direct southern exposure, but how do I do this on a south facing slope?

I made the use of a microclimate created by the buildings on our place. I planted these trees along the western boundary of the property on the north side of the trailer just north of the hen house. This way, sun shining on a frosty morning won’t cause sunscald. There’re large trees on the western side of the yard so the trees are protected from westerly winds. Also, the north side of the yard will stay cooler than the south side of the yard and will prevent the trees from budding too early. The fruit trees will bud later, preventing late frosts from destroying the flowers and therefore future fruit.

How I Planted My Trees

Here in this part of Missouri, we are able to plant trees any time that we can work the soil during the late winter.  In more northerly climates, trees would need to be planted later in the season either late winter or early spring but definitely before the trees bud.

For each tree I dug a hole about a shovel’s depth and at least three times the side of the bare-root stock. I made the holes square because a square hole is better than a round one as it encourages the roots to push out into the surrounding ground. I kept the soil I removed on a tarp.

I added a few inches of good garden compost and worked it into the soil around the hole.  I mixed the compost into the top two inches of the soil out to what would be the tree’s dripline.  I placed the tree in the center of the hole and spread out the roots. As I put the soil back around the tree, I made sure to mix some compost into the soil as I replaced it around the tree. I made sure that I planted just to the slightly darker junction on the tree’s trunk that indicated where the soil level was when it was first grown. I made sure that the soil around the hole wasn’t planted deeper or shallower than when the trees were first grown. Since my fruit trees were grafted onto rootstock, I made certain that the joint was above ground.

Before I buried the tree roots, I put a thick wooden stake a few inches from the center of the hole and on the side of the north wind (As I said earlier, I have trees for a windbreak.) I hammered this firmly into the ground using a mallet. I firmly pressed the tree and post into the ground with my heel, careful not to damage the roots. When the hole was half full, I pulled the tree up an inch and then let it drop to help the soil fill in around the roots.

When all the soil was added and firmed, I attached the tree to the stake with a soft tie and left enough room for the tree trunk to grow. I plan to add a protective fence around the trunk of each tree.  At this stage I  covered the area which would be the dripline with sawdust to suppress weeds.

I watered the soil well to stop the roots drying out and to further settle the soil around them.

Further Care During the Spring/Summer/Fall

Until the root system is at least as large as the tree it supports, the trees are particularly vulnerable to environmental stress. During this first year, the trees can easily die from not getting enough water or nutrients. I will need to keep the trees well-watered, especially during dry weather. A good soaking once or twice a week is much better than surface watering daily, though during extreme heat it can be worth doing both. It’s also vital to keep the area around the tree completely free of weeds and grass as they will compete with the young tree, which is why the sawdust mulch will be highly effective.

<p value="<amp-fit-text layout="fixed-height" min-font-size="6" max-font-size="72" height="80">I will also have to remember to remove any and all blossoms from the trees this first year and not let any fruit develop. By keeping the trees from bearing the first year, the trees will have less stress and become healthier and produce greater bounty in the future.I will also have to remember to remove any and all blossoms from the trees this first year and not let any fruit develop. By keeping the trees from bearing the first year, the trees will have less stress and become healthier and produce greater bounty in the future.

I am looking forward to sharing more about this orchard in the future. If you have any questions about growing your own home orchard, please let me know by commenting below.

<p value="<amp-fit-text layout="fixed-height" min-font-size="6" max-font-size="72" height="80">If you have anything you would like to add, feel free to add it in the comments below as well!If you have anything you would like to add, feel free to add it in the comments below as well!

Featured

Which Came First, The Chicken or the Egg?

side-by-side incubator and brooder
This setup has an incubator and a brooder side by side. It’s not a bad system for just a handful of chicks.

On my homestead, the answer to that question was the chicken. However, hatching eggs is part of the perpetual equation. On July 9, 2020, my chicks arrived from The Cackle Hatchery of Lebanon, Missouri. I chose The Cackle Hatchery because I listened to some advice Dad gave me some advice about purchasing chickens when I was growing up. He said to always buy my chickens from the reputable hatchery nearest my home. This way the chicks don’t have far to travel and will have less stress on them. I found that to be true. Out of the 50 chickens that I ordered, I received 55. Of that 55, I had 53 survive to adulthood. I have butchered (with help) a few of the roosters (with more to harvest) and still have a large flock. This past week we added five more.

On December 21, 2020, the shortest day of the year, my hens started laying their first eggs. From then on, all winter, the hens have been laying like it was summer.

On February first, just before the coldest weather so far this winter (and hopefully the coldest overall) I started incubating eggs. To incubate eggs, of course, I needed fertile eggs. Hens can lay eggs without a rooster, but they cannot get fertilized eggs without one. Because I had my chickens and oodles of roosters with them, I am certain that I had fertilized eggs.

I chose other criteria for the eggs I chose. One criterion is that I needed eggs that were as clean as possible. I chose the cleanest because eggs have a natural coating on them that protects the embryos in the egg from bacteria so I don’t want to wash them.

Also I like to choose eggs that are as round as possible. According to my Dad, his mother used to do this and 80% of the eggs that hatched were hens. I don’t know how true this will be for me, but I believe it is an experiment worth trying.

 For what should be obvious reasons, I didn’t refrigerate the eggs I used for hatching.  However, I needed to keep the eggs more than 24 hours before incubating, and I turned them from side to side every twelve hours until I was able to get them into the incubator. This will keep the yolk from being stuck to one side for too long. I also made sure the eggs were stored pointed end down. The pointed end should be down at all times during storage and also while in the incubator. The reason is that the chick inside will need the air pocket that is on the rounded side.

In the past, I had an incubator that did not have an egg turner with it. I had a large mortality rate with the chicks because I had to manually turn them and sometimes, I would forget.  I set up the incubator in a quiet location and then plugged it in, ready for the eggs, but I ran my incubator for a few days to make certain that everything was working properly. I kept tabs on my humidity levels and be certain that the humidity levels don’t go below 50%. Next, I put the eggs in the incubator pointed end down. I put an “x” on one side and an “o” on the other so that as it turns automatically, I’d be able to tell if the turner was working properly. I kept this up until the eggs had been incubated for 18 days. Also, I checked humidity and temperature levels daily.

Candling

On day eight, I carefully took out each egg and used the candling light on the incubator in a dark room to check to see if a chicken embryo was growing. If I saw a large mass inside the egg, it meant that an embryo was growing if I saw air pockets through the egg, there was no embryo, and I discarded that egg. Also, I removed any broken or cracked eggs.

Hatching

chick in incubator
Chick recently hatched and still in the incubator.

On day 18, I stopped turning the eggs and around day 21 I started hearing some peeping inside the eggs.  However, I knew that I did not want to open the incubator anymore for any reason. I didn’t lift the incubator hood because I didn’t want to get any cold air or any bacteria in it and I didn’t want to bother the chick either.

I left the chicks alone and knew not to try to help the chick peck its way out of the shell. I knew that it won’t survive if I did. In some cases, hours pass before a chick busts through its egg completely. I allowed them to dry completely before I put them in the brooder box.

I wasn’t worried about keeping the chicks in the incubator too long, especially since the weather had been so cold lately. Chicks can remain in the incubator for up to 48 hours. I, however, kept them in there only about 24 hours after hatching.

Brooding

chicks in brooder
A mason jar waterer and a homemade feeder and a heat lamp create a comfy environment for these chicks.

On day 18, I set up the brooder in a packing box next to the incubator. I put several layers of newspaper at the bottom of the box and set up a heat lamp. I filled the chick waterer and had it at room temperature before moving chicks into the box. I also filled the feeder with food in it ready for the chicks.

Yes, five chicks hatched from this first batch. The youngest didn’t hatch out until day 24 and unfortunately he did not survive. This first batch I am keeping for our use, but from here on out, I hope to hatch chicks to sell as well.

I have the second batch of eggs in the incubator right now. My ability to raise chickens perpetually has now been made possible.

the incubator
Now that the first batch has been removed, the incubator has been fumigated and the second batch started.

The Perpetual Homestead Series

As mentioned in my first post Becoming a Perpetual Homesteader, one of the books that I will be writing for The Perpetual Homesteader series is The Perpetual Chicken House. Feel free to ask any questions because I would love to help! Ask your questions in the comments below.

Featured

Planting Tomato Seeds on a Snowy Day

Tomato plants in the womb
Grow tomatoes from seed for better selection and cost savings.

The cold and snow from the past few days has got me thinking even more about starting my garden. I have a lot of other things that I would like to do. For instance, I have to get my fruit trees in their permanent locations, and I have perennial plants that need to be put in the ground as well however, with more than six inches of snow still on the ground, those projects will have to wait until the snow is melted. That should be happening this coming week, but until then, planting indoors seems to be on the agenda.

I am Wanting Lots and Lots of Tomatoes

That’s why I am planting tomatoes from seed. Tomatoes are very versatile. Tomatoes can be eaten raw in salads, on sandwiches and just eaten right off the vine. They can be canned into tomato sauce, tomato juice, tomato paste, salsa, with peppers and onions, and plain canned tomatoes. Green, tomatoes can be made into relishes and pickles.  I never seem to be able to grow enough tomatoes.

Last year, planted several varieties of tomatoes from seed and bought some others as plants. The plants I purchased had thick stems and were about 8-10 inches tall. Because I had moved to my new location, many of the taller plants that I had grown from seed had died and all I had were small tomato plants that were only a couple inches tall. I thought that there was no way that they would ever grow. However, they did. Actually, what surprised me was that the small tomato plants took off in my garden almost immediately whereas the taller, store-bought plants did not do as well, and the homegrown plants actually overtook the other ones.

 I didn’t do as well with my tomatoes as I would have liked, but this year I plan to do a better job with them. More on that later when I plant them in the garden. For now, though, let’s go over planting seeds for growing transplants.

What Tomato Seeds to Plant

Planting tomato transplants from seeds to plant in my garden later will save me money and lets me choose varieties that are not often found at plant nurseries.  Because I save seeds from tomato plants that I grew last year, I use only heirloom or open pollinated seeds. This way the tomatoes that I grow will grow true to the variety. I have several types of tomatoes that I will be growing this year. This first batch of tomatoes is the Beefsteak variety. This variety is an indeterminant which means that the plant will grow and produce throughout the season.

Preparing the Soil

Next, I mixed my soil. My soil mix is primarily garden soil and vermiculite. The reason I am using the vermiculite was because a friend gave it to me, and I never like wasting anything.

I put this soil into growing trays or small containers: Recycled or biodegradable trays are best. I use a plastic recycled planting tray and place recycled pots inside them. Later I will transplant the plants into individual containers so that I simply place the whole thing into the soil. As an alternative, you can use an egg carton. For the later transplants, I like using Dixie cups.

Some people like to use a glass or metal spray bottle for watering the seeds, but you can repurpose an empty household bottle. Just make sure to pick one that never contained harsh chemicals, as the residue can damage your delicate plants. I personally use a one cup measuring cup and pour small amounts of water over the soil after planting.

Popsicle sticks make handy plant markers and that is what I am using here. These markers are like name tags for your plants, which comes in handy when you’re planting different varieties. Of course, if you’re only planting one type of seed, they’re not necessary. I have a supply of them so I will definitely be using them.

Putting Seeds in the Soil

I start my tomato seeds 6-8 weeks before the last frost date indoors. Doing so allows my plants to go through the whole germination and into the growth process and be ready to bear fruit when warm weather arrives. If you’re planning to keep your tomato plants indoors or in a greenhouse, this is not an issue, so you can start any time.

I placed 2-3 seeds per container to make up for any that may not germinate. I spaced them with equal distance between each other.

I then sprinkled a little extra potting soil on top of the seeds and gently patted the surface to make it smooth.

Next, I sprayed my seeds using my spray bottle until the soil is moist but not soaked. This requires about 4-5 squirts. Once my seeds turn into plants, I’ll be able to use a small watering can.

 I mark one of the popsicle sticks and write the names of the tomato varieties on the stick and note the dated sown on my gardening calendar.

Finally, I cover the planting tray with the plastic and place them onto the growing shelf.

Germination

Tomatoes love warmth, so I placed the planting containers in the sunny window in my living room. During the germination process, I will keep the tomatoes warm and moist. That is why I cover the plants with plastic to ensure the soil stays moist and the seeds stay warm. Keep lights above and a heat mat under tomatoes until they germinated.

Grow lights are highly recommended. Because the lights can be placed only a couple of inches above the seedlings, it prevents the leggedness (long, skinny stems caused from insufficient sunlight of a window). The lights help tomatoes develop stockier stems and bushy leaves.

In addition to lights, rotating my plants so that they get equal amounts of sunlight will prevent them from leaning in one direction.

Growing the Seedlings

When the first true leaves appear, gently brush I’ll gently brush my hands over their leaves a few times per day. This action simulates wind and helps to strengthen the plant’s stems. (If you smoke, be sure to wash your hands before doing this as tobacco mosaic can disease your tomatoes.)

Once your tomato plants have at least three or four sets of true leaves, they’re ready to be hardened off. More about planting tomatoes in the garden later. I will probably be transplanting these tomatoes into larger containers before putting them permanently in the garden, however because this way I can develop a better root system before planting outdoors.

I planted eight varieties of herbs this week too. More about herbs later! I hope you’re having a good week! Do you plant your own seeds for transplants? I would love to hear about it!

Essential Guide to Self-Sufficient Living: Energy and Water Solutions

As it says on the title page, this book by Carol Robb is a step-by-step guide for developing energy and water sources and mastering growing techniques to safeguard your family against any disaster.

The book warned that systems sometimes break. She began in the introduction by reminding us that over 3000 individual companies run our power grids in the US. The grid is divided into three regional grids: Eastern, Western, and  Texas. High-voltage transformers interconnect power across the country. The transformers take raw power from the power plant and convert the electricity into safe and usable voltages for places like homes, offices, and factories. If something happens to the transformer, these places have no power. Replacing a transformer could take 12 to 18 months. If one transformer goes out, they usually divert electricity from another transformer. Because the grids are interconnected, a problem in one grid can vastly affect the grids on the whole regional grid. 

In the book she goes into detail about how we can produce our own power using the best means possible. In some areas solar power might be best utilized. In other areas, wind power could be preferable. Other aspects of energy production are considered as well. Not only is electrical creation considered, but also wood heat and water heating.

From there, she discusses water. Even though, most of the time we don’t even think about turning the tap and letting the water flow, water can be a big issue in an off the grid situation. The book demonstrates ways to not just how to store an abundant supply, but also what to do with waste water that also accumulates.

The book doesn’t stop with energy production and water either. It shares data regarding building an off-grid shelter as how to raise a garden and livestock. The book is full of graphs and charts and is the perfect first book for anyone looking to secure their home, energy, water, and food production against long-term grid situations or as simply a hedge against run away inflation or as a means of protecting the environment.

In my opinion, this book deserves a two thumbs up! I recommend it for anyone who wants to go off grid fast or even slow. Get your copy today!

Another Book You Don’t Want to Miss

What would you do if suddenly going to the grocery store for food was no longer a possibility? Do you have food stored? Do you have a garden? Most of the tomatoes, peppers, cucumbers, and other perishable vegetables won’t keep long enough if they aren’t preserved. So, what would you do if electricity and canning lids were not available? How would you preserve these vegetables throughout the season when your garden is not producing?

This is why the book was written. It was written to teach you how to grow vegetables that need no special storage methods. These are vegetables that your ancestors knew would keep without canning and refrigeration. These same vegetables contain enough nutritious calories to sustain you through those nonproductive months.

You will learn the proper propagation method for each vegetable. This will allow you to maintain a harvest year after year. This is true no matter what the traditional marketplace looks like. Get your copy today in Kindle or in print!

What To Do With Leftovers from Christmas Dinner

 A few weeks ago, I wrote a post about what to do with the Thanksgiving Turkey. If you have leftover turkey that you don’t know what to do with, check out that post for ideas. Check out this post if you haven’t seen it yet. Today, we’ll be discussing what to do with the Christmas ham.

Sharing with the Less Fortunate

In Great Britain, the wealthier members of society have what they call Boxing Day which is the day after Christmas. On this day, they box up the leftovers and take the food to the less fortunate members of their society.

This is a good idea for anyone. Rather than throwing out your leftovers on the day after Christmas, consider joining neighbors in creating healthy meals to give to the homeless in the area. You can also consider sharing with elderly or single-parent families who attend your church. You might even consider sharing one or two of the dishes that I share below.

Of course, if like many of us, your leftovers are not extras, but ingredients for meals that you can use to get you through not only Christmas week but well into January.

Ham Freezer Meals

One of the easiest ways to use ham leftovers is by creating freezer dinners using ham. Make meals using your ham, mashed potatoes and gravy, sweet potatoes, and green beans using freezer-safe containers.

Ham Sandwiches

Slices of ham, especially spiral ham make some of the best ham sandwiches. Add some cheese and grill the sandwiches, serve with a bowl of soup and you’ve got a hardy lunch to eat at home or at work.

If you like ham salad sandwiches, you can also easily grind the ham, add mayonnaise and sweet relish for this type of sandwich instead.

Ham and Scalloped Potatoes

If you made mashed potatoes from freshly peeled potatoes, then you probably have leftover fresh potatoes therefore you can make ham and scalloped potatoes from scratch.

Making ham and scalloped potatoes from scratch is easy. In my opinion, it also tastes better than the boxed scalloped potatoes. Here’s my recipe:

Preheat oven to 375 degrees Fahrenheit

Peel and slice potatoes.

Chop one onion

Cube the desired amount of ham

Layer potatoes, chopped onion, and ham in casserole baking dish.

Salt and pepper between layers.

Layer until the casserole dish is full.

Create a thickener. Mix a couple tablespoons of white flour or corn starch with a half cup of water. Pour over the vegetables in the pan. Now pour additional milk to cover the vegetables. Top with a couple tablespoons of butter.

Baking until potatoes are done and top lightly browned.

Allow the dish to cool slightly to thicken.

Serve hot.

Ham and Beans

Don’t let the ham bone or the fat go to waste! You can use many different types of beans to make ham and beans. Northern, navy, black, and pinto beans as well as black-eyed peas are often used for ham and beans.

Wash beans and soak overnight.

In the morning, throw out the rinse water and rinse the beans. Cover with water and cook in pot on stove for an hour. Throw out the cooking water and rinse again. I then put the into my crockpot along with ham bone and extra fat if it is available. I then add a chopped onion and chopped green pepper if I have it.

Add desired seasonings.

New England Dinner

Another meal that I enjoy making with leftover ham is a meal my mother always called New England Dinner. In this meal, we cook potatoes, chopped onion, carrots, and cabbage in ham and ham drippings until vegetables are done.

Ham for Breakfast

Don’t leave breakfasts out of the mix. Ham can be served with eggs as a side. It can also be diced and mixed with eggs as ham and scrambled eggs.

These ham and eggs can also be added with cheese, salsa, sour cream and put in a tortilla.

Ham omelets can also be added to the breakfast menu.

You can also slice ham and serve as a breakfast side for pancakes and waffles.

Don’t Let that Ham Go to Waste!

As you can see, ham left over from the holidays should not end up in the trash can. With proper planning, we all can improve our utilization of it and save money in the process.

Are you looking for more ways to save even more on your food budget? Check out my book The Survival Garden! Available on Amazon.

Homemade Gifts to Stretch Your Gift-Giving Dollars

Money is tight for a lot of us this year. The price of food is still cutting into our budgets as is the cost of almost everything. This is where making holiday gifts will help balance holiday gift giving. Of course, there will probably be products that you want to purchase. Young children and high schoolers don’t take kindly to receiving homemade gifts. However, co-workers, employees, employers, your child’s teacher, and grandparents are often much more open to homemade gifts.

Home baked goods

One of the easiest and least expensive things to give at Christmas time is homemade baked goods. Homemade yeast or quick breads are always appreciated by recipients who don’t bake. Holiday cookies are always a welcome tasty treat.

Different types of homemade popcorn can also be a hit. Years ago I gave a batch of homemade caramel and peanut popcorn to my friend’s children and they thought it was the best popcorn ever! The popcorn doesn’t have to be sweet either. Cinnamon, butter, spicy, and green onion ranch are just a few ideas that you can make and share.

Homemade teas

This is something that I have recently started making. I can make a lot of tea at a discount price.

Homemade herbal blends

Don’t have the money to go out and buy supplies? Take the herbs in your cupboard and combine them to make delicious herbal blends.

Making herbal vinegars or vanilla is also a hit.

Homemade Cleaning Products

Have you ever made your own laundry detergent? If so, consider sharing a batch to several friends and share how you made it.

Have you ever made orange cleaner? Again, share a pint and share how you made it.

Create a book where you share all your homemade cleaning products.

Coffee block candles

This idea came from a church project that our pastor’s wife shared many years ago. The outside of cheap plain candles were softened by placing the candle in hot water for a couple of minutes and then rolling the candles in coffee beans. When the candle was lit, the coffee smell permeated the air.

Sewing and Embroidery

If sewing is your thing, you can make all sorts of simple items using scraps from your scrap bag. You can make anything from potholders to clothing to quilts.

Crocheting or Knitting

If sewing isn’t your thing, but crocheting or knitting is, you can make potholders, dishcloths, vests, sweaters all kinds of things. You’re just limited by time and the amount of yarn you have available to you.

Wood or Metal Craft

If you have these skills, there are numerous things you can do as well.

Give a Free Digital Product

I have done this a few times for friends and family who I knew couldn’t afford to purchase one of my books. For Christmas send them an email wishing them well for the holidays and then offer them one of my books for free. This way, they get my book. (They’d get the book and I might get a review in return which is a win-win for both of us).

You might also consider sending a pdf for free to writing customers telling them that it is your Christmas gift to them. You would share new information that will be coming out to the general public in the New Year, but you are giving it to them now as a free gift. You might even combine it with a free consultation as suggested in the next idea.

A Skill Trade Ticket Booklet

Perhaps you don’t have any craft skills, but there are things that you can agree to do that can be of value to people you want to gift. How about a skill ticket booklet.

This idea is simple. Just create a list of things that you would be willing to do during the next year for this person. For a family member, it might include skills like “do your turn at dishes for an evening” For a neighbor it might be something like “mow your lawn while you’re on vacation (for free of course)” or “watch your kids for an evening” For a co-worker, you might offer something like “bring you coffee every day for a week”. For a business associate you might say “I will give you a free consultation for your business.

Consider a Barter/Swap Meet

Speaking of trades, here’s another idea to get more bang for your holiday gift-giving buck.

It might be too late for this year, but next year, you might want to consider a barter/swap meet to trade what you make with friends who also make craft items. Here’s how it would work. You and your friends would bring your goods to a centralized location. There, you could bargain with them about how you can exchange what you have for what they have.

This way, each member of the swap has an opportunity to have homemade Christmas gifts to share with your family that are not like something that you made last year.

Because everyone is in a centralized location, you can make more complicated Trades for instance, if you have a crocheted item and a friend of yours makes soap and wants your crocheted items but you don’t want soap, but you do want another person’s birdhouse. You can trade your crocheted item for the soap and then trade the soap for the birdhouse. The trades you could make would only be limited by your collective imagination.

These are just a few ideas that I thought of, but I bet you could think of a few of your own. You don’t have to be a Scrooge this Christmas when you have homemade options like these.

Do you have a person on your gift list who loves to read? How about giving a book from The Locket Saga Series this year! The first book in the series is When God Turned His Head. Available on Kindle and in paperback.

Christmas Decorating on a Budget

Most of us have had our Christmas decorations up since around Thanksgiving, but there are some people who don’t. Everyone has their reasons for this, so I am not going to delve into that. However, there are those of us who don’t have decorations and can’t afford to spend a lot on Christmas this year. If you’re one of these people, this article is for you.

The Christmas Tree

One of the Christmas staples (at least here in the United States) is the Christmas Tree. This decoration is the centerpiece of our holiday festivities. Purchasing a real tree can be expensive and in our current economy. Purchasing a fake one’s price is equally prohibitive.

So besides not having a tree at all, what are your options?

Several times in my years growing up and when I was a single parent, we didn’t always have the option of purchasing a tree so we had to get creative. I remember several years where we went out and collected long pine branches and tied them together to make a tree to hang our twinkling lights and ornaments on.

I recently read another idea that I think I would use if I didn’t have a tree. I live in a rural and I have a few round tomato cages hanging around that could make an inexpensive small artificial tree.

To make this tree, place round end on ground on the floor and tie the prongs at the other end so that they form the top of the tree. Be sure that this metal form for your tree is set squarely on the ground so that it doesn’t tip over. Now wrap tree with a single small string of lights that you can purchase at a dollar store. Now, wrap the tree with the lights with a string of green fake garland.  

Homemade Ornaments

Numerous ways exist to make Christmas ornaments on a budget. Many of these ideas can be found online. Look at what you already have available to use to create ornaments if you need them. Use your imagination. I had a friend who made personalized ornaments as Christmas gifts to my family. She took pieces of the slate from a broken chalkboard and drilled holes in them. She then painted simple Christmas related pictures and wrote the recipient’s name on them. She then put a piece of ribbon through the hole so we could hang them on the tree.

I have made ornaments different ways. I have made tiny ornaments with colored felt, glue, and even cotton balls.

I have used a recipe to make clay ornaments that I dried and my sons and I decorated.

My sons and I have strung popcorn and cranberries for garland. My children and I have also made red and green paper chains as garlands as well.

Other Festive Decor

Doing other home decorating adds to the festive feeling of the season. Plastic poinsettia flowers, and real or fake garland placed around a couple of white candles on a red, green, or even white table cloth makes any meal seem more festive.

Any time that I have made ornaments or other tree decorations, I have always tried to include my children in the projects. This way, even though we didn’t have much money, we were able to create memories which in my opinion, is the most important part of holiday decorating.

Gourmet Weeds by Cygnet Brown and Kerry Kelley

Give a budget-friendly, one of a kind gift both for you and the person you’re gifting to-Gourmet Weeds by Cygnet Brown and Kerry Kelley. Check it out here.

Don’t Put It In The Trash

I hate wasting food. When I think about the food that so many Americans throw out, I feel bad for the people in other countries who would give anything to have what we so carelessly throw away.

Ingredients for Future Meals

When I have leftovers, I first think “How will I use these?” Sometimes, I just eat the leftovers as is in a meal the next day. Other times, they become ingredients for future meals. Here are some examples:

Leftover mashed potatoes come to mind. I love making potato cakes by adding dried green onion, salt, pepper, and an egg to the mashed potatoes and forming the potatoes into balls. These balls are then rolled In flour, cornmeal, and seasoning salt then mashed into patties. These patties are then fried. Left-over bacon grease makes a flavorful grease for this purpose.

If I have mashed potatoes in which neither extra salt nor pepper was added, I use it as a bread-making base. This was used in centuries past when wheat flour was in short supply.

Excess Fruits and Vegetables in the Refrigerator

It is sad whenever we throw out fruits and vegetables that mold in the back of the refrigerator. I try to avoid letting this happen.  I try to rescue as many of them as possible by drying anything that we could not eat fresh.

Celery, onion, tomatoes, carrots, and peppers are some of the vegetables and strawberries, pears, and apples are two fruits that we like to put in the food dehydrator. The vegetables can be used as flavoring for soups and stews. Fruits can be added to breakfast oatmeal to create a variety of flavors.

I thoroughly wash celery, potatoes, carrots, and onions well before peeling. After peeling the vegetables, I store the peelings in a plastic freezer bag and place the bag in the freezer. When I have enough vegetable scraps to fill a stock pot, I put it in a pot cover it with water, and boil it until the peelings turn to mush. Allow the vegetables to cool. Strain the cooked vegetables from the stock and then use the stock for soup making. It’s best to use the stock right away or freeze it rather than canning (bottling) it.

What’s Left Still Doesn’t Go In the Trash

At my house, when all else fails, leftovers and scraps go to my cats or chickens. Meat and milk products that don’t have a different use go to the cats. I put the vegetable scraps and some greasy foods on top of the compost pile.  What the chickens don’t eat, gets composted. It’s a simple process.

Are you looking to save even more money? Here are a few more articles that I’ve written that will help you balance your budget

Recycling in the Garden https://the-perpetual-homestead-er.com/2022/04/04/recycling-in-the-garden/

Crafting a Stable Bucket Pantry https://the-perpetual-homestead-er.com/2024/02/28/crafting-a-stable-bucket-pantry/

30 Uses for Baking Soda https://the-perpetual-homestead-er.com/2024/06/12/30-uses-for-baking-soda/

Seven Ways to Save on the Grocery Bill https://the-perpetual-homestead-er.com/2024/05/29/seven-ways-to-save-on-the-grocery-bill/

Should I Store Food? https://the-perpetual-homestead-er.com/2024/11/06/should-i-store-food/

Creative Ways to Use Thanksgiving Turkey Leftovers

Here in the States, I use the leftovers from Thanksgiving as creatively as possible. To creatively using turkey, after the holiday, I often meal fixings on sale. I have often purchased turkeys, hams, and the like at a discount. Today, we’ll discuss how I have used the leftovers from Thanksgiving, especially turkey leftovers.

Who enjoys eating sliced turkey sandwiches after the holiday meal? For one or two meals that is. After that, turkey can be used in other ways as well.

Use refrigerated turkey within 2-3 days. If you don’t expect to use turkey within that length of time, chop, dice, or shred turkey. Next, place the turkey in meal-sized bags in the freezer for future meals during the next month or so. Here are a few ideas on how to use those leftovers in ways that don’t seem like leftovers!

Turkey Salad

There’s more to do with turkey leftovers than just making boring sandwiches! Instead, make a turkey salad that uses the turkey, but cranberries and other ingredients from the Thanksgiving meal as well.

Here’s my recipe for turkey salad. Turkey salad can be eaten as a salad or as a sandwich filling. This is a fantastic way to use these ingredients that may already be in your pantry.

Start by cutting cooked turkey into cubes or by shredding them. Put the turkey in a mixing bowl.. Chop some celery and add to turkey.

Now add dried cranberries, fresh or dried into the bowl. Add mayonnaise, sour cream to the salad. You can also add some Dijon mustard for added seasoning. Salt and pepper to taste.

Turkey Tetrazzini

1 (8 ounce) package cooked Egg Noodles

2 tablespoons Butter

1 6 ounce can sliced Mushrooms 

2 cups cooked chopped Turkey 

2 cups leftover turkey gravy

1 cup Sour Cream

1 teaspoon Salt

0.12 teaspoon Pepper

¼ cup dried Parmesan cheese  or ½ freshly grated Parmesan Cheese

Preheat oven to 375 degrees Fahrenheit. Mix all of the ingredients except cheese and pour into a buttered baking dish. Sprinkle cheese on top of the mixture in the pan. Bake until hot and bubbly. Serve hot.

Turkey Pot Pie

2 cups Turkey Gravy

1 cup chopped diced turkey

One peeled and cubed potato

1 cup frozen mixed vegetables

Salt and pepper to taste

9 frozen, unbaked baking powder biscuits

Preheat oven to 375 degrees Fahrenheit.  Mix the first 4 ingredients together and salt and pepper to taste. Butter a 9×9 inch baking pan 0.23 x 0.23 meters). Put the mixture in the pan and place biscuits in square in pan. Bake until biscuits are completely done.

Frozen Turkey Dinners

Take a chunk of turkey, a dollop of potatoes, a dollop of turkey dressing and cover this with leftover turkey gravy. Add a side of sweet potatoes in a separate section of the dish if possible. Now you have a turkey dinner! Cover with freezer-safe plastic and store in the freezer until you use them. We heat these in a microwave whenever we want a quick and easy meal in the evening.  We used to make these all the time when we were kids but instead of using the microwave, we reheated the dinners in the oven.

Making and Canning Turkey Broth

 Don’t let those bones and that turkey skin go to waste! You can turn that into broth for making soup during those cold winter days. Put bones and skins into a pot along with onion skins and pieces of discarded celery with the leaves. Add several garlic cloves and other spices you like to your turkey broth. Cover bones, skin, and vegetables with water. Bring to a boil. Simmer this mixture for several hours. Add water if necessary during that time. Add salt and pepper to taste. Carefully remove big pieces of bones, skin, and vegetable pieces. Allow the mixture to cool enough so you can refrigerate it. Cool it long enough in the refrigerator for the fat to congeal on top. Remove excess fat. Save fat to add flavor in other poultry dishes. Reheat the broth enough so that you can strain the liquid from any small bones or vegetable scraps.

Once the broth is strained, you can put it in containers and place in the freezer and save to use in soups or any dish that requires poultry broth. You could also do what I do and can it. Pour the liquid in sterilized jars. Cover the jars with sterilized lids and rings and pressure can for 75 minutes for pints and 90 minutes for quarts.

Canning Excess Turkey

If you don’t have room in your freezer, but you still have leftover turkey, process it for long-term storage in your canner (bottler). Pack a sterilized pint jar (a half liter) with leftover turkey and cover with turkey broth. Cover with a sterilized jar lid and ring. Pressure can for 75 minutes in the pressure canner.

As you can see, there’s no reason to waste your holiday turkey and fixings! Planning to use your leftovers in creative ways will not only create delicious meals but will also save you money because you’re not letting anything go to waste!

Gourmet Weeds

Are you looking for a Christmas gift for a special someone? Gourmet Weeds is a cookbook about weeds in your backyard. You probably have them in your backyard and don’t even know they are edible!

Gourmet Weeds by Cygnet Brown and Kerry Kelley

Order for Christmas today! Don’t delay!

Cutting Corners To Thrive This Winter

Winter can be expensive, especially if you live in a cold climate. Preparing for the upcoming winter season monetarily now will help you meet the cost of heating your home even during extended periods of extreme cold weather. Having food and water is always necessary, and I covered them in previous posts. Be sure that these supplies are located in areas of your home where it’s not likely to freeze. When it comes to those items, think of providing hot and comforting drinks and foods in your pantry stores and you’ll have a good idea about what to add in that department.

Insurance

I am not an insurance professional. What I suggest here is based on my own experiences and opinions.

Be sure your insurance is up to date. Always check your insurance when it comes due. Check to see that you have everything covered that is likely to occur where you live.

Keep as much money in your pocket as possible.

To save money, have only the highest possible co-pay possible, but have than amount of co-pay in your bank account.

This will keep your insurance premiums down and will keep money in your pocket. Sit down with your insurance agent and look at the difference between the highest co-pay and the lowest co-pay. Bank the difference into a savings account marked “insurance co-pay. Do this with any insurance policy you have. Use this money to pay your co-pay. When you have enough money in the account to cover your largest co-pay, take additional funds that are collected from the difference and use it to increase your portfolio by investing in stocks bonds, gold, or real estate.

Use term insurance for life insurance when possible. For instance, term life insurance on your house or car payment occurs on a sliding scale. This way, you get the biggest bang for your buck because if something happens to you, at least your car and house payments will be eliminated, but you won’t have to pay as much for life insurance overall. Use other forms of term insurance as well. Take the difference between term insurance and whole life and add that to your portfolio in the form of paid-off debt, bonds,

Insulation

A little more insulation strategically placed can prevent disaster during extreme cold spells. Seal air leaks around doors and windows as well. This will save you money on your energy bills.

Fuel

Once you’ve sealed the holes to conserve energy, the next step is to cover your winter energy needs. Store up winter heating fuel and an alternative fuel source in case the primary source is ineffective. When supplementing with wood heat or with a propane heater be sure to have plenty of fuel on hand to last through any extreme weather event. You never want to be without a reliable heating source and alternative of some kind.

Prepare Your Vehicle

Prepare your vehicle for the winter season by changing the oil and other fluids as necessary. Do any necessary maintenance. Be sure that tires are suitable for your area and be sure that tire chains are in working order. Place jumper cables and snow brushes and ice scrapers in the car. Other supplies like flares will help keep you safe when you’re on the road. Having a spare battery charged and ready to go would be an added bonus.

Winter Vehicle Emergency Bag

Having prepared your car for winter, you need to be ready for extreme weather while you’re on the road. Many drivers get stuck in a storm and are miserable when they don’t have what they need in the car. It helps to prepare a winter vehicle emergency bag and carry it with you whenever you leave home.

Be sure to have extra warm clothes and blankets in the vehicle. Carry a pair of suitable boots in case you have to get out into the weather. Add some hand and foot warmers. You don’t want to end up with frozen fingers or toes. Replace these extremity warmers every year to guarantee their effectiveness. In extremely wet weather, throw a pair of rubber boots and a rain jacket into the car instead.

Have a pair of cleats available in case you are forced to walk on ice. Bring extra water and food if you’re more than an hour from home. Bring food that is easy to open and use. Hot drink mixes are also a good choice for making uncomfortably cold situations more tolerable. Having a way to heat up food or water is a good addition to the bag.

Bring your winter vehicle emergency bag into the house after each trip. You’ll want to avoid letting the food and water freeze.

Besides these mentioned, I know there are other preparations that people can do in different areas of the world. Always look at potential scenarios and prepare accordingly.

You can also have a supply of inexpensive vegetables in your home that you grew yourself. Check out this book The Survival Garden by Cygnet Brown

Lessons from a Power Outage

We have spent the past few weeks going over the various aspects of living more comfortably in an electrical outage that could last more than a few hours. This is not an unlikely situation because a few years ago we had an ice storm. It created a power outage that lasted ten days.  

Lights

Of course, the lights went out. Fortunately, we had several ways that we can make light. We have candles. Candles have long been a source of light. The problem with candles though is that they are inexpensive and convenient, careless handling of them can cause fires. Despite the fact I had them, because I had a young child in the house at the time, I chose to use other options for light.

We used kerosene lanterns with a lot of success as well. Their lights provide a warm glow on those cold winter nights. Kerosene is great for long term storage too because kerosene has a much longer shelf life than many other lighting options. Like candles, however, they do involve a flame so care must be taken when using them.

We also had LED lights. We would have liked to have had solar power sources to keep them charged up, or even use rechargeable batteries and keep spares that we could continually charge. Winter storms may create problems with the ability of them to charge properly.  We didn’t have a generator back then, (we do now) but we could have used our car’s cigarette lights and charger attachments in the car to use as a charging source.

We have also used propane lights. These lights offer a light strong enough for reading without straining the eyes. Another economical option for lighting is to purchase cheap solar yard lights that you can charge by day and use by night.

Refrigeration

Because it was winter, refrigeration was not our biggest concern. We put our refrigerator food in coolers and put the coolers outdoors. We did not lose any of our refrigerated foods.

Cooking, Heating and Water Heating,

We had a wood burning cooking stove for cooking and heating our home and it worked well for both. If I had a propane stove, however, it would have been quicker for heating food and water. For our purposes for those ten days, our wood cook stove was sufficient.

No Running Water

Our biggest problem had to do with not having running water, but we managed. Because we had a well for water, when we didn’t have electricity, we did not have water. We had stored water for drinking and cooking, but water to keep the toilets flushed, doing dishes, and bathing were another story. We thawed snow and boiled it to use for these purposes.

An option to keep from having to wash too many dishes is to use paper plates, napkins, and plastic utensils. Aluminum foil or pie pans can be used to cook food over a wood stove or propane stove. However, dishes do eventually have to be washed. I tried to limit dishwashing to one time per day while we had no electricity.

Water from washing dishes was used to wipe down cabinets. This water was then poured down the toilet. I put the water from rinsing dishes in the mop bucket to mop the floor to keep my house looking like it did before the power outage.

After the floors were mopped, I saved the mop water to use to flush the toilet. We limited the number of times we flushed the toilets to avoid using as much water. We utilized the adage: “When it’s yellow let it mellow. When its brown, flush it down.” In other words, if going #1, don’t flush. If going #2, flush the toilet.

Personal Hygiene

It’s surprising how little water is needed to brush teeth. When water is limited, I wet the toothbrush, apply the toothpaste, brush my teeth, floss, rinse my mouth with a mouthful of water. Spit it out and then rinse off the toothbrush.

Bathing was usually limited to washing hair and sponge baths during this time. I have learned how to get clean including hair washing with just a gallon of water. It takes a little practice, but it can be done. It’s not as thorough as a shower or bath. I saved the water washing up and it too was used to flush the toilet.

Doing Laundry

During those ten days when we limited the number of clothes we wore and I didn’t bother trying to laundry clothes. However, if I were to do laundry, I could have taken them into town to wash at the laundromat. I also have the capability to wash my laundry at home. I have buckets in which to launder and rinse the clothes, a plunger to agitate the clothes for scrubbing the clothes, a hand wringer so I don’t have to wring out clothes by hand, and a line and clothes pins so I can hang them out to dry.

I am glad that I had planned through this scenario before I needed it. During the first few days, the heavy ice made it impossible for us to get out of our home, so having all this in place made it much easier to live a close to normal life. I am happy we had the experience because it taught me a lot about how we can work outside the system especially as it relates to the energy sector.

How about you? Have you had to deal with an extended power outage? If so, how did you and your family fare with it? what did you learn that you wished you had known before the event?

Not all the food we had during the power outage had to be refrigerated—some never was. I show this in my book The Survival Garden, which is available in paperback and Kindle.

Should I Store Food?

A hundred years, even as recently as fifty years, ago, families were storing food to last them through the winter.

For centuries, housewives put up food that they grew in gardens that they planted, tended, and harvested. They would raise animals and animal feed to harvest for meat. They milked cows or goats for milk to use to make cottage cheese, sour cream, and various types of cheeses. For weeks during the late summer and late into autumn, they would pickle, can, dehydrate, and later freeze vegetables. They would smoke, can, and freeze meats. They stored root crops in their root cellars. All of which to serve their families during the bitterly cold winter months.

Now, the majority of Americans don’t know how to do any of it. Nevertheless, there has been a resurgence of interest in these skills. Hundreds of blogs and social media outlets have popped up (including this one). Younger generations are learning the skills of their ancestors.

Unfortunately, not everyone can raise a garden and livestock. Fortunately, we have grocery stores from which to purchase what we cannot grow.

Above, I have shared a chart. This chart is an easy way to use as a guideline for purchasing food from the store or online.

Regarding this list, let’s go over a couple ground rules.

The First Rule of Prepping

This chart is just a guideline. The first rule of preparing for lean times is “Store what you eat and eat what you store.” This means that if you don’t eat it, you shouldn’t be storing it. If you don’t eat tuna fish, store canned ham. If you don’t like canned ham, store canned chicken or some other type of meat. If you don’t like using iodized salt, purchase sea salt instead.

The Second Rule of Prepping

The second rule of prepping is closely related to the first and that is that we rotate our stored foods. This is what we call the “first in, first out.” In other words, use the oldest foods first.

Some people who swear by the idea that we store food in long term storage just in case of the end of the world as we know it. I don’t follow this policy. I believe that we best serve our families by developing a system whereby we first use older food. It would be a travesty facing an SHTF situation with a pantry full of stored foods that we can’t properly digest or we simply don’t enjoy. We are better off purchasing what we already eat. Having extra in case we have a week or two where we need to dip into our stored foods is far better than that.

Growing Your Own

I personally prefer the security of growing my own. This year I have a winter supply of fresh potatoes and sweet potatoes and a pantry filled with home canned foods.

I wrote The Survival Garden for people who also want to grow their own food. This book focuses on vegetables that you can grow that don’t need to be canned, frozen or dehydrated.

Get your copy of The Survival Garden and begin planning your 2025 vegetable garden today!

How Do We Know We Have a Healthy Diet?

When people start thinking about preparedness, food is first on their list, however, you could survive for up to three weeks without food. Oxygen, special needs, and water take priority to having food, but once those are dealt with, food is next priority on the survival list.

Many survivalists will tell you that the most important survival aspect related to food has to do with the number of calories (energy). However, for a long-term survival situation, you not only need the calories, but you’ll need protein and vitamins and minerals if you want to remain in good health. To determine how many calories each of us needs to maintain our current weight, we need to evaluate how many calories you need to consume as an individual.

Here’s how to determine how many calories a full grown adult needs to consume each day to maintain their current body weight. BMR = 370 + 21.6 (1 – F)W where: W is body weight in kg H is body height in cm A is age F is body fat in percentage The value obtained from these equations is the estimated number of calories a person can consume in a day to maintain their body-weight, assuming they remain at rest.

An easier way to figure this out is to use a calorie maintenance. There are many free ones available on line. Just Google “Calorie Maintenance Calculator”.

Do this for every member of your family and add up the number of calories from all family members. Now you have the number of calories that every member of your family will need for one day. Multiply that by 30-31 and you have enough to determine how many calories your family needs to maintain their current weight for an entire month. Multiply that number by 12 and you’ll know how many calories your family will need for an entire year.

Now that you know how many calories you’ll need, you need to determine in what form you will want to have those calories. You’ll want to have calories that provide for complete metabolism. You’ll want a certain amount of calories in the form of protein, some in the form of fat and others in the form of carbohydrates.

Protein Foods

Chicken, beef, pork, fish, wild game, and other animal proteins are protein sources that many survivalists say are imperative to maintain the muscles needed to be able to do the work that was required when modern conveniences were not available.

Another type of protein is proteins available from milk and milk products like yogurt, cottage cheese, and cheese.

Eggs are also a good source of complete protein. If cholesterol or

Other high-protein foods are dried beans and lentils. These are not complete proteins. These proteins need another protein source round out the amino acids to make a complete protein. Fortunately, these proteins are in the completed with the proteins in meat scraps, grains, and milk (cheese).

The Recommended Dietary Allowance (RDA) for protein is a modest 0.8 grams of protein per kilogram of body weight, or 0.36 grams per pound. The RDA is the amount of a nutrient you need to meet your basic nutritional requirements. It’s the minimum amount you need to keep from getting sick — not the specific amount you are supposed to eat every day.

Fats

Fats are another macro-nutrient that our bodies need for sustenance. Fats also provide dense calories and will sustain your energy levels for longer periods of time than proteins or carbohydrates. You tend to eat more fat in the winter will keep warmer. A fat gram contains 9 calories but proteins and carbohydrates contain 4 calories per gram.

The animal fats used by humans are butter, suet (beef fat), lard (pork fat), and fish oils. Important vegetable oils include olive oil, peanut (groundnut) oil, coconut oil, cottonseed oil, sunflower seed oil, soybean oil, safflower oil, rape oil, sesame (gingelly) oil, mustard oil, red palm oil, and corn oil. Fats and oils provide more calories per gram than any other food, but they contain no protein and few micronutrients. Only butter and fish-liver oils contain any vitamin A or D, though red palm oil does contain carotene, which is converted to vitamin A in the body. Vitamins A and D are added to margarine. All natural fats and oils contain variable amounts of vitamin E, the fat-soluble vitamin.

The amount of fat you need per day depends on your calorie goals and diet.

1,500 calories: About 83–125 grams of fat per day. (747-1,125 fat calories)

2,000 calories: About 111–167 grams of fat per day. (999-1, 503 fat calories)

2,500 calories: About 139–208 grams of fat per day. (1,251-1,872)

In general, it is recommended to consume less than 10% of daily caloric needs in the form of saturated fats, and to replace saturated fats with unsaturated fats if possible2. It is also recommended to minimize consumption of trans fats, and to consume less than 300 mg of dietary cholesterol each day.

Carbohydrate Foods

The remainder of your caloric  needs should be consumed as carbohydrates. High-caloric foods that stick with you for long periods include potatoes, sweet potatoes, rice, wheat flour (usually in the form of some sort of bread, corn meal, grits, and other grains are good foods to have to ensure that you’re getting the calories you need.

Other foods that are primarily carbohydrates are fruits and vegetables, but they do not contain a lot of calories.

Micronutrients

Fruits and vegetables may not have high caloric values, but that doesn’t mean they aren’t highly valued. Fruits and vegetables provide vitamins and minerals that aid in helping the body absorb and use the energy offered by the macronutrients.

It’s Not Just About Nutrition

Not only do you want to be concerned about the nutritional value of the food you are eating, but you also want food that tastes good.  

Salt is a nutrient that makes food taste better, but it also has a role in converting calories into body energy.

Sugar, honey, maple syrup, and the like are simple carbohydrates the body readily uses for immediate energy. The sweet taste provides satisfaction that cannot be denied.

Vinegar is a preservative but also adds zing to your diet and can be included in teas, marmalades, and salad dressings. There are several different kinds including distilled white vinegar, apple cider vinegar, black vinegar, champaign vinegar, malt vinegar, red wine vinegar, rice vinegar, sherry vinegar, and white wine vinegar. Any of these vinegars will last years in your temperature-controlled pantry.

Herbs and spices offer a variety of flavors that can keep anyone from food fatigue even though you’re eating the same foods every day.

Now that you know what you need to maintain a healthy diet, you know the nutritional value. You have what you need to know to maintain your health when going to the store is not possible. (for whatever reason.)

One fantastic way to get many of your necessary nutrients is by raising some food in your own garden. Some of it doesn’t have to be canned, frozen or dehydrated, but can be stored at home.